fbpx

Archive for “Progressions” Tag

Bodyweight Training Progressions – Jordan Tingman

bodyweight training exercises - plyo push upsAsk any strength coach, and they will tell you that most athletes lack strength, control and mobility in many basic bodyweight training exercises. Utilizing bodyweight training, “can result in both physical strength and stamina” (Harrison, 2010).  This is why bodyweight training progressions are such an important part of any strength training program.

We often think that bodyweight training is very simple, so we don’t spend much time thinking about it.  We want to rush into more advanced training methods because they seem more exciting.  Unfortunately, when we skip over fundamentals, it catches up to us down the road.  Spending time teaching and perfecting bodyweight training exercises has the potential to pay big dividends as athletes mature, so this should be an integral part of any youth training program.

When it comes to younger or female athletes, upper body exercises such as the pull up or push up tend to be difficult. With the squat, maintaining proper posture is difficult for many athletes due to a wide variety of mobility or kinesthetic awareness issues.

Instead of being taken through a proper progression, we often see athletes struggle through sloppy reps or force themselves into positions they can’t maintain.  Fortunately, there are ways to modify these exercises that allow athletes to perform them correctly while utilizing the correct muscles.

This article will highlight three of the basic bodyweight training exercises that are often performed incorrectly, and it will describe simple progressions to ensure long-term success.

Push-up:

A few of the most common flaws seen during the push up are lack of upper body strength, elbows flared out, improper hand positioning and lack of core strength to maintain stability and posture throughout the movement.

Here is an example of a proper bodyweight push up:

  • Plank position in the core is maintained throughout the entirety of the exercise.
  • Elbows are at a 45 degree or closer angle from the body, emphasizing proper use of upper body musculature, and not overstressing the shoulder joint.
  • Hands placed just under and outside the arm-pit, not even with the head like is commonly seen.
  • Body is lowered in a controlled manner until the elbow joint is below a 90 degree angle.

If an individual lacks upper body strength, the push up can be modified by elevating the surface in which the hands are placed.

This surface can be anything that is elevated and allows the individual to maintain proper core stability throughout the movement.  This could be a box, bench, or bar on a squat rack.  As strength is developed, slowly lower the angle in which the push up is done until the athlete can perform a standard push up.

If an individual lacks a lot of core stability, a banded hip-supported push up can be used.  Attach a band around the safety catches and position the athlete so it’s under the hips during the push up. This alleviates the weight of the hips and aids in maintaining the plank posture throughout the movement. This can be progressed by using smaller bands until the individual can maintain hip posture throughout the entire movement.

If an athlete can maintain core position and effectively use the upper body muscles, but simply isn’t strong enough to perform many reps, an eccentric or isometric component can help.

Have the individual perform a 3-5 second eccentric and hold in the bottom position for one second before pushing up.  This builds strength and control in all positions of the movement.  If the athlete cannot perform the concentric portion of a push up at all, performing eccentrics can build that strength.  Athletes can perform 4-8 negatives, simply lowering slowly, then “rolling” back up to the top position for the next rep.  

As a coach, you can vary the amount of time of the eccentric or isometric portion, and vary the reps depending on the capabilities of the athlete.

Pull-up:

One of the hardest, but effective bodyweight training exercises is the pull-up.  Due to a lack of upper body strength, many athletes cannot perform even a single pull-up. Those who can perform a pull up tend to do it incorrectly. The most common issues include:

  • Lack of scapular retraction
  • Inability to start each rep with full arm extension 
  • Inability to get the chin above the bar with each rep

Placing a band around the J-hooks of a squat rack will give assistance to the most difficult position of the movement. Ensure that when the individual lowers their body, they still extend their arms into the bottom position.

To strengthen different positions of the pull-up, add an isometric component at the top or middle of the exercise. This reinforces proper positioning and strength in a variety of the positions of the pull up.  Emphasizing the eccentric component throughout the full range of motion is also very helpful when building strength in the movement.

As mentioned in the section about push-ups, you can manipulate the eccentric or isometric times and the number of reps to make the exercise more or less difficult.  This will be dependent on the capabilities and strengths of the athlete.  For example, an isometric hold at the top plus a 5 second negative is a great way to develop strength in young or large athletes who struggle with pull-ups.  

Squat:

One of most popular bodyweight training exercises is the squat, but it is also the one most commonly rushed through.  The most common mistake we see here is adding a load before the athlete can even maintain correct posture in an air squat or goblet squat.

We look ask these four questions when coaching the bodyweight squat:

  • Are they maintaining an upright posture throughout the entire movement?
  • Are their heels staying in contact with the ground throughout the movement?
  • Are they properly hinging at the hip before descending into a squat position?
  • Are they able to maintain an upright posture until the parallel position of a squat?

You should be able to answer “yes” to all of these questions before loading an athlete with a barbell.

A good initial assessment is to see whether the athlete can properly execute an air squat.

In this video, the arms are out to assist in maintaining an upright posture throughout the air squat.

Feet are slightly outside of shoulder width with toes slightly pointed out. This position can vary from individual to individual depending on what their bodily mechanics look like. If their heels are coming off of the floor, their foot position may be the first thing you need to manipulate.

If an individual has trouble maintaining an upright posture to the parallel position, a good way to work on this is to have them air squat to a target.


In this video, the individual is squatting to a box slightly below the parallel position.  This reinforces the hip hinging aspect of the squat and allows the coach to cue the athlete to maintain an upright posture until the box is touched.  You can also hold the bottom position (without putting any pressure on the box) to reinforce this position and strengthen the lower back.  

You can load this movement by adding a goblet hold while the individual squats to a box. Ensure the individual does not relax the core or rock back onto the box to gain momentum before standing up.  Again, an isometric hold at the bottom can help athletes feel correct posture.  

Squatting to a box may also allow the coach to assess issues in the squatting pattern.

Then once they can maintain an upright position to a box- you can take the box away and allow them to perform a Kettlebell Goblet Squat:


If the athlete shows instability while performing this movement, add a tempo to the eccentric portion and/or an isometric hold at the bottom.  This will reinforce correct body positioning throughout the squat.


While there are many different modalities that you can use as a coach, bodyweight training is an excellent way to lay a solid foundation.  In order to slowly progress athletes in these movements, the bodyweight training progressions above can help ensure long-term progress and success.  You can also use these exercises as a part of a complete strength training program that will continually reinforce the foundation you have developed.  

Citations:

https://journals.lww.com/nsca-scj/Fulltext/2010/04000/Bodyweight_Training__A_Return_To_Basics.5.aspx

Jordan Tingman – CSCS*, USAW L1, ACE CPT, CFL1 is a graduate of Washington State University with a B.S. in Sports Science with a Minor in Strength and Conditioning. She completed internships with the strength & conditioning programs at both Washington State University and Ohio State University.  She is now working as a Graduate Assistant S & C Coach at Eastern Washington University.

The IYCA High School Strength & Conditioning Specialist certification is the only course available that directly addresses the needs of the high school athlete.  Learn more about the HSSCS HERE:
Bench Press Progression – Part 2 in a Series on Exercise Progressions

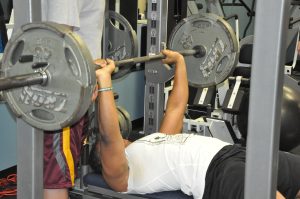
bench press progressionPause Bench Press Progression – In the last installment of this article series, we talked about the importance of exercise progressions and the front squat progression we utilize with our middle school and high school athletes.  It can be found at https://iyca.org/front-squat-progression.  In this installment we will be discussing the importance of the Pause Bench Press progression.  We will also give you the progression plan we implement with our athletes and our recommendations for athletes in  7th and 8th grade and high school.  In the last portion of this article, we will discuss some problems or issues that may occur when prescribing this exercise and the reasoning behind our use of this particular exercise for our program.  

When most people talk about strength training, weightlifting, powerlifting, or bodybuilding, the bench press is probably most commonly mentioned exercise, and probably the most commonly performed exercise.  Go to any gym, health club, fitness center, box, or whatever the facility is, and there will be a place to bench press there.  That can be a good thing and bad thing because many people believe that anyone can do it without a plan for progression when learning the movement.  Skipping over the basics in anything is usually detrimental, but in lifting it can cause long term issues that are hard to overcome.  Age appropriate progressions are the key, so let’s go through our Pause Bench Press progression one step at a time.

Bench Push-Up

This is our starting point for our pause bench press progression. We begin with both hands on the bench  performing a push-up with our chest touching the bench in each repetition. Body posture and proper execution is the focus when performing this exercise.  If a kid needs to, they can put their knees on the ground as a regression. We will not progress an athlete if they cannot perform 10 perfect reps of the exercise.  

7th Grade 8th Grade High School

WK 1 – 6 x 6 WK 1 – 6 x 8 WK 1 – 6 x 10

WK 2 – 6 x 8 WK 2 – 6 x 12

WK 3 – 6 x 10


Push-Up

For the next exercise in our pause bench press progression, we increase the difficulty and volume of exercise from the previous movement.  Just as with the focus of the previous movement, body posture and proper execution of the exercise is critical for maximum benefit to the athlete.  When performing this movement, we tell the athletes to squeeze the elbows into the body, not allowing them to flare outward. Just as with the Bench Push-Up, if needed they can have their knees on the ground. We will not progress an athlete if they cannot perform 10 perfect reps of the exercise.

7th Grade 8th Grade High School

WK 4 – 6 x 6 WK 3 – 6 x 8 WK 2 – 6 x 12

WK 5 – 6 x 8 WK 4 – 6 x 12

WK 6 – 6 x 10

When beginning to use weight while performing a bench pressing variation, whether it is barbell, dumbbell, or kettlebell… safety is important.  We use a back spotter, who can provide either a lift off or a spot for safety purposes. We avoid using side spotters due to the possibility of one spotter grabbing the barbell and tipping it when trying to assist. We teach our spotters to have their hands in an over & under grip close to the barbell without touching it. We want to see that space/gap to ensure that the lifter is doing the work, while giving the spotter the ability to assist if needed. When spotting the dumbbells, we have the spotter spot near the lifter’s wrist. This way the spotter can assist the lifter appropriately during the exercise.  

 The next crucial thing we teach is the proper set-up on the bench.  We utilize a consistent barbell to eye relationship by having the athlete lie down directly under the barbell in a straight line upward.  The next thing to teach is pulling the shoulder blades together and digging into the bench when laying the back down. We have an advantage for athletes performing this movement because of our specialized type of upholstery designed to allow the lifter to grip into the bench more easily when lifting.

Body position is the next thing we teach our athletes when it comes to our Bench Press progressions.  First, we want the shoulder blades in the bench.  Second, we want the hips to stay in constant contact with the bench for the entire time throughout the movement. Lastly, we want the feet flat and pressed into the floor. This allows for the lifter to use the lower body by pressing through the floor during the bench pressing exercises.

The grip on the barbell is the next part of the exercise execution. We have tape on our barbells to better assist our athletes in knowing where to put their hands. Our blue tape is on the outer ring of the power barbell, while the red tape is on the smooth part of the power barbell and knurling ends towards the middle of the barbell.  We allow for comfort purposes that our athletes go no wider than pinky fingers on the blue tape.  

Barbell path is something most people usually don’t pay much attention to, but it’s something we coach about constantly.  We teach a straight-line path for the weight to travel. In my opinion, doing this is the safest and most efficient way to press.  Straight-line pressing also allows the lifter to better find their groove when pressing.  Each of the previous components are coached each time we perform a bench press variation.

Once we begin to utilize weight in our progressions, we use barbell to dumbbell type of progressions.  Using the barbell first allows for proper development of a lifting path while using the dumbbells. It adds a stabilization effect and increases the execution difficulty as we advance in our progression plan.  Another thing you will notice in our progression plan is the initial use of partial range of motion, followed by full range of motion movements.   

Floor Press

This is the first exercise in which we add external resistance in our bench press progression. We begin with a 25lbs barbell and then work up from that point.  Have the lifter lie on the ground under the barbell, have them lower the barbell straight down tucking the elbows in at a 45-degree angle. Then they should lower the barbell until the elbows come to rest on the ground. Once the barbell is completely at rest, the lifter should press the barbell upward fully locking out the arms to complete the exercise.

7th Grade 8th Grade High School

WK 7 – 6 x 6 WK 5 – 6 x 12 WK 3 – 6 x 10

WK 8 – 6 x 8 WK 6 – 6 x 10

WK 9 – 6 x 10


DB Floor Press

This is the same movement, but instead of using the barbell, use of dumbbells is introduced. When performing this movement, we have the palms facing towards each other which makes it a little easier to keep the elbows in the proper position.

7th Grade 8th Grade High School

WK 10 – 6 x 8 WK 7 – 6 x 12 WK 4 – 6 x 10

WK 11 – 6 x 10 WK 8 – 6 x 10

WK 12 – 6 x 12


Board Press

This exercise is another “partial range of motion” movement, but with greater motion than the Floor Press.  We start by placing a shoulder saver from elitefts on the barbell in the middle of the bar.  This lift is begun by having the lifter lower the barbell the same way as in the Floor Press, stopping when the shoulder saver comes to rest on the chest.  Once the barbell is on the chest, the lifter presses the barbell upward locking the arms out to complete the exercise.

7th Grade 8th Grade High School

WK 13 – 6 x 12 WK 9 – 6 x 10 WK 5 – 6 x 8

WK 14 – 6 x 10 WK 10 – 6 x 8

WK 15 – 6 x 8

DB Bench Press

This is the first full range of motion exercise we use in our bench press progression. We use the same palms-facing-forward hand position as the DB Floor Press.  Have the athlete get set-up on the bench, then extend the dumbbells with the arms to get started performing the exercise.  Lower the dumbbells down until they touch the chest, then press them upward until the arms are locked out at the top.  Focus must be on paying attention to not bouncing the weight off the chest with momentum. The lifter must control the weight the entire time while performing the exercise.

7th Grade 8th Grade High School

WK 16 – 6 x 12 WK 11 – 6 x 10 WK 6 – 6 x 10

WK 17 – 6 x 10 WK 12 – 6 x 8

WK 18 – 6 x 8


Close Grip Bench Press

This is another full range of motion movement in our bench press progression and is very close to our final movement. The biggest thing with this movement is the lifter’s grip of the barbell. We have our athletes place their middle finger on the red tape on the barbell to start.  To initiate the exercise, the lifter lowers the barbell down under control until it touches the chest, then the lifter presses the barbell upward completing the exercise by locking out the arms at the top.  Focus must be on paying attention to not bouncing the weight off the chest, as the lifter must control the weight the entire time while performing this exercise.

7th Grade 8th Grade High School

WK 19 – 6 x 12 WK 13 – 6 x 10 WK 7 – 6 x 8

WK 20 – 6 x 10 WK 14 – 6 x 8

WK 21 – 6 x 8


DB Incline Press

This is really the only exception to our rule of barbell first, dumbbell second, in our bench press progression. When performing this movement, which is very similar to the DB Bench Press, the angle of the bench is in an inclined position.  Remember that we want to utilize the same hand position as all other dumbbell pressing exercises. Again, attention must be paid to not bouncing the weight off the chest, as the lifter must control the weight the entire time while performing the exercise.

7th Grade 8th Grade High School

WK 22 – 6 x 12 WK 15 – 6 x 10 WK 8 – 6 x 8

WK 23 – 6 x 10 WK 16 – 6 x 8

WK 24 – 6 x 8


Pause Bench Press

This is the final movement in our pause bench press progression and it is the primary upper body pressing exercise in our program. When performing this exercise, the lifter lowers the barbell as before until the barbell rests on the chest. The lifter remains tight and pauses for 3 seconds, then explosively presses the barbell upward, completing the movement by locking the arms at the top of the exercise.  Controlling the barbell throughout the entire exercise is vital to the successful performance of the exercise.

7th Grade 8th Grade High School

WK 25 – 6 x 12 WK 17 – 6 x 10 WK 9+ – 6 x 8

WK 26 – 6 x 10 WK 18+ – 6 x 8

WK 27+ – 6 x 8


The most common issue that arises when following a bench press progression is doing things too fast and too soon.  As I mentioned earlier, everyone thinks they can bench press, but performing the exercise, and performing the exercise correctly/safely are two different things.  One of the reasons we utilize the pause in our bench press movement is to teach proper control of the exercise instead of bouncing the barbell.  Another reason we have embraced the pause is that it helps keep the hips on the bench while pressing the barbell. Yes, adding the pause will decrease the total weight a lifter can press. However, we believe this is the most efficient way for an athlete to press with the upper body.  Adding the pause reveals a lifter’s true upper body strength levels.

This is the second of three in our series of progression articles. I love the feedback I have already received, and I look forward to the third article, which will cover how we teach the power clean in our program. Not only will we discuss the progression we implement, but we’ll share the reasoning behind why we teach the progression the way we do. I would love to hear what you think, and I can be reached at tjacobi@strong-rock.com

Tobias Jacobi

Tobias  Jacobi has been a strength & conditioning coach at Strong Rock Christian School for 4 years and spent 15 years as a college S & C coach before that.  He spent time at East Carolina University, Charleston Southern University, Kent State University, Western Carolina University, Elon University, UNC-Chapel Hill and Cumberland University.  He holds multiple certifications, has worked with thousands of athletes at every level, and has spoken at clinics all over the country.


For more information on how to train high school athletes, check out the IYCA High School Strength and Conditioning Specialist course and certification.  The HSSCS is the only certification available that focuses entirely on training high school ages athletes.  The HSSCS includes several hours of video instruction and two textbooks with contributions from 20 of the top strength & conditioning coaches from major universities, high schools, private facilities and NFL teams.  Click on the image below to learn more about the High School Strength & Conditioning Specialist credential.

Regressions and Progressions in Multiple Training Blocks [Part 1]

Regressions and Progressions

Introduction

soccer-1341849_640Team training can be challenging. There are a variety of factors that have to be taken into account when working with large groups and sometimes it can be a bit overwhelming.

When programming for a diverse population, it is important to account for the various needs of the group in order to ensure success. Injury history, physiological age and ability level are just a few of the factors that need to be considered when developing your training programs.

These factors become even more important when you will be working with the same group for an extended amount of time. This will be a 2-part blog series that will explain this process.

This blog post will focus primarily on what must initially be considered in order to program for the long-term effectively. The second post will focus on specific examples of progressions and regressions and how to utilize those in LTAD programming.

#1 Backward Design

It is important to begin with the end in mind. As the coach, you must determine what your top tier exercises will look like in your program. A top tier exercise should be the most advanced exercise your athlete will reach while training.

After determining what your top tier exercises are, you will work backward to determine what exercises you need to help your athletes reach the top tier of your program.

Pro Tip: Begin with your most advanced exercise and work backward.

Squats

#2 Developing Multiple Training Blocks

Developing multiple training blocks is necessary to implement regressions and progressions effectively in team training LTAD models.

A 9th grade 14-year-old athlete is much different from an 18-year-old athlete physically, psychologically and emotionally. You must also account for the junior in high school who has never lifted weights.

Differentiated training blocks will allow you to do this effectively. You must develop training blocks that set them up for long-term success. One of the most effective ways to do this is to implement a model that utilizes progressions and regressions of the same type of exercise.

Developing this type of program will allow you to differentiate for large groups of athletes while keeping your athletes on a similar plan.

Pro Tip: This is an example of a lower body squat emphasis day for these athletes.

Developmental Level Exercise
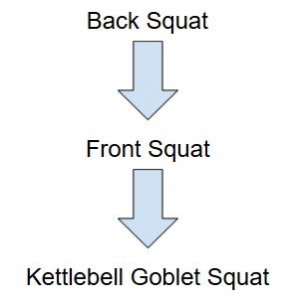
Blue (Seniors – 17-18 years old) Back Squat
Gold (Juniors – 16-17-years old) Front Squat
Gray (Sophomores – 15-16 years old) Overhead Squat
White (Freshmen – 14-15 years old) Kettlebell Goblet Squat

#3 Developing a Deep Toolbox

Developing a deep exercise toolbox is a must if you want to meet the individual needs of your athletes, while at the same time setting them up for long-term success.

It is important to evaluate your athletes in order to determine the correct exercise for each individual athlete. An athletic profile should be developed from the assessment process, which will aid in exercise selection for your athletes.

Use a method which determines a baseline exercise every athlete should be able to complete before progressing forward. Look for a couple of progressions forward and several regressions backward.

There should be a reason and defense for all of your progressions and regressions in your programming. Develop a deep toolbox, but do not get too far out there in your programming for developmental athletes. Master the basics with this age group.

Pro Tip: Here is an example of progressions and regressions on a lower body squat day.

Progression & Regression Levels Exercise
P2 Barbell Back Squat
P1 Barbell Front Squat
Baseline Exercise Barbell Overhead Squat
R1 Kettlebell Overhead Squat
R2 Kettlebell Front Squat
R3 Kettlebell Goblet Squat
R4 Bodyweight Squat

Conclusion

This is the process to use to begin plugging progressions and regressions into your developmental blocks in an LTAD plan. Part 2 of this blog will get very specific with real life examples of what this looks like at Battle Ground Academy.


About the Author: Fred Eaves

Fred EavesFred Eaves
– Ed.S, M.Ed, CSCS, RSCC, IYCA, USAW, USATF
– BIOFORCE Conditioning Coach Certified
– 2015 NSCA H.S. Strength Coach of the Year
– 2013 Samson Equipment & AFM H.S. Strength Coach of The Year


Prepare Your Athletes To Perform

Learn how to leverage the Long-Term Athletic Development Model to ensure your athletes are prepared to perform. In expert Wil Fleming’s free 7-minute video and PDF checklist, he covers how to create a training system that prepares young athletes to move better, get stronger, and enhance their performance.

Learn More


Why Implement Plyometrics into Your Training Programs: Part 1

Why You Should be Implementing Plyometrics: Part 1

men-82140_640Before we get into why you should be implementing plyometrics into your training programs, let’s first define plyometrics.

The Merriam-Webster dictionary defines plyometrics as an exercise involving repeated, rapid stretching and contracting of muscles (by jumping and rebounding) to increase muscle power.

Pro Tip: Plyometric exercises are a great tool to use to put power behind the muscle.

Plyometrics can be used with many athletes or non-athletes at varying levels. However, as a wrestling coach, it’s a tool I use to help and even simulate explosive drive through their opponents while on the mat.

In Part 1 of this blog, you will receive 3 reasons why you should be implementing plyometrics in your training programs and Free Access to the Top 4 Plyo Exercises.

3 Reasons to Implement Plyometrics

Reason #1: Putting the Power Behind Muscles

One of the main reasons to implement plyometric exercises into a training program is to give athletes the power they need to throw faster, jump higher, or hit the ball harder and farther.

For example, plyometric exercises give wrestlers the power they need to drive through their double leg take downs, a basketball athlete the powerful vertical for a rebound, a swimmer the ability to “push” off the block and the list goes on.

Pro Tip: Application of power is a key component in successful athletes. What’s the point if your athlete is lifting a ton of weight and they can’t apply it?

Reason #2: Progressions

Plyometrics can be a great tool for progressions. Do you have an athlete or athletes who have mastered a certain exercise, or have reached a glass ceiling with a certain exercise, but you’re not sure how you can progress those athletes?

Give plyometrics a try! A good example is a basic body weight squat progressing into squat jumps. Great push-ups need a challenge? Challenge them with plyometric push-ups (one of my personal favorites).

Pro Tip: Progressions are very important in developing an athlete’s long-term capabilities. Be sure that athletes are proficient in all mechanics before moving them on to more complex moves and adding plyometrics.

Reason #3: Performance Development

Through regular and adequate use of plyometric exercises your athletes will be able to jump higher or farther (depending on their reasoning for jumping), run faster and longer (plyometrics has been shown to improve distance runner’s conditioning), throw harder, and at the end of the day develop the necessary tools to reach their goals!

There are many reasons to add plyometrics to your training, and in my next blog, I will expose 3 more. For now, it is important to remember that plyometrics are a tool, and should be used within your existing long-term athlete development programming.


About the Author: DeCoreus Leavell

DL-HeadshotDeCoreus Leavell
 
– IYCA High School Strength and Conditioning Specialist Certified
– Assistant Coach at Christian County High School
– In the span of 3 years coached 3 state champions and 15 state placers at the middle and high school level


Top 4 Plyo Exercises

Every successful athlete needs the ability to exert a maximal amount of force in the shortest possible time interval (i.e. power). In Coach Wil Fleming’s short 4-video series, he outlines how plyo exercises improve a variety of movement patterns that increase strength, speed, power and much more.
 
IYCA-Plyo-LM-Blog-ad


The Power of Pulling

A Complete Progression for All Athletes Who Want Power and Success

If you have been following the IYCA and those that contribute to their content, you have probably heard the training philosophy: 2 pulls for every 1 push.

Tug of WarWhile I agree that pulling strength is incredibly important, I think it’s necessary to step back and understand what a stronger backside can do for an athlete.

First and foremost, just like their adult “desk jockey” counterparts, young athletes sit ALL DAY LONG. Combine that with heavy backpacks, phones and tabletswe know that their posture sucks!

Activating and strengthening the over-lengthened posterior chain muscles (lats, glutes, hamstrings, etc.) via pulling exercises will counteract the effects of teenage living, at least briefly.

Pro Tip: A much more important reason for an athlete to train the posterior chain, is the ability to push. Yes, you read that correctly, PUSH!

Look at most of the texts with a training program for athletes. You are much more likely to find Bench, Squat, Deadlift, Military Press or Strict Overhead Press than you will Chin-ups or Rows.

First of all, the Press, Overhead or Bench tends to elicit more total body activation.

Since pushing or pressing is much more common athletically than pulling is, pulling movements take an accessory role compared to pressing movements.

If you have ever taken a group of young athletes through the shoulder mobility screen via FMS, you will see a majority that have fantastic mobility but massive winging and an overextended rib cage. These factors, if ignored, could have terrible consequences for an athlete that is thrown directly into overhead pressing.

Given the proper progressions for vertical pulling and building the musculature around the scapula, an athlete will be set up for success in overhead pressing patterns.

To develop a strong, athletic press for athletes, they need to progress through vertical pulling progressions!

Progressions

Half Kneeling Single Arm Resistance Band Rows

This is usually the most confusing exercise for our athletes when they see their first program because we don’t have a cool or creative name for it. Therefore, it looks like this:

HK SA RB Rows…Yikes!

Two things are happening here:

  1. The athlete is learning half kneeling, thereby, glute activation/hip flexor lengthening tied into a rowing patternreversing postures experienced all day in a classroom.
  2. By doing a single arm row, the athlete can “feel” what it is like to actually move the scapula around the rib cage rather than shooting it straight back.

Notice this is NOT a vertical pull. Oftentimes, starting an athlete with a vertical pull will end in overextending the ribs, and never activate musculature to develop strength for more advanced progressions.

Pro Tip: The best cues here are simply ribs down, reach, then pull the blade into the opposite back pocket. Sometimes, it’s helpful to kinesthetically guide the athlete’s scapula through the movement after they have tried a few times themselves.


Jungle Gym Rows

We call them Jungle Gym Rows because that is the brand of suspension straps we have. Obviously most people know them as TRX rows. This is my favorite progression for upper body pulling and will likely be revisited throughout an athlete’s annual training program.

However, throughout my 10+ years as a coach/trainer, I have seen this exercise butchered much more than I have seen it done correctly.

It starts by having the athlete plank their body (legs, butt, & core active to make a straight board with their body—a plank!). Then, they need to “reach”, followed by bringing their elbows behind them.

One mistake we see is the athlete shrugging their shoulders up to make up for a weak upper back. The cue we use to eliminate that is, “shoulders away from the ears.”

The movement ends when the chest is broad and the back is extremely active.

Early on, correct athletes and have them stop short of what they think is end range. If you don’t, they will keep pulling—since it gets easier—and roll their shoulders forward, losing the upper back engagement.


Seated Lat Pulldown

Here is the first exposure our athletes have to a vertical pulling pattern. They must establish great positioning before moving on to the most demanding progressions, which is why using the seated version is the first choice.

Pro Tip: Our gym does not have a cable machine so we use resistance bands. However, if you do have a cable machine, I would still suggest having your athletes use it while sitting on the floor straight legged.

If necessary, you can put something under their pelvis, like a yoga block, to create neutral positioning of the spine during the movement.

Once they are in position, the cues are the same: “ribs down, reach, then pull the blades into the back pockets.”

This should result in a very vertical movement. The hands should come down right on top of the medial shoulder. The tendency is to overuse the anterior delts and pecs, and bring the shoulders together to achieve full range under fatigue.

Coach the athlete to keep the chest and shoulders broad, and stop before the upper body rounds to try and finish the set. The end range position looks and feels quite similar to the Jungle Gym Row, except the hands are on top of the shoulders rather than closer to the armpits.

Quality always trumps quantity here, so educate your athletes that it’s not worth it to grind out reps when their form stinks.

Recover and finish the set correctly.


Chin-ups/Pull-ups

Our athletes love their chin-up/pull-up days…sarcasm is hard to convey in text, but they usually don’t like chin-up/pull-up days.

That is, of course, until about junior or senior year of high school. Once they have developed the strength and worked through all the progressions, they notice that they have a stronger back and shoulders than all their friends. Then, chin-ups are the BEST! 🙂

Start teaching the pattern to athletes early. Despite a lack of strength, it develops potential for massive back, arm and grip strength. These are traits that assist greatly in the ability to press, and also make a better transition from middle school to high school sports or JV to Varsity.

Grip strength, is an undervalued asset that comes in handy when everyone is bigger than you and thinks they are stronger than you. If you can hold onto the ball or the stick and handle yourself, you gain respect from your older teammates and develop confidence.

Pro Tip: Start athletes using a band for assistance to learn a proper, vertical path for the chin-up or pull-up.

Form checks are critical early on as they often have done body weight movements like this before.

If we don’t correct them right away, we will have to backtrack later on. The same thing goes for push-ups, which you can read more about in my Pushing Power in Athletics Blog.

Don’t let an athlete do 6 chin-ups the wrong way and then correct their form only to achieve 3 the next time. That kills their confidence.

Focus the cues on pulling the blades into the back pockets and keeping the chest/shoulders broad, reinforcing the carry over from the lat pulldown to the chin-ups. It’s great to break a set up into increments early on.

Pro Example: If we want 24 reps of work, instead of doing 3 sets of 8 reps, we would write it in their program as 3 sets of 2 reps 4x. When we coach it, we would explain it as, “do 2 reps perfectly and aggressively, then rest 20 seconds and repeat with the same perfection and aggression.”

They won’t always achieve perfect reps but the quality of the entire set and the 24 total reps they do will improve dramatically.

Wrapping it up

Pulling exercises for an athlete are incredibly important.

I hope you now have a better understanding of WHY they are so important for young, developing athletes and how you can better utilize these progressions in your own training programs!

ADAPT and Conquer,
Coach Jared


About the Author: Jared Markiewicz

JarredJared is founder of Functional Integrated Training (F.I.T.). F.I.T. is a performance-based training facility located in Madison, WI. They specialize in training athletes of all levels: everyday adults, competitive adults and youth ages 5-20+.

The long-term vision for F.I.T. is recognition as the training facility for those desiring to compete at the collegiate level in the state of Wisconsin. Alongside that, to also develop a platform to educate those in our industry looking to make strides towards improving the future for our young athletes.

Find out more about Jared’s gym by visiting F.I.T.

Career Highlights

  • 2014 Fitness Entrepreneur of the Year – Fitness Business Insiders
  • 2014 IYCA Coach of the Year Finalist
  • Volunteer Strength Coach for West Madison Boys Hockey and Westside Boys Lacrosse
  • Helped develop dozens of scholarship athletes in 3 years of business
  • Instructed Kinesiology Lab at UW-Madison
  • Houses an internship program at F.I.T. that started in 2013
  • Member of Elite Mastermind Group of Nationwide Fitness Business Owners

Generate Power in your Athletes with
Power Evolution

Discover, step-by-step, how to develop the most coveted trait possessed by the world’s most successful athletes.

Power Evolution
 

Kettlebell Training: It’s All About Progressions


Kettlebell Training With Young Athletes


Kettlebell training progressions with young athletes


By Pamela MacElree MS


Just like every other training modality, kettlebells also have training and movement progressions.


I find it ironic that we often see people approaching kettlebell training far differently than they would barbell training or even the use of a dumbbell. Everything has a progression, always. I’ve talked about it before, you wouldn’t give someone additional weight in a squat if their bodyweight squat has poor form and you especially wouldn’t give them a weight to use in squats if they never squatted before.


If this is the case why would we automatically hand someone a kettlebell and show them how to do snatches if they had never done one before, if they had never used one before, or if they had never done any other similar movements before. We don’t.


This is where progressions come in to play when training young athletes. Progressions are highly important to understand and know to ensure that our clients and athletes both have good form and once they have maintained good form, can safely make increases in weight.


Since I mentioned kettlebell snatches earlier, let’s use them as the example. Keep in mind that I am not teaching how to do a kettlebell snatch, I am showing you the progression on where to start when first teaching the snatch.


Let’s take a look at things in reverse order:


    • Prior to doing kettlebell snatches we should ensure that being able to do a one arm kettlebell high pull is a proficient movement pattern.


    • Prior to doing one arm kettlebell high pulls, we want to teach and learn two arm kettlebell high pulls.


    • Prior to doing two arm kettlebell high pulls, we will teach the kettlebell Romanian deadlift. 
    • Prior to learning the kettlebell Romanian deadlift we teach the good morning stretch.


As you can see there are several steps that need to happen before teaching young athletes a kettlebell snatch. The purpose here is to not actually teach you the kettlebell snatch but to show you the movement patterns that need to be learned and perfected prior to attempting the snatch.


The good morning stretch shows us that our athletes understand the hip hinging process of moving the hips back in space, rather than down toward the floor as in a squat.


The Romanian deadlift follows the same hip hinging pattern as the good morning stretch with external load, slow and controlled. When learning the Romanian deadlift you start with two hands on the kettlebell and move to one.


After mastering the slow and controlled movements, we will move into the more dynamic explosive exercises of the two arm and one arm high pulls and finally progressing to the snatch.


Here’s a video to help you coach young athletes bring all of these kettlebell movements together :


Around The World For Better Balance Training For Young Athletes


Young Athletes Balance Training


By Dave Gleason
 

In this video IYCA Expert and Athletic Revolution Pembroke Owner Dave Gleason discusses and demonstrates one of his favorite Activities for training dynamic balance in young athletes.


Progressions, regressions and even a way to make this exercise more fun for even the youngest of athletes is included in this short video coaching clip.


Let us know what you think of these exercises for improving the balance of young athletes below.


Teaching The Perfect Push Up To A Younger Athlete


Younger Athlete Push Ups Exercise


Push up for younger athlete from the IYCA


By Dave Gleason


Teaching the push up to a younger athlete can be arduous and complicated depending on physical maturity, body awareness, current skill and or experience. Let’s face it, in most scenarios the younger athlete has had no instruction, incomplete instruction or instruction with incorrect information. Once more, the opportunity to perform a push up is usually at the end of a practice, as a form of punishment or as an element of a timed standardized testing protocol. We know none of these story lines are optimal for any young athlete to achieve true success.


Creating a foundation where a younger athlete can progress to a push up worthy of actually performing as part of any training program is where we need to start.

In this video Dave Gleason, 2010 IYCA Trainer of the Year and owner of Athletic Revolution in Pembroke MA, shows you the progressions he uses with a younger athlete 10-13 years old.


Plyometric Progressions for Young Athletes

Young Athletes and Plyometric Progressions

By Wil Fleming

On the surface plyometrics are all about force production. For young athletes they are a great way to learn to produce force, apply it into the ground and propel their body in a new direction.

The overlooked part of plyometrics, that needs to be considered is the role of force absorption in an athlete’s development.

If athletes never had to land, or never had to stop there wouldn’t be as many injuries. Plain and simple. Almost 70% of knee injuries occur from non-contact movement. A great percentage of those injuries occur in change of direction movements or landing.

These types of stats should raise our eyebrows and make us look not only at force production but at force absorption. We must prepare our athletes for landing, otherwise plyos are like equipping your your young athletes with a bigger motor, but no brakes.

Applying the brakes to plyos can be done simply by using a progression of multi-planar jumps. Young athletes should do each jump at a high intensity and then “Stick” the landing for 3-5 seconds.

This progression is appropriate for athletes of nearly all ages, and will be challenging to young athletes of all ages.


Top 4 Plyo Exercises

Learn more about power exercises for athletes by viewing our top 4 plyo exercises free video series. You’ll have no trouble progressing your athletes to new levels of performance.

IYCA-Plyo-LM-Blog-ad

Training for Power: The Top 5 Exercises for Athletes to Dominate the Game


Training for Power with Young Athletes


Young Athletes hang position


By Wil Fleming


My young athletes are known for explosive power, from middle school volleyball players to football players preparing for the combine all of them out class the competition when it comes to quick bursts of power.  Recently I put together a presentation outlining my favorite exercises to do just that.  I have shared a brief outline of the topics covered in that seminar in the list below.


1. Hang Clean and Snatch-


You will notice that I did not say the Power Clean or Power Snatch.  Power cleans are the staple of most training programs, but the key is by doing this movement from the hang position i.e. with the bar just above your knees.  This position is much closer to ones athletes actually use in athetics and athletes have a much greater potential for technically sound lifts.

The snatch must be included because it is such a powerful movement as well and can lend diversity to the program.


2. CHAOS agility drills

Much of the need for power in football comes in the reaction to a movement of the ball or of the defensive player, because of this football players must also have the mental awareness to make explosive movements as a reaction. Credit Coach Robert Dos Remedios for this one, but my favorite training tool for this are CHAOS agility drills (it stands for Conscious to unconscious Have unpredictability Active to Reactive Open drills Slow to Fast). The idea behind it is to have athletes mirror one another in specific patterns first and then to open ended drills with many different movement patterns, more closely replicating the actions of actual game play.


3. Kettlebell Swings

This is a foundation movement for any athlete looking to develop more power. The action in the kettlebell swing is founded on the idea of a hip hinge, this is important because most athletes need to gain better control of the ability to hinge at the hips.  Most athletes are very much Quad dominant and are losing out on the potential of their backside. The Kettlebell Swing does a great job of teaching these motions effectively.


4. MB Throws

Using medicine balls in throwing motions (chest pass, Side throws, Throws for distance) is a great way to develop power in the upperbody for young athletes while incorporating the important parts of hang cleans, hang snatches, and Kettlebell swings (hip hinging).  Delivering a Medicine ball with force is a great way to engage the core in explosive activities as well, generating force with the lower body must require active core control to deliver the ball with the arms, This transfer of power is important to all sports.


5. Plyometrics

Athletes need to be adept at accelerating and decelerating their own body at maximum speeds. Plyometrics are the first way that athletes can learn to do so.  Maximal jumps with a stuck landing will help athletes develop resistance to injury and will simulate many movements in sport.


There is a lot more than just power that goes into becoming athlete. It takes general strength, resistance to injury, proper conditioning and a well prepared mind.


Focusing on power will take athletes a long way towards getting to where they want to be.


Hybrid Movements for Killer 6-13 Year Old Programming


Hybrid Movements For Young Athletes 


By Dave Gleason 

Creating fun, imaginative and challenging activities for 6-9, and 10-13 year old can be a difficult task.  Keeping in mind that 6-9 year old athletes are still discovering movement and 10-13 year old athletes are exploring movement will help.  Combining 2 or more ‘traditional’ exercises to generate new, hybrid movements will put your programming over the top! 

Lunge walks (monster walks) combined with bear crawls for discovering balance, systemic strength, contra lateral coordination and with a progression even reactivity.  Log rolls and push up holds (progressed to push ups) will cover a variety of training factors including core strength, upper extremity strength, spacial awareness and more. 


Watch this short video below to see exactly how to put these hybrid movements together with progressions!


Youth Sports Training for Large Groups

Youth Sports Training For;

Mobility & Active Flexibility
Injury Prevention – Mechanics
Injury Prevention – Deficits
Torso


I had 20 minutes, one volleyball court and 50+ young athletes…


So, here’s how I broke it down:


(A) Mobility/Active Flexibility (7 Minutes)


(more…)

Complete Athlete Development

[wpfblike]

Complete AThlete Development


The ‘Complete Athlete Development‘ System…


Now 100% Digital (So You Get IMMEDIATE ACCESS)


And Yours for Only $97


Click Here Right Now —>http://completeathletedevelopment.com/cad/digital


“When I read Brian’s ‘Speed & Movement Techniques’ chapter in his Complete Athlete Development Program, I knew that I was on to something very special…


… When I watched the corresponding DVD’s, I realized in an instance that the techniques and progressions he was showing were going to make my athletes the fastest and most agile in the game…


… I was right!”


I received that email from Heath Croll about 3 years ago.


My ‘Complete Athlete Development’ system was brand-new and I was anxious for feedback.


It’s one thing to coach successfully for 10 years, it’s another thing altogether to put your system on paper and ask people to believe in it.


But believe in it they did.


Fitness Professionals, Strength Coaches, High School Coaches – even Parents and Athletes!


(more…)

10,000 Youth Training Programs

[wpfblike]

Youth Training Programs

“Templates” became my haven for creating quality youth training programs.


They saved me literally hours of time in preparation.


They were perfectly based on my overall training system.


They were custom built for progressions and regressions.


They were ideal for use in small or large group settings.


And with about two hours of preparation, I could create one sheet that added up to more than 10,000 individual training programs.


Seriously


It’s all based on compartmentalizing and categorization.


I created a video to show you exactly how I did it and how you can as well.


This will be one of the most worthwhile 5 minutes you could ever spend on Youth Training Programs


See My Complete ‘Training Template’ System in Action —> http://completeathletedevelopment.com/


Exercise Programs For Kids and The Art Of Teaching Speed

Exercise Programs For Kids Speed Training

One of my favorite things to teach, both to young athletes as well as
Coaches, is the mechanics of speed.


Deceleration techniques specifically.


And that’s because speed is seldom taught as a skill at all.


Usually, the ‘speed work’ of a training session consists of some hurdles,
cones, sprinting and ‘plyo’ exercises with little attention being paid to
form or function.


Simply put, we don’t often TEACH speed and respect it in the way we
should.


Young athletes can (and should) be taught how to become faster and
more efficient from a movement perspective.


And in order to do that correctly, you must have a progressive system
in place that allows them to learn.


I always teach speed by instructing on the skill of deceleration first –
and I teach that from both a lateral and linear perspective.


Here’s my overview for teaching the skill of lateral deceleration for Exercise Programs For Kids:


(more…)

Common Mistakes in Youth Speed Training

The video above is an excerpt from the Youth Speed Training’ DVD in my Complete Athlete Development system.


Teaching quality deceleration and acceleration skills from different
angles is the most important place to start with an effective
Youth Speed Training system.


Do you have a system for Youth Speed Training?


Complete Athlete Development will be off the market very soon, but
the speed training system I outline within it will make all the difference
in the world to the success rates of your young athletes.


Heath Croll down in Virginia had this to say –


“… I realized in an instance that the techniques and progressions he
was showing were going to make my athletes the fastest and most
agile in the game…. I was right!”