fbpx

Archive for “Strength Training” Tag

Bench Press Progression – Part 2 in a Series on Exercise Progressions

bench press progressionPause Bench Press Progression – In the last installment of this article series, we talked about the importance of exercise progressions and the front squat progression we utilize with our middle school and high school athletes.  It can be found at https://iyca.org/front-squat-progression.  In this installment we will be discussing the importance of the Pause Bench Press progression.  We will also give you the progression plan we implement with our athletes and our recommendations for athletes in  7th and 8th grade and high school.  In the last portion of this article, we will discuss some problems or issues that may occur when prescribing this exercise and the reasoning behind our use of this particular exercise for our program.  

When most people talk about strength training, weightlifting, powerlifting, or bodybuilding, the bench press is probably most commonly mentioned exercise, and probably the most commonly performed exercise.  Go to any gym, health club, fitness center, box, or whatever the facility is, and there will be a place to bench press there.  That can be a good thing and bad thing because many people believe that anyone can do it without a plan for progression when learning the movement.  Skipping over the basics in anything is usually detrimental, but in lifting it can cause long term issues that are hard to overcome.  Age appropriate progressions are the key, so let’s go through our Pause Bench Press progression one step at a time.

Bench Push-Up

This is our starting point for our pause bench press progression. We begin with both hands on the bench  performing a push-up with our chest touching the bench in each repetition. Body posture and proper execution is the focus when performing this exercise.  If a kid needs to, they can put their knees on the ground as a regression. We will not progress an athlete if they cannot perform 10 perfect reps of the exercise.  

7th Grade 8th Grade High School

WK 1 – 6 x 6 WK 1 – 6 x 8 WK 1 – 6 x 10

WK 2 – 6 x 8 WK 2 – 6 x 12

WK 3 – 6 x 10


Push-Up

For the next exercise in our pause bench press progression, we increase the difficulty and volume of exercise from the previous movement.  Just as with the focus of the previous movement, body posture and proper execution of the exercise is critical for maximum benefit to the athlete.  When performing this movement, we tell the athletes to squeeze the elbows into the body, not allowing them to flare outward. Just as with the Bench Push-Up, if needed they can have their knees on the ground. We will not progress an athlete if they cannot perform 10 perfect reps of the exercise.

7th Grade 8th Grade High School

WK 4 – 6 x 6 WK 3 – 6 x 8 WK 2 – 6 x 12

WK 5 – 6 x 8 WK 4 – 6 x 12

WK 6 – 6 x 10

When beginning to use weight while performing a bench pressing variation, whether it is barbell, dumbbell, or kettlebell… safety is important.  We use a back spotter, who can provide either a lift off or a spot for safety purposes. We avoid using side spotters due to the possibility of one spotter grabbing the barbell and tipping it when trying to assist. We teach our spotters to have their hands in an over & under grip close to the barbell without touching it. We want to see that space/gap to ensure that the lifter is doing the work, while giving the spotter the ability to assist if needed. When spotting the dumbbells, we have the spotter spot near the lifter’s wrist. This way the spotter can assist the lifter appropriately during the exercise.  

 The next crucial thing we teach is the proper set-up on the bench.  We utilize a consistent barbell to eye relationship by having the athlete lie down directly under the barbell in a straight line upward.  The next thing to teach is pulling the shoulder blades together and digging into the bench when laying the back down. We have an advantage for athletes performing this movement because of our specialized type of upholstery designed to allow the lifter to grip into the bench more easily when lifting.

Body position is the next thing we teach our athletes when it comes to our Bench Press progressions.  First, we want the shoulder blades in the bench.  Second, we want the hips to stay in constant contact with the bench for the entire time throughout the movement. Lastly, we want the feet flat and pressed into the floor. This allows for the lifter to use the lower body by pressing through the floor during the bench pressing exercises.

The grip on the barbell is the next part of the exercise execution. We have tape on our barbells to better assist our athletes in knowing where to put their hands. Our blue tape is on the outer ring of the power barbell, while the red tape is on the smooth part of the power barbell and knurling ends towards the middle of the barbell.  We allow for comfort purposes that our athletes go no wider than pinky fingers on the blue tape.  

Barbell path is something most people usually don’t pay much attention to, but it’s something we coach about constantly.  We teach a straight-line path for the weight to travel. In my opinion, doing this is the safest and most efficient way to press.  Straight-line pressing also allows the lifter to better find their groove when pressing.  Each of the previous components are coached each time we perform a bench press variation.

Once we begin to utilize weight in our progressions, we use barbell to dumbbell type of progressions.  Using the barbell first allows for proper development of a lifting path while using the dumbbells. It adds a stabilization effect and increases the execution difficulty as we advance in our progression plan.  Another thing you will notice in our progression plan is the initial use of partial range of motion, followed by full range of motion movements.   

Floor Press

This is the first exercise in which we add external resistance in our bench press progression. We begin with a 25lbs barbell and then work up from that point.  Have the lifter lie on the ground under the barbell, have them lower the barbell straight down tucking the elbows in at a 45-degree angle. Then they should lower the barbell until the elbows come to rest on the ground. Once the barbell is completely at rest, the lifter should press the barbell upward fully locking out the arms to complete the exercise.

7th Grade 8th Grade High School

WK 7 – 6 x 6 WK 5 – 6 x 12 WK 3 – 6 x 10

WK 8 – 6 x 8 WK 6 – 6 x 10

WK 9 – 6 x 10


DB Floor Press

This is the same movement, but instead of using the barbell, use of dumbbells is introduced. When performing this movement, we have the palms facing towards each other which makes it a little easier to keep the elbows in the proper position.

7th Grade 8th Grade High School

WK 10 – 6 x 8 WK 7 – 6 x 12 WK 4 – 6 x 10

WK 11 – 6 x 10 WK 8 – 6 x 10

WK 12 – 6 x 12


Board Press

This exercise is another “partial range of motion” movement, but with greater motion than the Floor Press.  We start by placing a shoulder saver from elitefts on the barbell in the middle of the bar.  This lift is begun by having the lifter lower the barbell the same way as in the Floor Press, stopping when the shoulder saver comes to rest on the chest.  Once the barbell is on the chest, the lifter presses the barbell upward locking the arms out to complete the exercise.

7th Grade 8th Grade High School

WK 13 – 6 x 12 WK 9 – 6 x 10 WK 5 – 6 x 8

WK 14 – 6 x 10 WK 10 – 6 x 8

WK 15 – 6 x 8

DB Bench Press

This is the first full range of motion exercise we use in our bench press progression. We use the same palms-facing-forward hand position as the DB Floor Press.  Have the athlete get set-up on the bench, then extend the dumbbells with the arms to get started performing the exercise.  Lower the dumbbells down until they touch the chest, then press them upward until the arms are locked out at the top.  Focus must be on paying attention to not bouncing the weight off the chest with momentum. The lifter must control the weight the entire time while performing the exercise.

7th Grade 8th Grade High School

WK 16 – 6 x 12 WK 11 – 6 x 10 WK 6 – 6 x 10

WK 17 – 6 x 10 WK 12 – 6 x 8

WK 18 – 6 x 8


Close Grip Bench Press

This is another full range of motion movement in our bench press progression and is very close to our final movement. The biggest thing with this movement is the lifter’s grip of the barbell. We have our athletes place their middle finger on the red tape on the barbell to start.  To initiate the exercise, the lifter lowers the barbell down under control until it touches the chest, then the lifter presses the barbell upward completing the exercise by locking out the arms at the top.  Focus must be on paying attention to not bouncing the weight off the chest, as the lifter must control the weight the entire time while performing this exercise.

7th Grade 8th Grade High School

WK 19 – 6 x 12 WK 13 – 6 x 10 WK 7 – 6 x 8

WK 20 – 6 x 10 WK 14 – 6 x 8

WK 21 – 6 x 8


DB Incline Press

This is really the only exception to our rule of barbell first, dumbbell second, in our bench press progression. When performing this movement, which is very similar to the DB Bench Press, the angle of the bench is in an inclined position.  Remember that we want to utilize the same hand position as all other dumbbell pressing exercises. Again, attention must be paid to not bouncing the weight off the chest, as the lifter must control the weight the entire time while performing the exercise.

7th Grade 8th Grade High School

WK 22 – 6 x 12 WK 15 – 6 x 10 WK 8 – 6 x 8

WK 23 – 6 x 10 WK 16 – 6 x 8

WK 24 – 6 x 8


Pause Bench Press

This is the final movement in our pause bench press progression and it is the primary upper body pressing exercise in our program. When performing this exercise, the lifter lowers the barbell as before until the barbell rests on the chest. The lifter remains tight and pauses for 3 seconds, then explosively presses the barbell upward, completing the movement by locking the arms at the top of the exercise.  Controlling the barbell throughout the entire exercise is vital to the successful performance of the exercise.

7th Grade 8th Grade High School

WK 25 – 6 x 12 WK 17 – 6 x 10 WK 9+ – 6 x 8

WK 26 – 6 x 10 WK 18+ – 6 x 8

WK 27+ – 6 x 8


The most common issue that arises when following a bench press progression is doing things too fast and too soon.  As I mentioned earlier, everyone thinks they can bench press, but performing the exercise, and performing the exercise correctly/safely are two different things.  One of the reasons we utilize the pause in our bench press movement is to teach proper control of the exercise instead of bouncing the barbell.  Another reason we have embraced the pause is that it helps keep the hips on the bench while pressing the barbell. Yes, adding the pause will decrease the total weight a lifter can press. However, we believe this is the most efficient way for an athlete to press with the upper body.  Adding the pause reveals a lifter’s true upper body strength levels.

This is the second of three in our series of progression articles. I love the feedback I have already received, and I look forward to the third article, which will cover how we teach the power clean in our program. Not only will we discuss the progression we implement, but we’ll share the reasoning behind why we teach the progression the way we do. I would love to hear what you think, and I can be reached at tjacobi@strong-rock.com

Tobias Jacobi

Tobias  Jacobi has been a strength & conditioning coach at Strong Rock Christian School for 4 years and spent 15 years as a college S & C coach before that.  He spent time at East Carolina University, Charleston Southern University, Kent State University, Western Carolina University, Elon University, UNC-Chapel Hill and Cumberland University.  He holds multiple certifications, has worked with thousands of athletes at every level, and has spoken at clinics all over the country.


For more information on how to train high school athletes, check out the IYCA High School Strength and Conditioning Specialist course and certification.  The HSSCS is the only certification available that focuses entirely on training high school ages athletes.  The HSSCS includes several hours of video instruction and two textbooks with contributions from 20 of the top strength & conditioning coaches from major universities, high schools, private facilities and NFL teams.  Click on the image below to learn more about the High School Strength & Conditioning Specialist credential.
Top 4 Exercises to Improve the Power Clean

In this article Coach Tobias Jacobi discusses the top 4 exercises used to improve the power clean.

The power clean is one of the most popular exercises used to improve sports performance.  The ability to externally load the triple extension of the knee, hip, and ankle is one of the main reasons the power clean is so popular.  Another reason is the coordination required to properly perform the exercise,

Improve the power clean

which leads itself to being a movement that assists in athletic development.  In my time as strength & conditioning coach at both the high school and collegiate levels, I have noticed a trend that athletes who perform the power clean the best often see great carry-over onto the playing field.

The technical aspect of the exercise must be stressed, taught, and progressed properly in an age-appropriate manner.  In our system, we teach 7th graders the hang clean over a 34-week program, 8th grader perform the power clean by the end of our 34th week, and our high school student-athletes go through a 9-week progression program.  In this article, we will discuss some of the exercises we use to help improve the power clean performance of our athletes.  The front squat, hang squat clean, overhead squat, and KB swing are all exercises that we use to help increase our performance of the power clean.

Front Squat

In my opinion, the best assistance exercise to improve the power clean is the front squat.  We recently make a change in our program when we switched our primary squat variation from the box squat to the front squat.  Making this change has already lead to significant increases in our athlete’s ability to perform the power clean.  Because it helps mimic the catch of the power clean, we place great emphasis on the rack position during the front squat.  Doing this helps athletes learn the proper position for catching the barbell at the bottom of the power clean.

Just like any exercise, we see common issues in the front squat that must be addressed.  The first issue a coach will run into is the position of the barbell in the rack position.  The bar should be resting on the natural “shelf” created by getting into the “rack position” free weight squat to improve the power cleanwhere the barbell will be placed on the deltoids near the upper clavicle.  To address this, our teaching progression includes the “free weight squat,” something I stole from Iowa’s Football Strength & Conditioning Coach, Chris Doyle.  The free weight squat is basically a front squat with the arms pointed straight ahead instead of gripping the bar.  This teaches athletes the proper barbell placement when performing the front squat.
Another issue is the hand placement during the exercise.  Because of our teaching progressions and attention to detail, we have had tremendous success using the “rack position” for the front squat.  Wrist mobility and flexibility work is included in our programs starting in the 7th grade, which has given our athletes the mobility necessary to use this position.  As a college coach, I dealt with many athletes who lacked the mobility to get into the rack position, so I often had to adjust their hand placement in the front squat.   We would often hold onto wrist straps that were strapped to the barbell. For other athletes, we would have them only perform the free weight squat, and in some of the worst cases, we would have athletes cross their arms.  I believe the carryover from the front squat to the power clean is severely diminished when you use a different grip then the rack position, so this needs to be emphasized if the goal is to improve the power clean.  Here is a properly performed front squat:

Hang Squat Clean

In my opinion, the 2nd best assistance exercise to improve the power clean is the hang squat clean.  When performing this exercise, it is important to make sure the athlete is being explosive by initiating the exercise with a jump.  A common mistake is to perform the exercise by simply dropping under the barbell instead of moving the bar upward.  While this seems to accomplish the same end result, it defeats the purpose of the exercise, which is to generate power.  The other portion of the lift that a coach must pay special attention to is catching the barbell at the bottom of the squat.  Doing this helps improve the lifters ability to catch the barbell with heavy loads.  With this exercise, you must start with lighter weights and slowly progress to heavier loads.  Once this exercise is mastered, athletes will see a significant improvement in their ability to perform the power clean.

Again, when implementing the hang squat clean, we introduce it as part of our power clean progression, so our kids will actually perform this variation before they perform the full power clean.  We have seen tremendous success using this format and it allows for the usage of multiple exercises throughout the duration of an athletes training career in our program.  Performing the movement fluidly and not achieving proper depth on the catch are two common issues coaches will see when implementing the hang squat clean.  Both issues are fixable when coached properly over time.

The fluidity of the movement is very important to the proper execution of the exercise and takes some time for athletes to understand.  Fear also prevents some athletes from catching the barbell down in the full squat position.  That is one of the reasons that we use this in our teaching progressions, so kids understand it’s not about load, it is about proper technique.  Once they understand this, they typically begin to perform the exercise properly and feel successful.  In some cases, I have had to regress athletes to a hang clean to front squat combination exercise to get the movement patterns to slowly work together.

The other issue a coach may see is the athlete not being able to achieve the full squat position when they catch the barbell.  Each situation is different.  The issue could be lack of hip flexibility, lack of ankle flexibility, or again just fear of getting under the barbell.  Kids with larger bodies also have a tendency to lock the hips when catching the barbell.  This is usually a technical motor pattern a coach must clean up or may stem from fear, where the athlete will have to develop confidence with lighter loads.  If it is a flexibility issue for the hips, the overhead squat is my favorite exercise to address the problem.  There are plenty of exercises that can be used for this, so pick what works best for your situation.  If it is and ankle mobility problem, we address that by using slant boards and band stretches to help develop the needed range of motion.

Here is a properly performed hang squat clean:

Overhead Squat

My 3rd favorite exercise to help improve the power clean is the overhead squat.  This exercise is typically associated with performing the snatch, however in my experience it is also great for building a solid power clean.  The biggest carry over from the overhead squat to the power clean is that it teaches the full range of motion when they catch the barbell in the bottom of the power clean.  Another benefit that is added from the overhead squat is the teaching of balance and weight distribution.  This is a very popular exercise for Olympic Weightlifters to use when training to improve their lifts.

When performing the overhead squat one of the most commons things a coach will see is the toes turning outward.  While there may be reasons for some kids to turn their toes out, we try to have our kids keep their feet as straight as possible when performing this exercise.  From my experience, tight ankles usually create this issue.  Again, we implement slant boards and band stretches to help improve range of motion for the ankle.

Another issue a coach will often see when prescribing the overhead squat is that some kids may have tight hips and cannot get to depth because of this.  Once we know the hips are the issue, we utilize a series of stretches to help improve mobility.  A combination of static stretching, foam rolling, and band stretching are used to help improve range of motion.  With both issues, it will take time and consistency to see results as these are not quick fixes for athletes.  However, addressing these issues usually helps many areas, so it’s worth the time and energy.

Kettlebell Swings

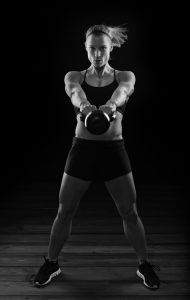
The last exercise we will discuss to improve the power clean is the kettlebell (KB) swing.  There are many ways to perform the KB swing and for our purposes we perform it keeping the KB as close to the body as possible and focusing on hip involvement when executing the lift.  The initial movement of the KB swing is the crucial hinge of the hips backward before violently extending the hips forward.  We want to “snap” the hips forward, and the athlete should feel this snap when performed properly.  The bell should swing up to shoulder level, while keeping the arms straight.  A common mistake is the bending of the elbows which engages the upper body.  This is something we want to avoid.  The bending of the elbows also takes emphasis away from the hips.  We typically use the double arm swing, but you can also utilize a single arm version of the exercise.  When performing the single arm exercise the one additional coaching cue is that we turn the thumb backwards when the bell goes in between the legs.  The snap of the hips and minimal arm use is the exact same as the double arm version of the KB Swing.

The ability to produce substantial amounts of force into the ground and express it externally is the reason I use the power clean so extensively.  I believe that improving power output helps lead athletes to success on the playing field.  I’ve seen this power transfer to the playing field with many athletes including Michale Spicer, Bryce Cardin, and Jack Williams.  Michale was a defensive end who played for me when I was at Western Carolina University.  He had the biggest power clean I have ever seen in person, which was 425lbs.  Spicer also played professional football for 8 years in the NFL, AFL, and UFL.  Bryce Cardin played for me while at Strong Rock Christian School.  Cardin, who was an undersized offensive lineman, posted a 320lbs power clean while in high school and earned 1st Team All-Region honors as a senior because of play on the field.  Finally, Jack Williams was a defensive back who I coached at Kent State University.  Jack was the owner of a 343lbs power clean and was an All-Conference defensive back along with being a 4th round pick of the Denver Broncos.  He also spent time with the Detroit Lions, Chicago Rush, and Las Vegas Locomotives as a defensive back.

While their success obviously wasn’t exclusively the result of performing the power clean, I have seen many athletes improve the power clean which has led to improved performance on the field.

The power clean is an integral part of our training program and of many strength & conditioning programs, and these four exercises will help you coach and improve the power clean in your program.  Using assistance exercises to help increase an athlete’s ability to perform the exercise is critical in the development of the exercise itself.  The front squat, hang squat clean, overhead squat, and kettlebell swing are all exercises that help in the improvement of an athlete’s ability to perform the exercise safely, efficiently, and effectively.  Utilize these exercises to help improve the power clean and watch your athletes numbers skyrocket.


Tobias JacobiTobias  Jacobi has been a strength & conditioning coach at Strong Rock Christian School for 4 years and spent 15 years as a college S & C coach before that.  He spent time at East Carolina University, Charleston Southern University, Kent State University, Western Carolina University, Elon University, UNC-Chapel Hill and Cumberland University.  He holds multiple certifications, has worked with thousands of athletes at every level, and has spoken at clinics all over the country.


Learn more about power development and strength & conditioning in the IYCA High School Strength & Conditioning Specialist certification featuring the Principles of Athletic Strength & Conditioning textbook.

Don’t Get Strong Wrong

Among the many concepts I’ve learned from my experiences as a strength and conditioning coach is: “Don’t get strong wrong.” 

Simple and straight to the point. Getting strong wrong is simply loading up athletes on lifts where their mechanics are either poor to begin with, or are being affected negatively due to the load being too heavy for the athlete to complete a full range of motion. This is where we see half squats, rounded backs on deadlifts, barbells stapling athlete’s chests on the bench press, cleans being pulled in atrociously inefficient manners, etc. The list goes on and on. The implications are numerous and can prove to be quite detrimental for the athlete.

This phrase perfectly depicts how poor strength coaches reveal themselves. Unfortunately athletes getting “strong wrong” is occurring more often than not at both the high school, colleges and private facilities across the country.

When an athlete adds weight to a dysfunctional movement, the risk of injury increases exponentially. This is brutally counterproductive considering one of the main responsibilities of a strength and conditioning coach is to prevent injuries. Athletes exposed to months, or years, of dysfunctional strength training may take just as long to properly learn or improve these imperative movements with less weight, and thus are not accomplishing the goals set forth by their strength coach. Time is of the essence when it comes to youth, high school, or collegiate level athletes. Having to take precious time to fix bad habits limits their potential under a strength coach’s watch.

Secondly, the poor motor patterns that are now being learned by athletes can become ingrained in the nervous system, and thus cause a multitude of problems down the road. Joint mobility and flexibility are sacrificed which leads to frequent soft tissue injuries taking place on the practice and playing field. It is assumed that to develop strength throughout the joint’s full range of motion, training must be performed throughout that range. A great example is provided when further dissecting the squat.

Studies show that maximum quad EMG is displayed at 80+ degrees of a squat and that maximum glute EMG is at 90+ degrees. We know that getting parallel to the ground is shown at 90 degrees but with athletes taking short cuts due to heavy weight they are neglecting two enormous muscle groups that are responsible for joint actions that are crucial for sport. Coaches need to remember that these are athletes they are working with, and sports are unpredictable. Taxing the body through its full range of motion with a little less weight, as opposed to overloading the body with a half rep, will better prepare the body for the unknown bends and twists that are associated with sports.

Lastly, what getting strong wrong does to an athlete’s psyche can be just as problematic as the physical repercussions. Coaches that teach or allow improper form, yet record the results, lead kids to believe they are capable of much more than they actually are. These young athletes boast about their weight room numbers (and 40 yard dash times) that are so far from the truth it’s painful to listen to. I’ve listened to dozens of kids talk about their massive squat numbers only to watch them perform half reps.  The problem stems from coaches pumping kids up and wanting to show off these big numbers to make it look like they are the best strength coach around for producing such great results.  There is a fine line between boosting confidence and creating delusion.

Smart coaches understand games aren’t won with deceptive bench press numbers, but rather with healthy athletes who are able to play to the best of their ability. At certain levels, the strength coach is around their athletes more often than their position or head coaches. Actions and messages portrayed by the strength coach can often resonate with athletes. Pushing these false standards of success can send out the message that it’s okay to cut corners. Keep the lessons and messages honest. After all, one of the best privileges of being a coach of any kind is seeing an athlete grow to become an honorable human being, not just a standout on the playing field.
So what can coaches do to prevent the bad habit of getting strong wrong? The easiest answer would be to simply teach athletes proper execution from day one, then begin progressive overload in a safe and efficient manner.  For those working with large groups or teams, the ability to perform sound repetitions with a full range of motion simply won’t occur with every athlete. Varying levels of skill and experience are evident at every turn. A coach must focus on the following:

  1. Performing a well-executed warm-up involving the desired muscles and joints that will be utilized during the specific exercise and session.
  2. When introducing a new exercise, or covering a more advanced movement, always begin by teaching a bodyweight version, a regressed version, or utilizing teaching aids (dowels, practice bars, etc.) to perform the exercise.
  3. Progress an exercise or begin to progressively overload in a safe manner when proper range of motion and understanding of the exercise has taken place.
  4. Possess a coaching repertoire of regressions, modifications, and simple weight room aids to solve any dysfunctional patterns that occur.

Not every athlete will learn or progress at the same pace. Many factors come into play such as age, sex, training status, height, weight, etc. A successful strength coach should always be able to teach proper movement mechanics and make any adjustment necessary to prevent getting strong wrong.


Joe Powell is an Assistant Strength & Conditioning Coach and Adjust Faculty Member at Central Michigan University.  He has experience in a variety of settings including Division I Athletics, private sports performance, high school S & C, personal training and teaching college courses.
 

The IYCA High School Strength & Conditioning Specialist Certification is the only certification geared toward training high school aged athletes.  Click on the image below to learn more about this unique product.

How Resistance Band Training Can Impact a Strength & Conditioning Program – Part 3

Using Bands to Conveniently Impact a Strength & Conditioning Program

Resistance bands are easily the most convenient and effective way to work on first step speed mechanics as it relates to acceleration and deceleration.

Not only are bands easy to attach to the body but their ascending resistance allows athletes to load both acceleration and deceleration phases of running.

7. First Step Acceleration

It’s a well known fact that if an athlete can win the first 3 steps during a play in a game, they are probably going to experience good success continually throughout the game and probably win the event.

Resistance bands make it very easy to train large groups of athletes to increase first step speed and reaction. As a coach, partner-based first step speed training requires minimal setup or space to implement and is relatively easy for athletes to quickly learn.

As for the athlete, they are able to instantly feel the difference it makes on their quickness and agility within only a couple of training sessions. These two factors alone instantly make it successful.

These drills are typically done in a partner attached setup with athletes alternating while performing 3 or 4 sets of 5 reps. Because these drills will emphasize acceleration, the athlete only has to focus on getting out quickly against the band resistance.

Once learned, coaches can build in reaction starts through the use of whistle start hand signals.

Shuffle Acceleration Drill


8. First Step Deceleration

Once acceleration training is mastered, athletes can begin to work on deceleration by training under what is called a pre-loaded band setup. Performing the same drills, athletes now focus on learning how to decelerate under band-driven momentum.

Just like applying weight to increase strength, the band applies a resistance that the body has to overcome in order to become stronger at decelerating or slowing down momentum.

Shuffle Deceleration Drill


9. Partner Resisted Running

Once first step acceleration and deceleration speed drills are mastered, longer amplitude linear speed training can be implemented using a training approach called partner resisted running.

With partner resisted running, partners work together to challenge each other to run under a controlled resistance for 15 to 20 yards.

Partner resisted running allows athletes to now take their first step speed training through longer amplitudes of movement.

Here Is An Example of Partner-Based Forward Running


10. Implementing Non-Traditional Strength Training

The final way that resistance bands can be implemented into an off-season strength program is by using them to simulate non-traditional strength training drills like resisted crawling, towing, pushing or lunging.

In many cases these types of drills are used with specially designed equipment that increases cost and the need for greater training space. With a flat band’s ability to attach onto the body in multiple ways, it allows them to provide resistance to non-traditional movements that, in turn, challenges total body strength and coordination.

Non-Traditional Speed-Strength Training

Flat continuously looped layered bands, like the Quantum Band, provides coaches and their athletes with the ability to train all aspects of performance. They also allow them to simulate specific exercises and unique training approaches that historically required specialized equipment and additional resources.

Resistance band versatility makes it very easy and convenient to implement key aspects of an off-season training program without the need for added equipment, space or resources.

Dave Schmitz – The Band Man


About the Author: Dave Schmitz

Dave SchmitzDave Schmitz (aka…The Band Man) is the Co-Owner of Resistance Band Training Systems, LLC and the creator of https://resistancebandtraining.com, the only website exclusively devoted to training with large continuously looped resistance bands.

Dave has a unique professional background and vast experience as an orthopedic physical therapist, performance enhancement specialist, certified strength and conditioning specialist along with 27 plus years of living fitness and performance training.

All of this has allowed him to turn a simple 41-inch resistance band into an incredibly multi-faceted total training experience for 1000’s of athletes and fitness enthusiasts around the world—while helping 100’s of fitness professionals and coaches get their clients or athletes BETTER with BANDS.

How Resistance Band Training Can Impact a Strength & Conditioning Program – Part 2

Using Bands for Versatility in Your Strength & Conditioning Program

The ability to combine bands with free weights, create efficient metabolic circuits and safely be used to introduce strength training to younger middle school athletes adds to their off-season versatility.

4. Contrast Free Weight Band Training

Most off–season strength training programs are built around 6 or 8 week cycles that are designed to gradually improve absolute strength. In many cases after a cycle of this nature is completed the body needs what is called a de-load week.

This is a week where an athlete is allowed to let their body recover, heal and re-energize after performing a multi-week cycle of heavy gravity-based free weight strength training. It is during this de-load week that resistance bands play a significant role in allowing the body to continue strength training while still allowing muscles and joints to recover.

During this phase, barbell–band contrast training or band only exercises are implemented. This change of pace training allows the body to experience a completely different strength training stimulus while continuing to improve on common strength training patterns of movement.

Here are a few examples of easy to implement contrast band training exercises using bands in conjunction with frequently used barbell exercises.

Barbell-Band Bench

Barbell-Band Squat

Barbell-Band Dead-lift

Barbell-Band Push Press

5. Circuit-Based Metabolic Training

As the off-season progresses, metabolic conditioning becomes increasingly more important in preparing the high school athlete for their upcoming pre-season.

Resistance band’s ability to simulate any strength exercise while providing unlimited resistance and lightweight portability allows easy station circuit-based workouts to be set up and implemented anywhere.

Posterior Chain Metabolic Circuit

6. Middle School Strength Training

One of the safest ways to implement a middle school strength training program is through the use of body weight exercises. It teaches body awareness as well as core stability while still working against gravity.

Unfortunately not all young middle school athletes can effectively perform simple body weight exercises like squats, push-ups, pull-ups or single leg squat variations.

Resistance bands can supplement a body weight strength training program in 4 ways.

First, they can be used to assist body weight exercises to allow athletes to learn how to properly perform basic body weight exercises through full ranges of motion.

Second, bands can be used to apply added resistance to body weight exercises by quickly attaching the band onto the body.

Third, bands can be used to create unique exercises besides body weight movements that can increase exercise variety while influencing movements body weight exercises can’t.

Last, since most middle schools are not able to properly outfit a strength training room, resistance bands provide a highly cost effective way to introduce young middle school athletes to a simple strength training program.

Part 3 will turn the focus towards using bands as a speed development training tool to enhance both acceleration and deceleration while training both linear and lateral planes of movement.

Dave Schmitz – The Band Man


About the Author: Dave Schmitz

Dave SchmitzDave Schmitz (aka…The Band Man) is the Co-Owner of Resistance Band Training Systems, LLC and the creator of https://resistancebandtraining.com, the only website exclusively devoted to training with large continuously looped resistance bands.

Dave has a unique professional background and vast experience as an orthopedic physical therapist, performance enhancement specialist, certified strength and conditioning specialist along with 27 plus years of living fitness and performance training.

All of this has allowed him to turn a simple 41-inch resistance band into an incredibly multi-faceted total training experience for 1000’s of athletes and fitness enthusiasts around the world—while helping 100’s of fitness professionals and coaches get their clients or athletes BETTER with BANDS.

How Resistance Band Training Can Impact a Strength & Conditioning Program – Part 1

Impacting a HS Year Round Strength & Conditioning Program with Bands

As a strength and conditioning coach of a local high school where I have over 80 young high school athletes training in our weight room 4 days per week, I am constantly evaluating our efficiency and results.

Resistance bands have easily been our most versatile and cost effective training tool to date. Not only do the kids find bands to be extremely challenging to train with, but they also enjoy the ability to improve their free weight training results.

Anytime we can provide a training tool that motivates high school athletes to work harder, train more frequently and enjoy doing it, only good things happen.

I would like to share 10 ways, as a coach, you can implement continuously looped resistance bands into a high school strength and conditioning program.

1. Dynamic Flexibility Training

No question the greatest impact on keeping young athletes healthy, besides strength training, is making sure their joints and muscles are able to move freely through a full range of motion on demand.

A majority of youth injuries are directly associated with flexibility deficits due to frequent growth spurts. Unfortunately athletes do not like to stretch and if they do stretch, it’s often using simple body-weight movements performed poorly.

Band stretching allows athletes to use the band to passively and actively lengthen out key muscles of the hip and shoulder. Using a tool, in this case the band, to stretch seems to provide athletes with an added motivation to routinely perform a dynamic stretching routine.

This series of band stretches performed before every lift or running workout allows athletes to follow a routine program. Over time it creates permanent soft tissue length changes that athletes quickly recognize.

What’s even more interesting is the longer athletes perform the band stretching routine, the more they begin to appreciate the importance of flexibility and how it directly impacts improvement in strength, speed and power. These are not often recognized as flexibility benefits.

Dynamic Band Stretching with Young Athletes

2. Trunk and Hip Activation

The importance of establishing good activation of the trunk and hip stabilizers pre-workout is pretty well documented.

Using the same single band that was incorporated in the band stretching routine, athletes can quickly perform a series of resisted planks or hip stabilization exercises that will optimally prepare them for any running or lifting workout.

This series of band stabilization drills makes it convenient and easy to flow directly from stretching into a muscle activation series of exercises.

Simple Core Activation Exercises

3. Auxiliary Training

Free weight training should be a key part of any high school athletic-based strength program. However, regardless if that type of program emphasizes the use of kettlebells, dumbbells, barbells or sandbags, the type of resistance remains the same in that it is a gravity dependent constant resistance.

Resistance bands provide an ascending resistance that is not reliant on gravity. As a result, continuously looped bands can be used to create auxiliary exercises following different planes of motion or movement patterns while impacting muscles significantly different than free weights.

Combining straight plane free weight movements with multi-plane, multi-resistance vector band strength training allows the body to eliminate weak links in what is a total kinetic chain, tri-plane structure.

5 Best Lower Body Band Exercises for Youth Strength Training

5 Best Upper Body Band Exercises for Youth Strength Training

Stay tuned for Part 2 which will cover how to use resistance bands to improve barbell strength and sport specific conditioning as well as using them to develop a safe and effective middle school strength development program.

Dave Schmitz – The Band Man


About the Author: Dave Schmitz

Dave SchmitzDave Schmitz (aka…The Band Man) is the Co-Owner of Resistance Band Training Systems, LLC and the creator of https://resistancebandtraining.com, the only website exclusively devoted to training with large continuously looped resistance bands.

Dave has a unique professional background and vast experience as an orthopedic physical therapist, performance enhancement specialist, certified strength and conditioning specialist along with 27 plus years of living fitness and performance training.

All of this has allowed him to turn a simple 41-inch resistance band into an incredibly multi-faceted total training experience for 1000’s of athletes and fitness enthusiasts around the world—while helping 100’s of fitness professionals and coaches get their clients or athletes BETTER with BANDS.
 

5 Tips to a Healthy Football Season – And Any Sports Season

Football Season is Here

The season is upon us. Yes, ladies and gentlemen, it’s football season. The time of year where you can lose more friends than in an election year. So with that said, 2016 may be an interesting year. Let’s call 2017 the year of reconciliations.

If you are an athlete, football season can be grueling and can wear you down. If you are a coach, it can do the same thing. If you are a parent…well, parents have it easy. All you have to do is print out this article, tape it to the fridge, and your young athlete will follow all 5 tips, right?

The goal of this quick article is to give the athletes 5 tips to a healthy football season and give coaches some things to harp on with your athletes. In a loving way, of course.

5 Tips to Having a Healthy Football Season

Tip #1: Nutrition

Eating “properly” for performance is a year long struggle for the young athlete and can get even more difficult during football season. One of the hardest goals to meet is getting the calories an athlete needs to perform. With lunch around noon and practice after school, kids can go 6-7 hours without eating in the afternoon.

Pro Tip: Bringing snacks to school is important to fill those huge gaps in the day. But don’t forget, breakfast is the most important meal of the day. Don’t skip it.

Tip #2: Strength Train

If we work hard in the off-season, why lose all those “GAINS” during the season? Yea, I know, “I don’t have any time” or “we gotta spend that time watching film” is a common reason for skipping strength training. Time can be of the essence, but 2 days a week minimum is a must! Get into the weight room.

Pro Tip: The main goal in-season is to combat muscular imbalances that are caused by the season which CAN help prevent injuries. Oh yea, athletes CAN get stronger in-season! Don’t skip out on strength training during the season. Your off-season will thank you!

Tip #3: Sleep

You know what? I love video games too! I think it’s important to have fun with friends but don’t let it affect the season. Athletes need 8-9+ hours of sleep each night so the body can repair itself. Period.

Tip #4: Injuries

This is a big one for highly motivated athletes. Nobody likes to be hurt and miss games. But that slightly rolled ankle can quickly turn into a season ending injury if not treated correctly. There is a big difference between some bumps and bruises and an injury that can lead to something more serious.

Pro Tip: Maintain a good working relationship with ATC’s and make sure injuries are discussed.

Tip #5: Academics

Poor academics can lead to ZERO play time. Make school work a priority. Time management is one of the skills athletes will need to learn as a student athlete.

Pro Tip: Take advantage of free time. Use study hall for studying and homework (obviously), and use bus rides for the same thing. Being an athlete is work!

Have a Productive Football Season

Parents, I hope this is “fridge worthy”. Coaches, keep these tips in the front of your mind when it comes to your athletes. I hope that your football athletes will use these 5 tips to have a healthy and productive football season.

Josh Ortegon


About the Author: Josh Ortegon

Josh Ortegon - 5 Tips to a Healthy Football SeasonJoshua Ortegon is co-founder and the Director of Sports Performance Enhancement at Athlete’s Arena in Irmo, SC. Joshua earned his Bachelor of Science degree in Exercise Science from Western Michigan University in 2000.

As an IYCA-certified High School Strength and Conditioning Specialist, speaker, and writer, Joshua has helped establish Athlete’s Arena as the premier high-performance center in South Carolina since 2005.

Joshua has worked with a wide range of athletes from youth to professionals specializing in the areas of injury prevention, return to play and performance enhancement.


Are Your Athletes Prepared to Perform this Season?

IYCA-LTAD-LM-Blog AD-V1 - 5 Tips to a Healthy Football Season
 

Kettlebell Complexes for Conditioning: Important Factors

Kettlebell Complexes for Conditioning

Pamela MacElree provides us with a lot of content on kettlebell training for kids. She mostly talks about kettlebells being a great tool for introducing strength training to athletes and learning movement mechanics.

In her recent INSIDERS EXCLUSIVE post, Pamela spoke about how easy and simple it is to switch from one exercise to another, providing a great avenue for complexes and challenging all ranges of abilities and levels.

She mentions, that “there are many different ways to program conditioning into athlete workouts but adding in kettlebell complexes is a great way to get a lot of work completed in a short period of time. There are two distinct ways to do complexes and they each have their own level of difficulty.”

Check out the complexes in Insiders today!

IYCA-Insiders-Blog-ad-V5

Important Factors for Kettlebell Complexes

Here are important factors to “check off” and consider when applying kettlebell complexes in your programs:

  • Transitions are important – One kettlebell exercise should put you in a good position for the next kettlebell exercise in the complex.
  • Athletes should be proficient in each exercise in the complex – You do not want to introduce new exercises in a complex. Be sure that the athlete is proficient in individual exercises prior to putting them back-to-back in a complex.
  • Ability to recall exercises – Complexes should make sense to your athletes. You don’t want to compile a boat-load of exercises into one complex. They will spend most of the time trying to remember what is next, losing focus on the form and mechanics.
  • Find the balance – Balance the number of exercises in the complex with the complexity of the exercises themselves. Keep it simple.

Pamela has provided our Insiders with exclusive videos on two complexes. If you are currently an Insider, log in and check them out! If not, you can snag them for a month at only $1.


About Pamela MacElree

Pamela has owned and operated her own fitness business in the Philadelphia area for the last decade. In addition to training clients, she has spent the past 4 years coaching other fitness professionals through FR Nation.

Pamela has her Masters degree in Sports Performance and Injury Prevention, and also has expertise in kettlebell training, women’s fitness training, time management, goal setting and accountability. Pamela lives in Mt Airy, PA with her husband and their three furry, four-legged children: Bella, Leo & Max.

Crawling for Strength Training?

Crawling for Strength

That is right. In this video, Dave “The Band Man” Schmitz takes you through progressive concepts when it comes to strength training with bands…by teaching the crawl!

You may think…“everyone knows how to crawl”…but when you watch this video, you will realize that crawling can take your athletes to another level when taught with bands!

Pro Tip: Many kids don’t have the trunk and core stability to crawl. Crawling is a fully integrated movement that The Band Man breaks into its components to develop crawling ability, core stability, upper body stability and strength. He does this with a band to assist him against the number one thing that he can’t overcome…gravity!

Thanks for watching!


Get Your Own Bands Today to Implement in Your Youth Training Programs

Grab your bands today at resistancebandtraining.com and get 15% off using the Coupon Code rbtiyca15.


About the Author: Julie Hatfield

Julie Hatfield (1)Julie is the Executive Director of the International Youth Conditioning Association (IYCA). She grew up as an athlete and played collegiate softball at Juniata College. She currently owns and operates her own youth fitness business pouring into young athletes. Her areas of expertise are youth sport performance, youth fitness business and softball training/instruction. Julie grew up on a dairy farm and can challenge the best of the best in a cow-milking contest. 😉
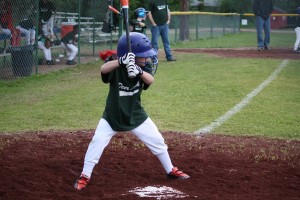
 

Baseball Season is a Marathon – Not a Sprint

As baseball season is well underway in most areas of the country, youth athletes across the country are dusting off gloves and bats and have geared their arms up for the spring season.

At any age, there is a sense of urgency to make every toss faster and further than the one before it. No matter the position, throwing can cause wear and tear on even the most prepared arm.

Here are THREE recommendations that every athlete should follow to keep them ON the field and OUT of the doctor’s office.

#1: Mechanics over Throwing More

The idea that to throw better you just need to “throw more” is rampant in the youth sports arena. It seems the same goes for all sports. Shoot more baskets, hit more slap shots, or simply jump until you can’t jump higher.

There is some truth to this but the key word here is some.Boy Throwing

Pro Tip: There are volume limits of which the shoulder and elbow can tolerate before breakdown sets in and thus the title of this article.

Young athletes come out of the gate sprinting in late winter/early spring and wear their arms out before things really heat up.

Teaching proper mechanics is one great strategy to reduce wear and tear on the arm. No different than a car with poor alignment where one tire wears faster than the others, the same is true for throwing. A great way to do this is to focus on throwing mechanics at the beginning and end of each practice. Perhaps it’s odd to focus on mechanics when the arm is exhausted but this is where education is most important.

The goal here is two fold.

First, having the athlete focus on throwing correctly, even for short distances, will reinforce correct mechanics while tired. Second (and most important), if a baseball player cannot throw correctly because their arm is too tired or it hurts, then it’s time to stop!

Too often athletes will just “sling” the ball or alter mechanics to keep throwing. This is a very bad idea. This is another solid education moment for any athlete because fatigue and pain seems to help absorb words better than when things are going well.

#2: Strengthen the Support System Throughout the Season

Once the season starts, the strength and conditioning that was done in preparation seems to go by the wayside. This makes sense, as there are so many hours in the day and hitting your cutoff man takes precedent over crunches.

Throwing requires a complex series of movements and too often we focus on only a few parts of the chain. Postural and scapular muscles are very important to position the shoulder correctly. When these muscles are strong, the rotator cuff doesn’t have to work as much to maintain good positioning while throwing.

Strengthening the postural muscles in the middle of the spine, obliques, and lower trap muscles helps. The combination of these muscles rotates the trunk and creates ideal arm angle during throwing. As long as these muscles are all working together, the rotator cuff doesn’t take as much of a beating.

Pro Tip: Simple exercises will do the trick such as superman’s, prone shoulder flexion with light dumbbells, and supine single leg adduction drops from side to side to engage the core.

What does swinging have to do with it?

Child at batThousands of swings over the course of the season reek havoc on the hip, pelvic, and lower back. This is because all the force transfers from the legs, up through the back, into the arms, and then contact is made with the ball, sending a jolt of energy back through the system.

This is important to throwing because many hitters and athletes will start to develop tight psoas, chest, and lat muscles from swinging and sprinting. When all these muscles become over-tightened, they tend to pull the lower back into extension and then shoulder into a downward rotated position.

What does this mean? Thousands and thousands of throws will become challenging, reducing the efficiency and quality of every throw.

Pro Tip: Be sure to keep the hips, chest, and lower back muscles nice and loose to maintain ideal body mechanics with throwing.

#3: It’s a Marathon, Not a Sprint

Every long distance runner knows they have to pace themselves because training only for 20 miles won’t finish the race. Baseball is no different. Having and executing a long-term game plan to ensure that a young athlete’s body is working from start to finish is paramount to long-term athletic success.

Too much of youth sports focuses on a game, a tournament, or a showcase. If attitudes and habits only address the now, the future for baseball—or any sport for that matter—is nothing more than a crap shoot.

At work, we put money into a 401k for retirement, we exercise to keep the heart strong and pumping, and we take vacations to keep stress from eating our body’s apart.

Do all the little things right and the big things will take care of themselves.

Play ball!

Dr. Keith Cronin, DPT


Want to help make sure your athletes are prepared to perform for the long-run?

Learn how to leverage the Long Term Athletic Development Model to ensure your athletes are prepared to perform. Sign up today to get instant access to our free 7-minute video and PDF checklist.

Learn More


About the Author: Keith J. Cronin

Keith CroninKeith J. Cronin is a physical therapist and owner of Sports and Healthcare Solutions, LLC. Keith currently supports US Operations for Dynamic Tape®, the “Original” Biomechanical Tape®, providing guidance for education, research, and distribution. He graduated with his Doctorate in Physical Therapy (DPT) from Belmont University in 2008 and later earned his Orthopedic Certification Specialist (OCS).

Prior to graduate school, Keith was a collegiate baseball player and top-level high school cross country runner. He also had the opportunity to work as a personal trainer (CSCS) prior to his career in physical therapy, providing a very balanced approached to educating fitness and rehabilitation. Keith has focused his career on the evaluation, treatment, injury prevention, and sports conditioning strategies for athletes, with particular attention to youth sports. He currently lives in the St. Louis, MO area with his wife and two daughters, Ella and Shelby.

Additional noteworthy items about Keith:

  • Keith is currently a reviewer for the International Journal of Sports Physical Therapy (IJSPT) on a variety of topics including throwing athletes, concussions, and ACL rehabilitation.
  • Keith has produced several online CEU courses for PTWebcuation.com on the topics of running injuries, ACL rehabilitation, Patellofemoral Syndrome, and injuries to the Foot and Ankle.
  • In 2012, Keith participated in a concussion education program in Newcastle, OK that resulted in the documentary “The Smartest Team: Making High School Football Safer” which had several runs on PBS worldwide.
  • Keith has also been published in a variety of media, publishing almost 100 articles through venues including MomsTEAM.com, Advanced Magazine, the 9s Magazine, the American Coaching Academy, and Suite101.
  • Keith was also featured on Fox2News several times on topics of concussions and ACL injuries.
  • In 2008, Keith was a winner of the Olin Business Cup at Washington University for his product innovation “Medibite” a jaw rehabilitation system designed to improve the outcomes for individuals suffering TMJ dysfunction.

Monitoring Part 2- Monitoring Tools That Every Coach Needs

In Part 1 of this blog I discussed why we monitor and considerations for monitoring your athletes.  Part 2 is going to deal with how we monitor at the high school level.

Monitoring can be an expensive venture, but there are also less expensive ways that can be implemented by virtually anyone at any level.

This blog will detail two practical and inexpensive ways in which, monitoring can be implemented to help you make decisions, allowing you to meet your athletes where they are at on any given day.

#1 Surveys

Having your athletes take quick daily surveys can help create awareness regarding their habits.  These surveys can be simple  and ask as few or as many questions as you would like. Keeping it simple is best. Here is an example of some of the questions to ask:

  • How many hours did you sleep?
  • Did you eat breakfast?
  • How many bottles of water did you drink?
  • How tough was practice yesterday on a 1-5 scale with 5 being the hardest?
  • How tough was your workout yesterday on a 1-5 scale with 5 being the hardest?
  • How do you feel overall 1-5 scale with 5 being the hardest?

You could make a survey through excel pretty quickly and log your information there to keep track of long term trends with your athletes. There are a couple of ways in which this can be beneficial for you.

  1. Make educated adjustments to your plan dependent upon feedback from the athlete
  2. Identify, where you feel they are at from a readiness standpoint that day.
  3. Look at long-term trends both individually and globally to make better decisions in programming for your athletes.

Individually, you may find that your athletes do not get enough sleep on Monday nights due to practice and academic obligations. Globally, you may find that the football team’s toughest day is on Tuesday every week. Knowing that your athletes average 6 hours of sleep on Monday nights and also have their toughest day on Tuesday allows you to adjust and make the best decision for your athletes that day.

It is very important that you use the data that you collect!

Pro Tip: Collecting data for the sake of collecting data is counter-productive. The adjustments you make off of the data collections is what is of real significance.

You can also up the ante and implement technology to take surveys. There are programs that exist where athletes can enter survey information into their phones, and it collects and organizes the data. This is a real time saver for busy trainers.

Here is an example of a survey:

Monitoring Part 2 Image- Fred Eaves

#2 Autoregulation (APRE-RPE Scales)

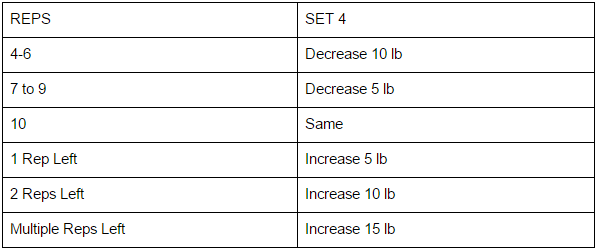
A second cost-effective way to monitor your athletes is by using an APRE/RPE scale in their strength training programming. APRE is defined by Dr. Bryan Mann as Autoregulatory Progressive Resistance Exercise.  APRE is a method that takes the daily readiness of the athlete into account through adjustment protocols that dictate working sets.  

There are two warm up sets, and then the third set is a set to failure at a prescribed rep max (RM). The results of the third set dictate the weight used on the fourth and final set.

As a coach, this can be used to help the athlete train to the highest level possible for that specific training session according to the physical state of the athlete.

We do not use strict percentages in our program but rather we use them as a guide.

Use this auto-regulation method to dictate our training loads for the day.

Pro Example:

I always use the example of the athlete who slept 3 hours the night before a hard training session that is under tremendous personal and academic stress when describing the need for this type of training. This athlete may have a prescription to hit 2 reps at 95% that day, but due to his physiological state that 95% is really more like 105% that day. This is why autoregulation can play such a key factor in the development of your athletes.

Dr. Mann from the University of Missouri has done a tremendous amount of work in this area, and has written an E-book specifically on APRE methods. 1

Mann’s Example:  

Here is what typical APRE protocol according would look like:

2016-02-29_1609

SET 4 ADJUSTMENTS- REFER to this chart after set 3

2016-02-29_1611

An RPE scale in conjunction with APRE methods is another effective manner in which to implement RPE. RPE  stand for rate of perceived exertion.  Athletes use this rating scale to rank the difficulty of a set in training.

Pro Example: Sample RPE rating scale

2016-02-29_1607

Pro Example:

An example would be an athlete does 155lbs. for 10 reps. When he finishes this set on set three, he rates whether or not he had one rep, two reps, or multiple reps left in the tank. Then picks an appropriate weight to finish his fourth set, using the adjustment chart below.

Here is an example of what this looks like:

2016-02-29_1604
SET 4 ADJUSTMENTS- REFER To This Chart after set 3

2016-02-29_1603
Look at long term trends when recording their numbers to make sure there is consistent progress.  Do not worry about disp as this is common due to the variable nature of the high school athlete.

Conclusion

Two simple and cost-effective measures in which to monitor and adjust for your athletes have been outlined.  Use these tools to tremendously impact your athletes in way that is both feasible and practical.


Are your athletes prepared to perform?

Download our free PDF and Overview video on the long term athletic development model.

WFIYCA


About the Author: Fred Eaves

Fred Eaves, Ed.S, M.Ed, CSCS, RSCC, IYCA, USAW, USATF, BIOFORCE Conditioning Coach Certified,  2015 NSCA H.S. Strength Coach of the Year, 2013 Samson Equipment & AFM H.S. Strength Coach of The Year
References

  1. Mann, B. (2011). THE APRE: The scientifically proven fastest way to get strong.


Overworked and Underpaid

Overworked, Underpaid and…Exhausted?

If you are reading this, it’s fair to assume it is because you answered “yes” to at least one part of that question.

Let’s be honest here, most of us feel this way at some point or another, no matter what industry you’ve worked in.

Many sport performance coaches spend countless hours planning, preparing and delivering, only to fall short on financial performance and feel exhausted. After all, we wake up before the sun, and go to bed just before it rises again…right?   

tired-418902_640If you are like most performance coaches, passion got you started—persistence keeps you going—and pride keeps you from quitting when the going gets tough. If you are feeling that you are 

overworked, underpaid and exhausted…well, the going has gotten tough.

What to do?

Take a few steps back, and figure out how you can turn your youth fitness business into a lucrative and successful place…afterall…the world NEEDS you!

Here are 3 Ways to avoid burnout as a performance coach:

Take a 30,000 foot view, quarterly:

Sometimes we can’t see what is really going on inside our businesses until we remove ourselves.  It isn’t always physically possible, but what if you could look at your business from the outside…

… what would you see? Would you like it? What wouldn’t you like? Is it what you envisioned when you started? Would you come into your own gym as a client, and why?

These questions serve to spark your curiosity, knowing what your business is really about is probably the most important thing you can do when it comes to being lucrative.

If you lose sight of your vision, your dream and the reason you started in the first place, likely that passion will fade and so will your business.

Know your numbers, monthly:

Many youth fitness business owners hate showing their numbers.  Knowing your numbers is a sure-fire way to gain insight into your business.

Numbers you have to know:office-620822_640

  • Gross Revenue
  • Expenses
  • Profit Margin
  • Leads
  • Clients Lost

There are more than these, but this is a good start.   Do you know these answers? If you don’t, you need to. If you want to make money, you have to know what is coming in and going out.

Don’t have “time” to track them, then keep ignoring them and the result (likely not the one that you or I want for you) will come, or acknowledge them and have the power to create solutions and change the course…and WIN!

It is that simple. Numbers tell the story, get to know your business’s story!

Work ON the business, not IN the business, weekly:

Performance coaches are good at coaching…we are not always businessmen and businesswomen.  Overlooking critical aspects of our business, like sales/marketing, setting goals, our numbers, strategies and systems, etc. can destroy a business.

By working ON your business, you focus on the strategies and systems that optimize your performance.  Spend an hour or two every week (or a timeframe that works for you), focusing on your business.

What to think about?

  • Strategies
  • Systems
  • Priorities
  • What is working
  • What is not working

If you are only working IN the business, you have blinders on to most of these things. You may know them, but they get forgotten. Don’t let that happen…it’s a good way to burn out.

Written By:

IYCA-newsletter-julie sig-v1 (1)


IYCA– Executive Director
YFS, YNS, YSAS
Fitness Business Owner


Program design can require a lot of time.

Here is a free video and PDF resource for you to help save you some time (and energy) on program design for long-term athletic development.

IYCA-LTAD-LM-Blog AD-V1

Are We Really Getting Stronger?

Is Your Youth Strength Training Program All Hype?

youth strength training program

By Mike McGurn

All sports I can think of require basic strength levels, and strength training has recently become a much sought after attribute in the athletic community. Kinesiologists, physiologists, athletic trainers, and professional strength coaches all tell us that if all we did was increase muscular strength by 35-40% in an athlete without changing any of the other attributes needed for the sport, there will be a definite improvement in performance levels.

The doubters may disagree and question how getting stronger can be of benefit in sports where the technique is the priority. Surely though, being a lot more stable or injury resistant when performing the activity is a major benefit.

I have always found that there is a massive transference from doing a proper youth strength training program into improving all the other physical components that a sport requires. Various journals and abstracts on Muscle Activity tell us ‘without sufficient strength, factors such as skill, flexibility, and endurance cannot be used effectively.’

youth strength training program

This is not ground breaking information, nor will it allow me to claim that I have discovered some amazing new angle in the fitness industry that I can exploit to become a millionaire overnight! The truth is, millions of athletes all over the world are now participating in ‘strength training’ programs.

The questions I have is whether these programs are actually improving strength or if they are one among the many overhyped fitness programs masquerading as the next best thing. Some so-called youth strength training programs I witness these days resemble a gadget assault course, with all sorts of non essential equipment being used.

Another aspect of these diluted strength programs that winds me up are exercise machines. Equipment manufacturers saw a niche in the fitness market with their highly engineered exercise machines, and boy did they have an impact. Gyms, health clubs, and sports clubs embraced this concept and were covered in rows of fancy machines which had the sole purpose of allowing you to do one exercise!!! Of course we know that this type of equipment is nowhere near ideal for developing useful strength.

youth strength training program

There are many other short term fads which are likely to go away as quickly as they appeared.

So how do we get back to actually building strength? I once heard the quote, ‘to get stronger lift heavy rocks.’ That isn’t too far wrong.

I call my approach to gaining real functional strength ‘the bullseye theory,’ which can basically be summarized by saying that throwing 3 aerodynamic darts to try and hit the bullseye is much more favorable than throwing 15 broken ones! In other words it is better to concentrate on a few aspects of training and do them well, rather than trying to cover a multitude of areas. Trying to do too many different things only leads to athletes spreading themselves too thin and diluting what they are doing. This means that despite busting themselves in the gym, they don’t really improve at anything in particular.

This is where I feel a lot of youth strength training programs are seriously flawed. Some strength programs I have observed have up to 15 different exercises. The reasoning was that in order to make the athlete stronger, every muscle group needed to be activated individually. This is simply not the case.

In general, when it comes to dedicated strength training, I believe athletes need to focus on only three core movement patterns: Olympic lifts, squats, and deadlifts.

youth strength training program

If all our athletes ever do in the gym is work on these patterns and their derivatives, and focus on them all the time, they will drastically improve their strength and athletic performance. My opinion is that to improve athletic performance Olympic lifts are king. Clean and snatch often and do it hard. Supplementing these lifts with squats and deadlifts will go a long way in developing strength in our athletes.

It really is that simple, a youth strength training program does not have to be complicated to be effective. Rather than trying to implement 15 exercises in a program to make sure all the bases are covered, focus on the few that give the greatest return.

Mike McGurn has been a strength and conditioning coach for 18 years. He is currently based in Belfast in Northern Ireland. 

If you are interested in learning more about developing complete athletes and GREAT youth strength training programs make sure you check out Complete Athletic Development!

youth strength training program


Top 4 Alternatives for Olympic Lifts When Training Young Athletes

Training Young Athletes Using Olympic Lift Alternatives


Youth Fitness Expert Wil fFeming on Training Young Athletes


As a coach and professional I know that I love the Olympic lifts when training young athletes. For good or bad I think that there is no EQUAL to getting athletes more explosive than the Olympic lifts.


Being married to a lift or movement places too many limitations on the program you are able to design and in particular limits the improvements that each individual athlete can make.


For the athletes that are exclusively training with me and are physically capable the Olympic lifts are the king of my gym. There is no BETTER way to get explosive.


As my training business has grown, however, more and more athletes find out and are recruited to train with me, the necessity is not to place my training on them, but to discover the best training methods for them.


This means that the athlete that are concurrently training in their high school and doing Olympic lifts 2-3 times a week need alternative methods to train explosively with me. My beliefs are not something that can supersede the needs, time or ability of the athlete.


training young athletes


This being the case when we are training young athletes, the Olympic lifts have been replaced with alternatives that replicate the explosive nature of these lifts.


Using Medicine Balls To Train Young Athletes


training young athletes with medicine balls


The broad category of medicine ball throws can be used for nearly every athlete to produce explosive strength. These throws provide a low impact to the athlete but a maximal force production.


Throws in the rotational plane can be used to develop a vital linkage of the upper body to the lower body through the core musculature. Correctly performed throws originate in the lower body and leave through the hands, a kink in the core armor will be very apparent if a delay occurs from initiation to delivery.


Regardless of whether athletes can do Olympic lifts or not, medicine ball throws are a vital part of athletic programs, nothing develops the all important power in the transverse plane quite like rotational medicine ball throws.


KB Swings To Train Young Athletes


training young athletes


Much has been written on the kettlebell and benefits of using it to develop explosive strength. The addition of elastic resistance can take this movement to an entirely different level.


The swing itself is an excellent tool to develop an explosive hip hinge pattern. Most athletes lack in the ability to feel the explosive hinge and the swing is the best movement that I have found to break knee dominant athletes of using the knee bend to initiate explosive motion in the lower body.


The end range of hip extension is one of the best ways for athletes to truly feel the maximum contraction of the glutes. The voluntary muscle contraction that most athletes have difficulty attaining through other movements is a must for athletes to achieve a total hip extension.


The addition of elastic resistance allows accomplishes 2 main objectives:


1) It spares you of having to buy an unlimited number of kettlebells. Our biggest kettlebell is 32 kg. Many of our high school athletes can toy around with this weight with little to no difficulty for 10-15 swings. By adding even a small band to the kettlebell, 10-15 swings becomes a much greater challenge.


2) The majority of resistance occurs at the top end, where athletic movements occur. The maximal contraction should occur at the top end of the swing movement. With just the dead weight resistance supplied by the kettlebell athletes are sometimes apt to use the top extension as a point of relaxation. The addition of band resistance increases the load as it travels away from the floor. This top “high resistance” position is also the position in which most athletic movements occur.


In general swings simulate overall athletic movement. A correct swing should have the athlete relax momentarily at the top of the swing after reaching full hip extension but before returning to contraction at the top. This contract, relax, contract pattern allows for greater recruitment on the next upward swing.


Prowler Sprints To Train Young Athletes


training young athletes with prowler sprints


The goals of Olympic lifting are varied. They can go from becoming a better competitor, across the spectrum to improving speed (I first noticed that I had become a much more powerful athlete due to Olympic lifting when my 40 yard dash time dropped .5 seconds in just 6 months) For the latter a great substitution is to do resisted sprinting with the prowler.


The idea of special strength training was popularized by USSR coaches, and in particular those coaches in track and field. My first exposures to it were as a hammer thrower, to us special strength training was literally training the specific event in which I competed with a heavier implement (can’t get much more special than that!). Prowler sprints are the perfect special strength tool for athletes looking to improve acceleration.


The sets are typically 8 seconds or less, and the athlete gets adequate rest. This timing both mimics the boughts typically seen in athletic competition, the length of time for typical Olympic lifts, and helps increase the alactic power an athlete is able to produce.


An increase in stride length will be seen for athletes training with resisted sprinting techniques. This increased stride length will be due to an increase in the athletes’ ability to produce more power.


Submaximal Front Squats or Deadlifts to Train Young Athletes

training young athletes with deadlifts

This is something that I have been toying with recently that has really improved the maximum power output that we are seeing from our athletes.


Loads of 40-50% 1RM on the bar and band resistance of less than 100lbs should be used. Athletes should be instructed to lift the weight with maximal force on the concentric portion of the movement.


Recently Bret Contreras wrote an excellent article on similar movements In it he describes recent research showing that maximal force produced during 40% of 1RM in the Hex Bar Deadlift is surprisingly similar to that produced in the Olympic lifts. (4800 Watts Hex Bar vs. ~4900 Watts in O lifts). While research has shown that maximal power production measured in watts can be achieved in the split jerk at nearly 6000 watts, this is very close when it comes to the big 2 Olympic lifts (snatch/clean).


Adding bands to the puzzle has not yet been studied but anecdotally my athletes have seen a large improvement in the ability to produce power top end hip extension. The greatest load is encountered at this point in which the athlete has the greatest mechanical advantage.


The bands pull the athlete down at a faster rate in the eccentric phase of the lift. To resist this greater speed the posterior chain must contract with a greater force. This is similar to the eccentric portion of plyometric action. Higher rate of contraction in the muscle spindles will lead to a greater force of contraction on the concentric portion of the lift.


Check these moves out next time your training young athletes and let me know what you think.


Learn how to become a Certfied High School Strength and Conditioning Coach by Clicking Here.

HSSC

Using Complexes In Warm Ups to Improve The Skills Of Young Athletes


Young Athletes weightlifting specific warm-ups

Young athletes olympic lifts warm up tips


By Wil Fleming


When your program is full of barbell strength training , in particular the Olympic lifts, it is important to sharpen the skills of your young athletes with a weightlifting specific warm-up.


A general warm-up is necessary for young athletes to increase mobility and activation, prior to training. Once the athlete is warmed up in general however, a specific warm-up for the days activities should be used to prepare.


In all sports the general warm-up is followed by a specific warm-up, baseball players should touch a ball before actually throwing out the first pitch, basketball players should take a couple shots before the buzzer sounds, just as in those scenarios, in strength training it is important to use some external loading before the training of the day.


A complex is the perfect way to do that.


Complexes are multiple movements done sequentially without rest in between movements. In order to complete a complex it is important to complete all the prescribed reps of one particular movement before moving on to the next drill.


Complexes can be a tremendous tool for conditioning as well, but in this case I would like to think of them for warm-up only.


The great thing about complexes is that they can really include whatever it is that you want for a given day. For my athletes I think that they are a great source of variation in the program, and a great way to challenge them on a given day.


I typically design complexes around what the movements of the day will be, if our athletes are to be cleaning in the session ahead, I will design a complex that includes clean movements. If we are snatching, then the complex will include the snatch.


Designing a complex


Limiting factors:


Athletes should be able to complete the complex without a severe break in proper technique. Complexes will have one movement typically that will be the limiting factor in the amount of weight that is on the bar.


For example: A complex of 5 exercises- Hang Clean, Front Squat, Push Press, RDL and Bent over row. In this complex , for nearly all athletes the bent over row will be the movement on which they will struggle the most with a given weight. In this instance the weight that an athlete can use for the prescribed reps on a bent over row


Selecting Exercises


Selection of exercises should mimic what the athletes will be asked to do in the training session later in the day. It is also important to use the LIGHTER weight of a complex to work on areas in which many athletes struggle. In the clean or snatch that is the pull around the knee area, and with extension of the hips. Including a movement that will specifically work on that area of the lifts is important.


Exercises should be selected in an order that moves logically for the athletes. This means that the starting points of each movement should be similar to the previous one.


For example: A complex that includes Front squats, to RDL’s, to Push Press becomes much more difficult due to the fact that the bar has go from resting on the shoulders, to the hands and back to resting on the shoulders. Changing the order from Front Squat, to Push Press, to RDL keeps the bar in the same position as long as needed.


Importance of Exercises


Explosive movement should be prioritized in complexes. This does not however mean that all complexes have to start out with a full clean or snatch, it does mean that a clean pull, or full clean should precede front squats.


Explosive movement requires a greater level of technical proficiency young athletes need to be fresher to complete these movements.


Examples of Complexes


Clean Complex:
2 to 3 sets of 5 -7 reps of each of the following:
Clean pull from above knee, Clean High Pull from Mid Thigh, Hang clean from Mid thigh, Power Jerk, Front Squat, RDL, Bent Row


Snatch Complex:
2 to 3 sets of 5-7 reps of each of the following:
Snatch Pull from below knee, Snatch High Pull from Above Knee, Hang Snatch from Mid Thigh, , Snatch Jerk behind neck, Overhead Squat, Snatch Grip RDL.


These same complexes could be used with Dumbbells or even Kettlebells. Try implementing them before your young athletes next session.


Change Lives Today


Wil


olymic lifts young athletes


The Olympic lifts are the most explosive and dynamic demonstration of force in which an athlete can participate. It is important to have established, an effective, efficient, and safe way to teach athletes to Olympic lift. Athletes can be taught at any stage to lift well, with proper technique using the methods outlined in this course. Learn more on Olympic Lifting with young athletes here…


Should Your Young Athletes Be Doing Power Cleans?


Young Athletes: Are Power Cleans with an Efficient Use of Our Time?


Young Athletes


By Jim Kielbaso


There is a great deal of anecdotal evidence and personal experience that comes into play when strength and conditioning coaches select strength training exercises, speed drills or conditioning routines for young athletes. The risk vs. reward scale is a great place to start, but not the only factor that should be considered. As a professional, I believe it is my ethical responsibility to prescribe safe exercises. But, according to the thought processes I’ve been hearing lately, it seems like a lot of people believe there are no bad exercises, just bad implementation. I understand the point to a degree, but I disagree. Risk vs. reward is one reason I feel this way, but there is another factor I weigh when making decisions.


Another ethical responsibility I think we all have is to implement “efficient” programs, and that is something I see missing more often than not. What I mean by that is that I think a lot of trainers waste time and energy doing things that won’t necessarily elicit the response with the young athletes that they’re after. I can see where someone may think “well, it might help, so I’ll implement it a little.” I can see that, but I hate to see coaches spending an inordinate amount of time on things that we’re not sure work better than other alternatives.


Let’s take the Power Clean as an example. Olympic lifting is a sport. There is a governing body and athletes compete against one another in the lifts. It’s possible that the lifts develop power, but it has never been shown that they develop power better than other alternatives. In my opinion, some of the alternatives such as dumbbell/trap bar squat jumps, pulls, DB pulls, and plyometrics are also much easier to teach and are much safer to implement and will elicit the same result. I’ve heard many coaches talk about how the catch is the most critical part of the clean to work on because that’s where the problems will be seen. The catch is also completely unnecessary, from a physiological standpoint, for developing power. Yet, as strength coaches, our romantic enchantment with the exercise keeps us doing it.


You’d think that if the exercise was SO great for young athletes that the rewards completely outweighed the risks, we’d have plenty of research showing just that. We don’t. We don’t have anything. It’s simply not out there.


Now, it might develop power. Let’s put that aside and think about whether or not it is efficient? How long does it take to get an athlete good enough at the lifts that they can actually derive the benefits? How much coaching and supervision does it take compared to, say, a squat jump? How safely will it be done when we’re not around or another coach is supervising? How many sets and reps are required to 1. Become proficient and 2. Get more powerful? We don’t know. And, is moving a bar with heavier weight even going to transfer to sport?


Hmmm. Again, we have no idea. What I do know are many professional strength coaches who tell me it takes them months to get their young athletes proficient enough at the clean that they no longer require daily instruction.


The principle of specificity states that in order for one skill to transfer to another, they need to be kinetically and kinematically the same for transfer to occur. The clean has been shown by Canavan to be dissimilar to a vertical jump, which is what is commonly argued as the movement it is most like. If it’s not like a VJ, then it’s nowhere near any other sport movement. So, is the transfer gone? I don’t know, but this principle seems to point in that direction. The principle also states that if x gets you better at y, then y should get you better at x. Playing a sport or practicing jumping does not make you better at the clean, so why do we expect the clean to get us better at a sport?


So, if we have no idea if it’s going to help us in sport, it takes a lot of time and energy to coach and implement, and it can be dangerous if done with slightly poor technique, is it an efficient way to spend our young athlete’s time? I have an opinion, but I don’t know the answer. I can kind of understand the argument that it helps prepare for sport, but is it efficient?


What I do know, is that gymnasts are incredibly powerful, flexible, and have great core strength and balance. So, should we all go through certifications for gymnastics and start implementing them with other young athletes because we want them to have all of those things? I would say that would be a poor use of our time. I know that jugglers have amazing hand-eye coordination. Should we implement juggling into our programs because we want our athletes to have that kind of coordination? Again, probably a waste of our time. So, why do we train for one sport to get better at another?


So, forget about whether the clean is safe or not. There are plenty of arguments either way. But, is it efficient?

Is it the best use of our time with young athletes?

Do we know, beyond a shadow of a doubt, that it is the best use of our time? In my opinion, if we can get the same result in half the time, why not use that option? I use the same thought process when determining workout volume. If I can get the same results in 45 minutes, 3 days a week, why would I ask my young athletes to train 2 hours a day, 4 days a week? But, many coaches do. I think it’s our responsibility to figure out how to maximize results in minimal time. Most young athletes are not professional strength athletes. They want to play their sport and should spend their time doing so. We should be with them the minimum amount of time possible and still get results. It’s like a prescription drug. A doctor is supposed to find the lowest dosage possible to get the desired response. As strength and conditioning professionals, I believe we should take the same approach when determining which exercises to include in our programs.


Making Strength Training Fun for Young Athletes using Resistance Bands

Making Youth Fitness Training Fun with Resistance Bands

Speed and Agility Training Program 3

A t least once a week, I am asked about youth fitness training using bands, and in most cases, all I can envision is kids being put through a grueling workout using big bands that literally throw them around like a human slingshot .

OK, maybe I am a little off, but I see a lot of things on YouTube that scare me when it comes to training young athletes.

So here’s a tip on how to have your athletes naturally enjoy training:

If you really want to make youth fitness training fun, start making the training game-oriented.

My goal with any young athlete resistance band workout is to get them to train instinctively because when they reach that level, they are as close to a game situation as they possibly can be. At that moment, training becomes fun because athletes are thinking about competing, not training.

Over the past several years, I have had the chance to test some resistance band training games with youth fitness training and wanted to share some of these simple training games with everyone in the IYCA.

Video – Partner Zigzag training for Young Athletes
Young athletes need direction and a target. I find cone drills like a simple Zigzag drill to accomplish both of these. The key to this drill is making sure athletes have a good understanding of how to shuffle or backpedal and how to hold for their partner. Once this is accomplished, Zigzag drills are very easy to implement. Within about 2 minutes, you will have taught and trained a young athlete how to decelerate in the frontal and sagittal planes while developing good reactive strength from their trunk, hips, and quadriceps.


Video – Ricochet
Ricochet is a drill I developed to teach deceleration in youth fitness training. It has become a training game because athletes can compete while performing it. It can be used for all band locomotion drills but can also be effectively used for strength training drills as well. The video below demonstrates how it works with locomotion. It is used for strength training drills in essentially the same way, with athletes alternating back and forth during the strength exercise. This format is great for developing teamwork, but it is also very effective at improving strength endurance—especially when done for a 2-minute time interval.


Video – Partner Reaction
This drill is where athletes get to test their partner, who now is their opponent. Athletes face off where one is offense and one is defense. Defense must react to offense and try to mirror them during the drill. Best drills for this are shuffle or turn-and-go drills. Also, 2-step deceleration drills work well with this setup. This is also a coaching favorite because you allow the kids to dictate the start and stopping point of the drill.


1-Minute Partner Challenge
The 1-minute partner drill is fun because you can do it with 2, 3, 4, or 5 athlete teams. You can do all the same exercise or you can have each athlete do a separate exercise for 1 minute. The goal is to get as many reps as possible in 1 minute before transitioning to another exercise. My favorite band exercise for this are:

  • Band Push ups
  • Assisted pull ups
  • Split Squats
  • Squat Jumps
  • Front Squats
  • Overhead Press
  • Turn and go (touching a cone)

To make this entire resistance band training game experience just a little more motivating, all these games can be played anywhere because bands are so portable. This means:

  • Kids can train at their practice site and not have to go into a smelly weight room
  • Trainers can have athletes train outside where it is much more enjoyable to do
  • Coaches can throw these types of drills into practice any time and supplement conditioning with strength training

To be a successful youth coach, you must find ways to motivate young athletes starting from a very young age and continuing throughout their high school years. Resistance bands can provide a definite change of pace that athletes find fun and challenging at the same time.


Getting BETTER with BANDS


Dave Schmitz


P.S. On this final video, I thought you would enjoy watching 2 very special young athletes have some fun competing while training in bands. Pay special attention to the laughing that comes along with this type of training. To this day, Kenzie and Carter Schmitz (yep these 2 are mine; I thank God every day) still talk about this experience and when they will be able to do it again. This is yet another reminder that youth fitness training doesn’t have to be filled with boring, routine drills; competition is a great thing!

Video – Kids Getting The Best of Some Fitness Pros


If you are looking for a fun and exciting new component to add to your training programs that will have your young athletes performing their best then check out the IYCA Resistance Band Course. In this course you will learn how to use one of the most versatile, and effective, training tools for young athletes!

rbic_total_200

https://iyca.org/bands/

Making Your High School Athletes Better


High School Athletes Programming


High School Athletes

By Wil Fleming


Recently I gave some thought to how many questions arise when putting
together programming for high school athletes. Questions about general strength
training practices, how to prioritize training goals, and what to do for speed and
agility are all important, but the most basic of questions that need to be asked by
any coach is:


What should be included in the program for your high school athletes?


As coaches we are all probably very familiar with the elements of a successful high school program in their entirety, but what are the finer points that can take your program for high school over the top?


Allow me to share with you the best ways to differentiate your program from all the others by looking at each phase of a high school training session:


SMR:A place to impact the health of athletes


A pre-workout program should do the job of preparing the athlete for the coming training and to some extent helping them recover from their prior training or practices. Foam rolling or other form of self-myofascial release should be included and should be mandatory prior to beginning that day’s session. High school programs and other coaches are doing SMR as an afterthought, by clearly laying out expectations for your athletes they will get more out of this part of the workout and be healthier.


Warm-Up:Continuity creates a great environment


Continuity in warm-ups creates the atmosphere at AR Bloomington, so
we stick with one for 2 months or so before altering it. In this way athletes
have very clear expectations of them and nearly all are able to achieve
some level of mastery within the warm-up period. I have also found that
a consistent warm-up is one of the single best times to create a fun and
exciting environment for the athletes through lively and interactive conversation.


Specific Mobility:Individualization


Specific mobility and activation should be differentiated by sport, position,
or athlete. We should take into account common movement patterns within
the sport, assessment results and injury history when designing this for each
athlete or group. No matter the size of the group, it is important that this time
be differentiated to keep athletes healthy, this touch of individualization even
in a large group goes a long way to insuring your athletes know that you took
into account their needs


Dynamic and Explosive Training:A difference maker


Dynamic and explosive training should consist of plyometrics and medicine
ball throws. This is a time for athletes to train their nervous system and train
fast twitch muscle fiber. In a lot of settings dynamic training gets thrown together
as an afterthought and sometimes looks like no more than “box jumps”. Smart
programming with progressions moving from: single response, to multiple
response, to shock, and unilateral work can greatly improve results for your
champions.


Speed and Agility:Basics first


Training for speed and agility can be the biggest opportunity for your AR to
be successful but so many programs go about it in the wrong way. Remember
that as with any other form of training, a foundation of technique should form
the basis of your training. Running mindless drills with no foundation will not
lead to success for your AR. Start with static drills, move to dynamic, and
finally move to randomization. Equip your athletes with the knowledge of
how to sprint, and how to change direction and they will be far better off than
any dot drill can make them.


Strength training:Choose to be different


Typically our high school athletes will be training with us concurrently with
a program run by their high school so we must take this into account. At most
high schools, athletes are trained predominantly through pushing movements
(squats, bench press etc), like the bench press and squat leaving their entire
posterior chain at a deficit to their front-side musculature. Balance your athletes
out by programming more “pulling” than “pushing”.


Energy Systems Training: So much more than just running


Athletes are very familiar with running mile after mile or “gasser” after “gasser”.
Exposing athletes to innovative energy systems training by using different
implements e.g. kettlebells or medicine balls, and by using exact intervals to
elicit particular responses, shows creativity on your part, allows you to use
your space more efficiently, and will make you a savior to your champions.


Flexibility:A final time to teach


Whether from the coach or the athlete flexibility gets a bad rap. Although
not as buzzworthy as mobility, training athletes for flexibility will undoubtedly
be to their benefit, if only for its use as a cool down. As a coach the time for
flexibility is a time for a wrap up of the days events and reminders for
upcoming events. It is your final time to connect with athletes in that given
day. Use it well.


Using this framework for how you approach the programming of your
high
school athletes will help you get them more invested and excited to be a
part of your High School Athletes, and make them better.
Remember that we are here to Change Lives!


Alternative Methods for Training Explosive Strength To High School Athletes


High School Athletes Strength Training


high school athletes

By Wil Fleming

Nearly all high school athletes, with very few exceptions, need to
develop explosive strength.


The instances in which the skill of explosive strength are used in
sports are endless, but when used “explosiveness” is very apparent.


A linemen firing off from their stance.


A soccer player rising above his opponents to head a ball toward goal.


A volleyball player making a quick lateral move to reach for the dig.


Instances of explosive strength are very vivid when used and typically are a part of a game changing play.


Typically I would now talk about the importance of Olympic lifts, but in some instances using a barbell is not possible due to equipment limitations or even the readiness of the athlete. In those instances, the need for High School Athletes does not diminish, but the need for creativity does increase.


(more…)

Strength And Conditioning Coaches Misuse of Speed & Agility Training


Strength And Conditioning Coaches Often Overlook Movement

By Jim Kielbaso


A lot of people in this field call themselves Strength &
Conditioning Coaches.

I don’t have a problem with the “Strength” part of the title, but the
“Conditioning” part could use a little work.


As a former college S & C Coach, I fully understand the time
constraints of the collegiate or high school environment. Running a
private facility for athletes, I also understand the limitations of
this situation. In both cases, it is very difficult to give every
athlete the time and instruction they need. Still, there is one area of
our profession that I feel is in desperate need of some attention.


That area is what I call Movement Training.


Recently, I was asked by a college coach what mistakes I have made in
the past and what I would do differently if I could re-live the past
6-10 years of my career. At first, like many coaches, my ego didn’t
want to admit to any mistakes, especially to another coach. But, after
some thought, I realized that the area in which I have the greatest
impact on athletes today, I simply did not understand when I was
younger.


A few years ago, I thought the best S & C Coach was the one who
most fully brutalized his/her athletes. I thought I was supposed to
lift my athletes until they puked and condition them until they
couldn’t see straight. Don’t get me wrong, I still think that stuff has
its place. I love putting athletes through brutally hard workouts, and
I think that kind of hard work can have amazing benefits (it also has
terrific entertainment value). But, through time, I have gained a
better understanding of how to maximize the “Conditioning” or “Speed
and Agility Training” part of my job title.


To a lot of coaches, conditioning means creating running programs that
enhance the physiological processes involved in aerobic or anaerobic
metabolism. You may not think of it this way, but that is essentially
what many conditioning programs are designed to do. I have no problem
with this. Conditioning sport-specific energy systems is a vital part
of athletic success.


Many coaches also implement speed, agility, and plyometric routines
into their programs, and I think it’s great to see coaches making an
effort to improve the physical abilities of their athletes.
Unfortunately, I see way too many mistakes being made in this area, and
I think many coaches are doing their athletes an injustice.


Over the years, we have read articles by some great coaches about
specificity, but the full message of these wise men is often lost in an
effort to use their message to support our own views. I’m sure you’ve
done it. You’ve read an article, and thought to yourself “That’s what
I’m talkin’ about. That’s why I do what I do. I’m going to use this
article to support my training philosophy.”


The articles have been great. They have helped a generation of S & C Coaches
formulate their strength training philosophies….strength
training philosophies. Why didn’t we see that the same information
we’ve applied to strength training can also be used to develop
effective speed and agility programs?


In my opinion, a lot of S & C Coaches approach speed and agility
training the same way they approach strength training. They find out
what other coaches are doing (through reading summer manuals, watching
workouts, etc.), and duplicate it in their environments. This has
worked out pretty well for strength training because there are a lot of
good Strength and Conditioning Coaches


Unfortunately, there are a few problems with learning about speed and
agility this way. First, there are not nearly as many quality speed and
agility coaches to learn from. Second, most of us didn’t learn anything
about effective movement patterns in school. Third, proper coaching of
speed and agility is highly dependent on coaching prowess, movement
analysis, and the ability to understand proper movement patterns. It is
more like teaching a sport skill; instructor knowledge is vital, and
you can’t just apply a cookie-cutter approach like many coaches do with
strength training. Nonetheless, we’ve learned our speed and agility
drills from Strength Coaches not Speed and Agility coaches. The best
case scenario for many of us was to learn a few drills from a track
coach or catch an article outlining a couple of exercises.


This kind of coaching just doesn’t cut it. I believe that movement
training falls under the “Conditioning” part of our job title, and it’s
time we take full responsibility for this important part of our jobs.


I like to call speed and agility work “movement training” because the
goal is to train athletes how to move more efficiently. The problem
with most movement training is the assumption that if we put some cones
or hurdles out in a cool design and have our athletes run through them,
we are making an impact on their movement patterns. The truth is, we’re
not. All we’re doing is helping them reinforce whatever movement
patterns they are using to get through the drill. Take a few minutes to
re-read some of those specificity articles, and I think you’ll see
exactly what I’m talking about.


I have had the good fortune of working with, observing, and Strength And Conditioning Coaches
from a lot of good sport coaches and instructors. I have never seen a
good basketball coach allow players to take hundreds of jump shots with
poor shooting technique, and I have never seen a good baseball coach
let players pitch and hit with poor mechanics. Unfortunately, I have
seen a lot of Strength and conditioning Coaches
allow athletes to perform hours of agility drills using horrible technique.
A lot of coaches assume that if the athletes are going through the drills, their athleticism
will improve. But, the benefits of performing speed and agility drills are
dramatically reduced if the athletes are not executing them with sound
mechanics and learning proper technique. If the coach is unable to
analyze the movement and give corrective feedback, what good is he/she
doing for the athletes?


There are still a lot of questions about movement training, but there
are certainly some answers and a lot of room for us to improve. I look
forward to examining this misunderstood aspect of our profession in
more detail with you in the future.