fbpx

Archive for “High School Athletes” Category

High School Strength and Conditioning: How to Get Started – Jim Kielbaso

Because the IYCA has the only certification designed specifically for high school strength and conditioning – the IYCA HSSCS – I get a lohigh school strength and conditioningt of questions about how to get your foot in the door or how to become a high school strength and conditioning coach.  I also happen to work in several high schools, I post a lot of content from weight rooms, and I love working in high school strength and conditioning, so it makes sense that people ask those questions.  But, is this job really right for you?

Through the years, I’ve answered these questions individually, and this video breaks down just about all of the advice I’ve given and everything you need to know to get your foot in the door or get started in high school strength and conditioning.

Keep in mind that this article/video is not covering how to be a great coach or any of the science and training methods needed to do the job.  This video is about understanding the job and how to get started.  I also explain how different each job can be depending on the situation at the school.  Some schools are very well funded, have great facilities, and have supportive coaches and parents.  Other situations are the complete opposite where just about everything is a struggle. You need to fully understand each situation and know which ones fit you the best.

The two most important things to understand are:

  1. There are both tremendous challenges and opportunities in high school strength and conditioning.  Funding, schedules, facilities, group size, skill level, motivation level, demands from coaches, safety, and constantly changing coaches and athletes are all part of the job.  But, being able to make a difference in the lives of hundreds of young people is an amazing opportunity.  Before you jump into this demanding job, make sure you understand the pros and cons and decide if this is the right position for you.
  2. You have to be a really good coach, teacher, and role model to be an effective high school strength and conditioning coach.  Just because you like to lift weights or were a good athlete does not qualify you to be a great S & C coach.  This is a demanding job and kids deserve to have a great coach working with them.  The mission of the IYCA is to help educate coaches in an effort to create exceptional training experiences for athletes, and we feel that this is very important.  That means that the days of unqualified and sub-par coaches in high schools should come to an end.  You need to have great knowledge, great energy, great coaching skills, and a passion for developing athletes at all levels and in all sports.

In the video, I discuss:

  • Is this the right job/situation for you?
  • Qualifications
  • Funding
  • Challenges & opportunities
  • Relationships
  • Creating a job vs. being hired

There is obviously a lot to understand before you get started in high school strength and conditioning, but this should help you understand what is necessary and give you a sense of what you can do to make things happen.


Jim Kielbaso IYCAJim Kielbaso is the President of the IYCA and Owner of Impact Sports Performance in Novi, MI.  He has authored multiple books, articles and training products and has spoken at events around the world.  He holds a BS in Exercise Science, an MS in Kinesiology and has gone through multiple certifications through the IYCA, NSCA, NASM and more.  Jim is a former college strength & conditioning coach and has trained thousands of athletes at every level of competition.  He runs a successful NFL Combine training program in Michigan and has been hired as a consultant for major sports programs like the University of Michigan Football Program and the University of Kentucky Basketball Program.


The IYCA High School Strength & Conditioning Specialist is the only certification created specifically for coaches training high school athletes, and it has recently been updated!.  The course includes several hours of video instruction (including a complete Olympic lifting instructor course) and two textbooks with contributions from some of the top strength and conditioning coaches in America.  Click on the image below to learn more about how to become a certified high school strength & conditioning coach.

Single Leg Squat Variations – Jordan Tingman

Single Leg SquatUnilateral exercises, or single-leg squat variations, are beneficial for a variety of reasons including that they require stability, they have the potential to eliminate imbalances, and they can help create awareness of weaknesses. The single-leg squat has been utilized commonly in knee rehabilitation settings such as with individuals experiencing patellar tendinitis or going through a return-to-play protocol with knee surgeries. Considering the stress that sport has upon the knees themselves, implementing exercises that stress the knee joint is imperative when preparing the body for these demands. The single-leg squat is a great way to strengthen not only the larger muscles of the leg but also all of the stabilizing muscles of the hips due to the nature of the unilateral exercise.

Though there are many benefits of the single-leg squat, they can be fairly difficult exercises to perform. Here are some ways to progress and strengthen the single-leg squat movement pattern:

Important things to note:
Some of the variations in the video emphasize the eccentric portion of the single-leg squat.  At first, many athletes struggle to perform the concentric portion of these exercises, so performing the lowering portion will help build the strength necessary to eventually control the full range of motion.  Focusing on the eccentric portion of the exercise is beneficial not only to strengthening the muscle fibers but it creates tension on the tendon structure of the knee joint itself. Challenge the eccentric portion with time under tension spending around 3-5 seconds on the descent during the exercise vs focusing on the concentric portion.  Athletes will still reap the benefits of utilizing the variation and will eventually increase their strength to a great enough degree to perform full range of motion repetitions.

If utilizing a longer eccentric time, perform around 4-8 repetitions on each leg for 3-4 sets.

If focusing on a normal tempo, utilizing higher repetitions (8-10) may be more appropriate. Determining the repetition ranges will depend on the athlete’s ability or what phase of training they are in.

You can also perform the single-leg squat variation in multiple planes using a variation of the Y-balance test:

Performing these movements can be done utilizing sliders or standing on a single leg and tapping the toe to each of the same positions. You can challenge this position by having the balancing leg on a foam pad to add more of an ankle stability component.

Since the Y-balance test holds validity in assessing an athlete’s limb-to-limb symmetry, adding these movements into a warm-up may also prepare the body for all the different planes associated with many sports.

Utilize these single-leg squat variations in conjunction with other exercises, including bi-lateral squats, to create well-rounded programming that addresses many needs.
Jordan Tingman – CSCS*, USAW L1, ACE CPT, CFL1 is a graduate of Washington State University with a B.S. in Sports Science with a Minor in Strength and Conditioning. She completed internships with the strength & conditioning programs at both Washington State University and Ohio State University, as well as a Graduate Assistantship in S & C at Eastern Washington University.  Jordan is a competitive Olympic weightlifter and is currently training athletes of all ages near her home in Seattle, WA.


The IYCA High School Strength & Conditioning Specialist is the only certification created specifically for coaches training high school athletes, and it has recently been updated!.  The course includes several hours of video instruction (including a complete Olympic lifting instructor course) and two textbooks with contributions from some of the top strength and conditioning coaches in America.  Click on the image below to learn more about how to become a certified high school strength & conditioning coach.

Top 3 Hip Hinge Exercises – Jordan Tingman

The ability to properly perform hip hinge exercises is a very important movement concept for any athlete, and every program needs to include a hinge exercise at some point.  This is a hip dominant exercise and utilizes a combination of the glutes, hamstrings, quads, lower back, and core muscles.  Not only will hip hinge exercises improve strength and power, but an inability to adequately perform this movement can lead to many other issues as Jason Goumas pointed out in his article about Overuse Injuries.

In this video, I break down three hip hinge exercises that I commonly utilize in my athlete’s exercise programming.

The first exercise I break down is the kettlebell swing. The kettlebell swing can be utilized anywhere from power to endurance. It is a ballistic exercise that requires proper sequencing of multiple muscle groups in order to be performed correctly. If the kettlebell swing is done correctly, I think it is a very beneficial exercise when increasing hip strength.hip hinge exercises

My second favorite exercise is the Romanian deadlift. Just like in the kettlebell swing, the hinge pattern is the same, however this time it is done in a slower more controlled matter. This movement can be done with a barbell, a kettlebell, dumbbells, resistance band, and many other implements. The RDL is more of a strength-building exercise that strengthens both the hinge pattern and hip extension.

The third exercise I included is the banded broad jump. I enjoy this exercise because it’s a plyometric hinge exercise. The band really reinforces the hip hinge, but also challenges hip extension when jumping. I like this exercise because it’s different and honestly, it’s fun!

Of course, there are many other hip hinge exercises that can be done, but these are my favorite variations that I use with most of my athletes.  I believe that starting athletes with these three exercises will develop a foundation and allow you to work towards single-leg versions and will improve move complex movements as athletes progress.


Jordan Tingman – CSCS*, USAW L1, ACE CPT, CFL1 is a graduate of Washington State University with a B.S. in Sports Science with a Minor in Strength and Conditioning. She completed internships with the strength & conditioning programs at both Washington State University and Ohio State University, a Graduate Assistant S & C Coach at Eastern Washington University, and is currently training athletes of all ages near her home in Seattle, WA.


The IYCA High School Strength & Conditioning Specialist is the only certification created specifically for coaches training high school athletes, and it has recently been updated!.  The course includes several hours of video instruction (including a complete Olympic lifting instructor course) and two textbooks with contributions from some of the top strength and conditioning coaches in America.  Click on the image below to learn more about how to become a certified high school strength & conditioning coach.

The Basis of All Training Programs – Joe Powell

When the human body receives a stimulus, it adapts to it in preparation to receive that stimulus again. The next time, you make that stimulus slightly stronger to continue the adaptation process. That’s progressive overload!Dumbbells

While it’s way more complicated that that, this process should be top-of-mind when choosing ANY exercise and implementing ANY strength program.  Of course, there are thousands of ways to implement progressive overload – periodized programs, linear progression, multiple-set schemes, HIT training, etc. – but the principle of progressive overload should be taught to every athlete so they understand how small improvements made over time will produce great results.

Listen briefly to what Michigan State Strength & Conditioning Coach, Joe Powell, has to say about the importance of making this a priority.


To learn more about progressive overload from 20 of the top coaches in the profession, check out the IYCA book Principles of Athletic Strength & Conditioning.  Chapter 5 by Arizona Cardinals Strength & Conditioning Coach, Mark Naylor, explores this topic in great depth and goes into detail on how to most effectively use this principle in training programs.

How to Get Better at Push Ups – Jim Kielbaso

It’s no surprise that many athletes want to get better at push ups.  It’s a foundational exercise that requires no equipment, and How to get better at push upscan be done anywhere.  Many coaches also look for ways to help athletes get better at push ups, but simply doing them more often isn’t a great way for many people to improve, especially those who aren’t capable of performing many good push ups.

When I work with athletes who struggle with them, but want to get better at push ups, I take a three step approach that has worked for hundreds of athletes.  This approach is outlined here and demonstrated in greater detail in the video below:

  1.  Teach them proper technique.  Often, I see young athletes use poor form because they either can’t or haven’t been taught.  I like to start the process by giving some instruction and cues that I can build upon as we train.
  2. Take advantage of negative (or eccentric) push ups.  Humans can produce about 20% greater force eccentrically than concentrically.  That means that we can perform the lowering phase of a push up much easier than the raising phase.  We can take advantage of this phenomenon by utilizing negative push ups in an effort to gain enough strength to perform full reps.
  3. Slowly progress from negatives with good form to full push ups with good form.  Having a slow system of progression can really help athletes get better at push ups in a fairly short amount of time.

Watch this short video to learn more about these steps:

Of course, effort and consistency are key to making progress, but taking advantage of this 3-step approach gives you a simple system than can help just about anyone get better at push ups.  By teaching proper technique, reinforcing it through the use of negatives, and slowly forcing the body to adapt (get stronger), you can give athletes the ability to take advantage of this foundational exercise.

Athletes that struggle to perform push ups often struggle with other exercises and movements because they lack the postural strength & stability to maintain main positions.  Once athletes can perform quality push ups, it will open up a plethora of variations and options that can be utilized when training for improved sports performance.  Learning how to use free weights, sprint faster, and improve a variety of sports skills will be enhanced by the ability to perform push ups.  Take advantage of this method to not only help athletes get better at push ups, but to improve their ability to control their bodies in sports.


Jim Kielbaso is the President of the IYCA and owner of Impact Sports Performance in Novi, Michigan.  He has authored multiple books, articles and training products and has spoken at events around the world.  He holds a BS in Exercise Science, an MS in Kinesiology and has gone through multiple certifications through the IYCA, NSCA, NASM and more.  Jim is a former college strength & conditioning coach and has trained thousands of athletes at every level of competition.  He runs a successful NFL Combine training program in Michigan and has been hired as a consultant for major sports programs like the University of Michigan Football Program and the University of Kentucky Basketball Program.

The IYCA High School Strength & Conditioning Specialist is the only certification created specifically for coaches training high school athletes.  The course includes several hours of video instruction (including a complete Olympic lifting instructor course) and two textbooks with contributions from some of the top strength and conditioning coaches in America.  Click on the image below to learn more about how to become a certified high school strength & conditioning coach.

Pelvic Tilt Control for Athletes – Jim Kielbaso

Pelvic tilt control is something that frustrates both coaches and athletes, but it is often not addressed very thoroughly.pelvic tilt   Coaches may recognize an exaggerated arch in the lower back, but that’s just one part of the equation.  The ability to control anterior and posterior pelvic tilt is critical to sprinting, squatting, hinging, and a variety of athletic movements.  Many athletes struggle with these movements because they simply don’t know how to create or control pelvic tilt.

For example, when you see an athlete struggle to maintain a flat back during squatting or hinging, they may not be able to control anterior pelvic tilt.  When you see an athlete sprinting with excessive lordosis, it may look like they can’t get their knees up or they have excessive backside mechanics, but this often stems from an inability to control the pelvis and maintain a neutral position.

Coaches often want to assume that these issues stem from strength or mobility issues, so we begin with stretches in an attempt to create better muscular balance.  This is not wrong at all – tight muscles can create all sorts of issues – but flexibility may not be the root problem.  More often than not, I’ve found that athletes simply cannot control or create anterior and posterior pelvic tilt.  They don’t have the proprioception or muscular control necessary to control these motions.  If he/she doesn’t know how to fire their abs, lower back, and glutes properly, they will appear to be “stuck” when asked to perform certain motions.

When this happens, I often use something I call the “Rubber Pants Full of Water” technique to teach athletes what it feels like to control anterior and posterior pelvic tilt.  The following video goes into much greater detail on this technique and others I use to help teach athletes how to control this important motion:

Try the Rubber Pants Full of Water technique or the homework exercise described in the video to get athletes to begin controlling their pelvic tilt.  You will find it much easier to teach common movements, and it will help them develop the ability to control their posture during any kind of movement.


Jim Kielbaso is the President of the IYCA and owner of Impact Sports Performance in Novi, Michigan.  He has authored multiple books, articles and training products and has spoken at events around the world.  He holds a BS in Exercise Science, an MS in Kinesiology and has gone through multiple certifications through the IYCA, NSCA, NASM and more.  Jim is a former college strength & conditioning coach and has trained thousands of athletes at every level of competition.  He runs a successful NFL Combine training program in Michigan and has been hired as a consultant for major sports programs like the University of Michigan Football Program and the University of Kentucky Basketball Program.

If you’d like to learn more about developing athletes, the IYCA Certified Athletic Development Specialist is the industry gold-standard for youth fitness and athlete development.  Click on the image below to learn more about the CADS certification program.


Top 3 Upper Body Pulling Exercises – Jordan Tingman

Upper body pulling exercises are one of the most neglected movements in poorly designed programs, but they are absolutely vital to creating well-balanced athletes.  It’s also common to see these exercises performed very poorly with very little attention given to correct posture, control, or form.  Because many athletes enjoy pushing exercises so much (like bench press, push-ups, etc.), adequate pulling is necessary to provide balance.  Many coaches adhere to the rule that the volume of pulling should match the volume of pushing, and some like to perform a greater amount of pulling.  While vertical pulls like pull-ups, chin-ups, and pulldowns are all outstanding exercises, this article will focus on horizontal pulls or rows.

Pulling exercises can be done utilizing a variety of equipment, and changing up the implement can often keep training more interesting and engaging.  The rest of this article will focus on three pulling variations that I enjoy including in my programming.

The first variation is fairly common, but a staple in any rowing progression – the prone dumbbell row. This is a great exercise because it allows for the athlete to focus on the important upper body postural components of rowing. Telling the athlete to maintain an upright chest on the bench allows for them to naturally eliminate the use of the upper trap/shoulder. This allows athletes to squeeze the shoulder blades when pulling, which is difficult for many athletes to do when learning how to pull. Ensure your athlete is reaching a full range of motion in these exercises, allowing them to protract and retract the scapulae while rowing. This often needs to be addressed separately with specific scapular retraction reps/exercises in order to help athletes learn how to control this movement.  Cue “elbows back” and rowing “low to the pockets” to again, make sure that they are utilizing the proper musculature.  You can also place your hand between the scapulae and cue the athlete to squeeze your hand with their shoulder blades as they lift the weight.  Many athletes will actually push their shoulders forward as they row, so time must be spent on this.

Pausing at the top of each rep is also difficult for many athletes.  This obviously makes the movement more challenging, so many athletes take the easy road and neglect the pause.  This is particularly true when heavier weights are used.  Pausing at the top allows you to focus on scapular retraction and builds strength at the peak of the contraction.

The second variation I include in my top 3 pulling exercises is the single-arm ring row. This is a challenging exercise, especially with those lacking a lot of core stability or upper body strength. This is a progression of the normal ring or TRX row. Begin by making sure the athlete has adequate core and upper body stability and strength to perform the exercise. You can make this more challenging by inverting it.

The last variation I include is the half kneeling single arm banded row. This can also be done with the athlete being directly under the band, gbut can also be done with the band attached at a higher angle to create a more vertical pull compared to the variation shown. The half-kneeling position challenges posture and core stability in addition to performing the rowing exercise.

Using just dumbbells, bands, and rings allows you to perform these exercises in most settings, and they give you enough variety to keep athletes interested.  I also like using these variations to space out larger groups when super-setting exercises.  For example, you may super-set the banded row with an upper-body pushing exercise or a squat.  You can set up the band away from the other exercise to create space and to keep traffic moving.

Try these three pulling exercises in your programs to help create balanced upper-body strength and use them as part of a progression to more difficult exercises.

Jordan Tingman – CSCS*, USAW L1, ACE CPT, CFL1 is a graduate of Washington State University with a B.S. in Sports Science with a Minor in Strength and Conditioning. She completed internships with the strength & conditioning programs at both Washington State University and Ohio State University, a Graduate Assistant S & C Coach at Eastern Washington University, and is currently working at D1 Sports Performance in Boise, ID.


The IYCA High School Strength & Conditioning Specialist is the only certification created specifically for coaches training high school athletes.  The course includes several hours of video instruction (including a complete Olympic lifting instructor course) and two textbooks with contributions from some of the top strength and conditioning coaches in America.  Click on the image below to learn more about how to become a certified high school strength & conditioning coach.

Top 3 Core Exercises – Jordan Tingman

Core exercisesContinuing our Top 3 series from Jordan Tingman, these are her Top 3 Core Exercise Variations.

While core exercises are certainly necessary in a comprehensive program, keeping core exercises exciting means trying different variations.  Athletes are always wanting something new or different, but variety has additional benefits beyond keeping athletes engaged.  Because the core is so complex and supports every movement we make, using a variety of exercises creates a greater challenge for the athlete, which will in turn provide greater transfer and gains. 

The first exercises I go over in this video are various Palloff variations. As stated in the video, the Palloff variations are great because they allow for the athlete to maintain an athletic position in the lower body whilst moving the upper body. You can make the Palloff press more complicated by adding in variations including chops and rotations. Feel free to mix these up and make up combinations. You could even cue each repetition. You can say “press,” “chop,” or “rotate,” and the athlete performs each variation according to your cuing, mixing it up and also challenging their mind to respond to the directions.

The next set of exercises are the crawling patterns. Crawling patterns are an excellent challenge because they not only address core posture and stability, but also challenge proprioception and scapular stability. The athlete has to maintain the crawl position with a neutral spine with knees one inch off the ground.  Simply holding this position poses a challenge for many. Have the athlete get comfortable with holding this crawl pattern first before adding in the variations. As explained in this video, you can change the variations with the crawl patterns. You can do leg lifts, shoulder taps, forward, backward, and sideways crawls, bird dog variations and more. 

Finally, the last group of exercises that I go over in the video are the Val Slide variations. These can be performed on a slick surface in socks, or with towels below the feet on a smooth surface.  Get creative with what you can use to perform the exercises if you don’t have Val Slides.  There are many core exercises that can be done utilizing this tool, but the ones included are plank sliders and mountain climbers. Ensure that your athlete can maintain a great plank position before adding in these dynamic movements. 

Enjoy the exercises, and leave comments about different variations you come up with or different ways you utilize each exercise.

Look for more Top 3 lists soon.

Jordan Tingman – CSCS*, USAW L1, ACE CPT, CFL1 is a graduate of Washington State University with a B.S. in Sports Science with a Minor in Strength and Conditioning. She completed internships with the strength & conditioning programs at both Washington State University and Ohio State University, and is currently a Graduate Assistant S & C Coach at Eastern Washington University.


The IYCA High School Strength & Conditioning Specialist is the only certification created specifically for coaches training high school athletes.  The course includes several hours of video instruction (including a complete Olympic lifting instructor course) and two textbooks with contributions from some of the top strength and conditioning coaches in America.  Click on the image below to learn more about how to become a certified high school strength & conditioning coach.

An Open Letter to Student-Athletes: Who Are You Without Sports? – Jill Kochanek

My name is Jill, but everyone calls me Jake. No one ever called me Jake, however, until I joined the Amherst College Women’s Soccer Team.  As a timid freshman, I was eager to prove myself and determined to play the sport that I love. With an upperclassman named Jill already on the team, during preseason my coaches asked me if I went by another name. I hesitated; I had always been Jill. Shortly after though, in the chaos of competition, my teammates’ commanding calls blended my initials, “J-K” into “Jake.”  

In the beginning, I accepted Jake but did not fully embrace the nickname.  I recall a teammate commenting that her brother’s name was Jake and another teammate telling me that her dog was named Jake. Great— I thought—there goes the cool first impression I was trying to make. Over the course of four seasons though, I would answer to Jake more than Jill on the field, in the classroom, and even at home. Eight years later, the name has stuck. My parents, siblings, old friends from Amherst and new friends extending from those Amherst ties all call me Jake.

Jake would stick with me in more ways than one: just as Jake grew on me, so did I as a player, teammate, and person. As Jake, an inexorable force outside of me but inseparably linked to me pushed me. It kept me tirelessly attacking and defending, following and leading, in formation with twenty other women in Amherst purple. As number 26, I felt that force drive me across the darkening grass—six and back, eighteen and back, half field and back, full field and back.  At the end of each practice as the sun set on Hitchcock field, sweat poured down our necks leaving our bodies as we set ourselves on the line to sprint again. Nourishing the field below our tired feet, sweat was the one thing we all agreed to sacrifice. In my senior season, that sacrifice would prove worthwhile and culminate in a league championship, NCAA Elite Eight match, and a record of 20-0-1. These tangible gains were just the beginning.  

On the field with my teammates, I learned how to be selfless; how to trust and be trusted; how to embrace my strengths and fearlessly confront my weaknesses; how to commit, be patient, and own my/our process: the next achievable step. I learned that what you communicate matters but “how” (you say something) given the “who” (you say something to) makes all the difference. And, I learned how important it is to control life’s controllables. My teammates challenged me to be a leader—a servant: someone who does not stop with bringing out the best in themselves but lifts others up. Inspired by their sacrifice, I grew to be a better player, teammate, and person. I grew to be Jake.

My student-athlete story seems to have a happy ending. It does. And—not but—and, it’s not without some unexpected challenge. In the last 10 minutes of our NCAA Elite Eight match against Messiah College, we were down 0-1. I was physically and mentally drained. I awkwardly, stretched out my right leg across my body to go for a loose ball. Off-balance, I tore my ACL and meniscus. I hobbled off the field and knew something was wrong but didn’t want to admit it. I didn’t want to concede. I asked our athletic trainer to try and tape my knee up to give me support and go back in. But I couldn’t walk. I was done.

Tears rushed down my cheeks and fell to the grass like the collective sweat that rushed down our necks. I wanted to be inside the lines again. I yearned to still be a part of our sacrifice. To be living the collective commitment we made to one another. To be on the field playing the game that we loved. In those final moments, I was flooded with a sense of loss. 

I am fortunate to have played injury-free for most of my high school and college career. We were fortunate to have made such a deep run into the NCAA playoffs alongside teammates and coaches who I’d do anything for. In those final moments and months to follow during my recovery process I felt a range of strong emotions. I felt gratitude for my experience, for the protected time I’d have to fully recover rather than rush back to play at the start of the next season. I felt relief that my body had held out. And, I also felt loss. I felt lost. 

I knew our season and my soccer career were soon coming to an end. But, I was not prepared for when it actually did. When the final whistle blew. 

I share my student-athlete story with you because at some point for all of us, sports will stop. There will be a day when the final whistle blows for all of us. A day when we all play our last game, when we are—like I was—left asking: Who am I?

For all student-athletes, not just our graduating seniors, this shutdown presents us with a unique opportunity to pause. To reflect and remember: why do you love sports? 

Maybe it’s the power of movement—the sense of freedom and empowerment you feel moving your body and seeing what you can do. 

Maybe it’s a love of competition—of the process, of challenge, of taking risks and testing your limits, of learning new skills and game strategies. 

Maybe it’s being a part of a team. Working together through adversity—making lasting friendships, building trust and having fun through all the little moments: the team dinners, bus rides, and locker room dance parties.

If it helps, we have 3 basic psychological needs as humans, the need to: 

(A) feel a sense of autonomy (“I have choice, control and agency”). 

(B) feel a sense of belonging (“I am valued and supported”), and 

(C) feel competent (“I am capable”), 

If you look down this list of “maybes”, you’ll notice that these reasons highlight all 3 of our basic needs. What we can call our ABCs—Autonomy, Belonging, and Competence. Meeting these needs supports our inner motivation and overall health and well-being.

So, what are your ABCs? Why do you play your sport/sports? Maybe you’ve got reasons outside the ABCs. Even better. The point is to take this time during the quarantine to reflect and be honest with ourselves. What’s your “why”?

During this shutdown it’s also important for student-athletes (at any age or stage) to ask: who am I without sports? It’s a both-and. Not an either-or.

You can be both an athlete/teammate/competitor and be a:

…painter

…musician

…writer

…singer

Tell me (and— coaches and parents if you’re reading this ask your student-athletes to tell YOU):

What energizes and excites you? What would get you out of bed at 5:30 AM for/to do?

What are you curious to know more about? 

What do you want to spend more time doing? What do you want to try? 

How do you want to connect with people? 

What larger purpose do you want to serve? How do you want to contribute? 

For the high school and college seniors graduating this spring, the COVID-19 shutdown has cut your season short and brought your career to an abrupt end. You are likely feeling a bitter sting: our harsh reality has replaced celebration and closure with COVID-19 restrictions. The senior year you thought you’d have, the special end-of-year events that would seamlessly, properly close this chapter of your life and open a new one may have instead been filled with uncertainty, loss, and sadness. Senior student-athletes I feel with you. And, I am here to tell you that you are not alone. Whatever emotions you are experiencing are valid and understandable. Allow yourself the time and space to acknowledge what you’re thinking and feeling. What you are going through is hard.

When you reflect on why you play and what/who you are grateful for, know that you will always carry with you your reasons for playing, valuable lessons you learned, and memories you made. It took me time after I played my last game to realize that:

My student-athlete experience was a process of discovery. Soccer was a meaningful setting that helped me discover aspects of who I am—a trusted teammate, lifelong learner, and performer who loves to commit to a big-picture vision and goal and to work the small actionable steps needed to get there. Soccer was a context that brought these aspects of “me” into focus. Soccer gave me a supportive, challenging space—and opportunity— to work towards being my best self: to embrace my inner-Jake.

I found so much meaning in, I drew so much of my self-worth from sports. And while I found so much of myself through sports, and—not but—and, I now know that sports are not ALL of me. Sports are not ALL of you. 

Identity is who you are. It’s a word with a paradox at its core (Stryker, 2017). It means that two things that are not exactly the same can be substituted for one another as if they are the same.

When we say “I am a student-athlete” the “am” is like an equals sign. Your individual sense of being something, a category (e.g., student-athlete, musician) that you consider yourself belonging to. You and the category, however, are not the same exactly the same.

You are a student-athlete.

You are also more than a student-athlete. 

Human beings we are weird. Don’t read the term “weird” in the negative sense: we are unique, dynamic, complex, and multi-dimensional.

Know that so many of the reasons you played sports, the lessons that you learned, memories that you made will stick with you. These are forever a part of you. Also know that your life, your identity, and your “why” do not end here. They don’t end with athletics. You might find that an activity, experience, or context fulfills you like sports do or did. You might also find that these different pursuits excite and inspire you in unique ways that sports did/do not offer you. 

You have so many gifts to share with us beyond what you do on the court, field, track, diamond, and pitch. There is a whole world out there with people, place, and opportunities beyond sports to explore. 

This open letter is not a “how-to”—with specific steps on what I think you should do. Only you can determine the steps that are best for you. Only you can chart your course: Be brave. Be curious. Be true to your whole self. Share that whole person with us. Your whole self is your best self, and when we know the true you, we will all be better. 

My name is Jill but everyone calls me Jake; I embrace when they do and I know now that there’s so much more to Jill than Jake. 

Jill Kochanek is a doctoral student at the Institute for the Study of Youth Sport at Michigan State University. She is also a high school soccer coach. As a coach-scholar, Jill is passionate about bridging the research-practice gap to make sport a more inclusive, empowering context. Her research and applied work centers on helping athletes (and coaches) take charge of their own developmental process and social progress. If you enjoyed this article, feel free to visit her youth sport coaching blog, bothandcoaching.blog, for posts that address other topics related to sport psychology and sociology and follow her on Twitter @bothandcoaching.


The IYCA Certified Athletic Development Specialist is the gold-standard certification for anyone working with athletes 6-18 years old.  The course materials were created by some of the most experienced and knowledgeable professionals in the industry, and the content is indisputably the most comprehensive of any certification related to athletic development.  Learn more about the CADS certification here:

Top 3 Power Exercises – Jordan Tingman

This is the first installment of a short “Top Exercises” series from strength coach Jordan Tingman, where she will break down some of her favorite exercises from different categories.  This is more than just her personal favorites, as she’ll be providing explanations and rationale for the selections and how to best utilize each. 

Power exercises are important in any strength and conditioning program, however the Olympic lifts may not always be the correct or most effective exercises for an athlete. Though the Olympic lifts are near and dear to my heart, over the last year I have started to broaden my programming and exercise selection and focused on utilizing other exercises that may better suit the needs of a team or athlete.

Power exercises are defined as exercises where an athlete exerts maximal force in a short amount of time. Exercises that are commonly associated with power include the Olympic lifts, jumping and throwing. I have included in this video some of the exercises that I have been recently utilizing in programming with my athletes at Eastern Washington University.

Trap Bar Jump

The first variation I chose for my top 3 exercises is the trap bar jump. I have loved utilizing the trap bar because it keeps the weight in the center of mass of the athlete, and can be a great tool for overloading a plyometric movement like a vertical jump. The athlete is forced to apply maximal force in order to jump the trap bar off the ground, but also achieves triple extension. The stick at the end of the jump is a great deceleration exercise and can be an excellent reinforcement for landing. Individuals with valgus collapse of the knees can really benefit from this movement if done currently. 

Split Jerks

The second exercise I chose was the power and split jerk. These are not commonly utilized exercises, however I feel like they challenge athleticism in a great way with power, balance and coordination. Utilizing implements such as the landmine and dumbbells remove a lot of the discomfort and fears associated with barbell split jerks and power jerks. The split position requires both coordination and balance in addition to the power benefits. You can perform this exercise with the dominant leg forward, or you can change it up and have the athlete perform equal reps with each leg forward. 

Lateral Medicine Ball Rotational Throw

The third exercise I selected for my Top 3 was the medicine ball lateral rotational power toss. Med balls are such a great explosive throwing implement because they can be utilized by ANYONE! I love this exercise because it’s such a great combination exercise –  rotational core and rotational hip power in a 2-for-1 type exercise. As mentioned in the video, when performing these exercises for power, make sure your athletes are performing these exercises at MAX effort every rep in order to reap the benefits of maximal force.  

I’ll be bringing you more Top 3 lists soon.  In the meantime, give these a try in your programming.

Jordan Tingman – CSCS*, USAW L1, ACE CPT, CFL1 is a graduate of Washington State University with a B.S. in Sports Science with a Minor in Strength and Conditioning. She completed internships with the strength & conditioning programs at both Washington State University and Ohio State University, and is currently a Graduate Assistant S & C Coach at Eastern Washington University.


The IYCA High School Strength & Conditioning Specialist is the only certification created specifically for coaches training high school athletes.  The course includes several hours of video instruction (including a complete Olympic lifting instructor course) and two textbooks with contributions from some of the top strength and conditioning coaches in America.  Click on the image below to learn more about how to become a certified high school strength & conditioning coach.

A Deeper Look Into the Squat – Joe Powell

The squat is often considered the most important exercise an athlete can perform in the weight room. It’s frequently performed by world-class athletes, the most novice of lifters, and everyone in between. Strength and conditioning professionals have long relied on the squat, and its variations, as a cornerstone of their programs, but its acceptance has not always been well received outside of S&C circles. It’s not uncommon for strength and conditioning coaches to receive push-back from people trying to vilify exercises in their program, with the squat being the target of the attacks. Whether it be sport coaches, athletic trainers, administrators, parents, or even athletes themselves, the squat is always surrounded by questions and opinions. It has been blamed for unrelated issues it hasn’t caused and even termed “dangerous” for reasons that many don’t know nor care to find out. To learn where all of this came from, it’s important to understand the history of the squat in America and how one particular researcher sparked a debate that continues today.

One would be remiss to discuss the history of squats in America without mentioning the name Henry “Milo” Steinborn. Steinborn is often credited with popularizing the squat in America. Prior to his arrival in 1921, the popular lifts in America were known as “power-type” exercises and consisted of lifts like bent presses, deadlifts, two-arm presses, and curls. After arriving in America, he quickly helped popularize the “speed’ and “quick” lifts that were more commonly performed on European shores. Among these lifts was the squat. Steinborn quickly garnered attention in the public eye by performing heavy lifts that were quite impressive, even by today’s standards. While Steinborn is notable for many reasons, it’s the way in which he performed the squat that will still shock many lifters today. Steinborn performed squat sets, as heavy as 550 pounds for 5 repetitions, without having any supports, wraps and most remarkably, no access to a squat rack. He simply stood the barbell up tall on one end, leaned under it and hoisted it across his shoulders. This style of squatting is aptly known as the “Steinborn Squat”.

While Steinborn helped bring the squat to America in the 1920s, it wasn’t until the 1950s where it became widely performed by weightlifters. Up to that point, the split stance was more commonly used to lift heavier loads. The squat was used, but more as a supplementary lift to help build leg strength. After 1950 the “odd-lifts,” which are now known today as the power-lifts, became vastly popular. Squatting, of course, became one of the main lifts. Lastly, those who performed what we now think of as the Olympic lifts used split stance squatting as their main method of lower body training because the rules dictated that a lifter could not come in contact with the bar during the lift. The rules changed in the early 1960s and thus the squat style of Olympic weightlifting took over as the predominant method as it was easier to perform heavier loads and was much more efficient.

By the early 1960s, the majority of Americans still did not partake in resistance training. The small minority who actually lifted weights were most likely bodybuilders, Olympic weightlifters, and odd-lift/power-lifters. Very few athletes who participated in mainstream sports lifted weights at that time. It was actually feared that it would make them bulky, slower and less competent at their respective sport. Outside of the fear of being a performance decrement, lifting weights and performing the squat specifically was thought to be harmful.

Around that time, K. Karl Klein, a corrective therapist, led the crusade hoping to prove that squats were harmful to the body and led to an increased risk of injury. His rationale being that full depth squats would actually stretch the ligaments of the knee, making them more “lax” and thus more susceptible to significant injury.

While enrolled as a graduate student in 1959, Klein conducted a study that altered the public’s perception of the squat for decades.  Klein’s study featured 128 experienced weightlifters who included full squats as a part of their training regiment, as well as 386 subjects who did not lift weights or perform squats of any sort. Klein’s study utilized a device that was built by Klein himself and was supposed to “objectively” measure the amount of medial or lateral “give” within the knee. The device was designed to brace the lower limb/shin region while the upper portion stabilized the quadriceps giving Klein the ability to manipulate the MCL and LCL manually.

After following up on his thesis, Klein published a series of articles on his research that concluded: “Full squats (where the top of the thigh is below parallel of the floor) damages the knee by stretching the knee ligaments.” His recommendation thus became: “No more than ½ squat should be used. In squatting the thighs should be slightly less than parallel.” His study and recommendation went on to be published in some of the most recognized journals for not only coaches but medical professionals as well. Publications such as Scholastic Coach, Texas Coach, Coach & Athlete, as well as The American Journal of Surgery featured Klein’s study.

Klein’s findings led many groups to deem the squat dangerous and thus unnecessary. Sport coaches saw it as a confirmation that lifting weights, in general, would make their players muscle-bound, and become slower, less flexible, immobile and more susceptible to injury. The medical community deemed it harmful and orthopedic surgeons and physical therapists, in particular, vilified the movement. Even the US military had a negative view of squatting. A letter sent to Klein from the US Marine Corps stated: “Our consultants agree that the type of exercise you condemn should probably be eliminated from physical conditioning programs.” The Army physical fitness test omitted anything that resembled a squat, and until recently, stayed the same for decades. While Klein had convinced many communities that the squat did more harm than good, there was still a strong contingency of professionals that saw Klein’s study as more subjective than objective.

As the years started to pass, new researchers began to conduct studies to determine if Klein’s claims were in fact true. With improved technology and a better anatomical understanding, the results began pouring in that in fact, Klein’s stance on the squat was incorrect. Between the 1960s and through the 1990s, researchers were coming to the agreement that squatting (and deep squats where the femur was below parallel to the floor) did not cause laxity in the knee ligaments and were safe to perform. These findings led to position papers put out by the NSCA and ACSM to help dispel the negative connotations that were set decades prior.

The Position Paper by the NSCA (1993 Chandler & Stone) states: “There is no objective evidence that full squats are harmful to the ligaments of the knee or the patellofemoral joint. When done correctly and under the supervision of a strength and conditioning specialist the full squat is safe and beneficial to athletic endeavors.”

The Position paper of the ACSM states: “In summary, the squat exercise is important to many athletes because of its functionality and similarly to athletic movements. If appropriate guidelines are followed, the squat is a safe exercise for individuals without a previous history of injuries. The squat is a large muscle-mass exercise and has excellent potential for adding lean muscle mass with properly prescribed exercise.”

Negative perception of the squat still exists to this day, and much of that perception can be traced back to a singular study performed by a graduate student in the late 1950s. By providing factual based evidence and understanding where the misconception arose so many years ago, strength and conditioning coaches can better defend the movements, including the squat, that they use in their program. The best way to defend a program is by educating. Continuing to do so will assist in showing others the benefit that a properly performed training program has in the world of athletics.


Joe Powell is an Assistant Strength & Conditioning Coach for football at Michigan State University.  He held a similar position at Utah State University and has been an advisor to the IYCA for several years.  Before his stint at Utah State, Joe was an Asst. S & C Coach at Central Michigan University where he also taught classes in the Department of Health and Human Performance.  Joe is a regular contributor to the IYCA Insiders program and is one of 20 strength coaches who helped create the High School Strength & Conditioning Specialist Certification.   Join IYCA Insiders or get the HSSCS to learn more from Joe.


Metabolic Conditioning for Athletes, Part 3 – Phil Hueston

This is the last of a 3-part series on metabolic conditioning for athletes. In Part 1, we discussed what metabolic conditioning is, what energy really is and what it means for the human body and, more specifically, your athletes. I broke down the three principle energy systems in the body and how Adenosine Triphosphate (ATP,) the “secret sauce” of energy for movement and other bodily functions, is used in the body.
In Part 2, we discussed the 3 forms of metabolic conditioning and the reasons to use each of these with your athletes. (We’ll very briefly review these again.)

In this last part of the series, I’ll break down the “how-to’s,” with some detail regarding what activities to include for various sports and how to maximize metabolic conditioning for your multi-sport athletes.

First, let’s quickly review parts 1 and 2. 

In 2011, Bergeron defined metabolic conditioning as “exercises that impose a moderate to high demand on the cardiovascular system and energy metabolism of the active muscle fibers to meet with the muscles’ repeated high energy requirement.” (Current Sports Medicine Reports, 2011) Metabolic conditioning is the improvement of energy storage, delivery and usage through the application of activity to the movement system of the body.

Energy can be neither created nor destroyed, only shifted in form. It’s this shape-shifting quality that allows us to have 3 separate energy systems for activity in the human body. The key to all of it, like any good recipe, is the “secret sauce.” In this case, that’s ATP.

The 3 energy systems we care about are 1.) Phosphagen (ATP-CP) System, 2.) The Glycolytic (Anaerobic) System and 3.) The Aerobic System. To keep them straight, you can think in terms of how long your athlete can “go” and how much force can be produced while going.

The Phosphagen System allows high force production, but short duration of work. Lots of ATP being created and lots being used. Creatine phosphate plays a role here. You get massive force, but only for about 30 seconds, with a 1 to 5 minute rest phase needed to fully recover. There are no fats, carbohydrates or oxygen involved in this process. It’s an anaerobic energy system.
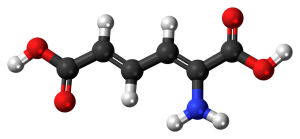
The Glycolytic System gives you more time, but less force production over that time. It involves the breakdown of carbs into pyruvate, then into either lactate (when oxygen isn’t plentiful) or acetyl co-enzyme A (when oxygen is available.) The latter is taken up by mitochondria for the production of ATP. The former is involved in a process which creates issues surrounding the buildup of metabolites and other cellular “trash.” (Technical term there, don’t just throw it around.) This system will give you 30 to 60 seconds of decent effort (maybe several minutes, depending on which studies you read) with a rest time of 1 to 3 minutes to refuel.

The Aerobic System will let you go long, but not hard. (Get your mind out of the gutter!) If you’re going 5 minutes or longer, this is your energy system. Of course, we’re talking about relatively low force production. 

Aerobic energy production involves ATP synthesis within muscle mitochondria and uses blood glucose, glycogen and fats as fuel. A very large amount of ATP is produced, but that production is slow compared to the other processes. Because force output tends to be low, recovery times can be short.

In part 2, we discussed the 3 forms of metabolic conditioning:

  1. Anaerobic-based – Based on muscles and systems, this form prefers ATP-CP as it’s energy source. Beginning in the Phosphagen system, there will be a slight shift into the Glycolytic system as muscle fatigue sets in. Preferential use of this system will lead to a preference for it. This form of conditioning strengthens muscles as well as improves the body’s endurance. It is peripheral in nature, creating conditioning in muscles and systems primarily, with overall endurance as a secondary benefit.
  2. Aerobic-based – This is more central in nature, providing overall work capacity and endurance conditioning for activities of varying speed, intensity and duration. It introduces cardiovascular parameters into the conditioning process, but can also be accomplished by means that are not necessarily “aerobic” in nature.
  3. Non-Exercise Activity Thermogenesis (NEAT) – All energy expended for all activities other than eating, sleeping and exercise or sports. It’s both central and peripheral in nature. It’s also not what we’re concerned with in this discussion.

There are lots of reasons to do metabolic conditioning with your athletes. Among them are increased calorie burn, improved metabolic efficiency and flexibility, improved Excess Post-exercise Oxygen Consumption (EPOC), improved cardiovascular capacity, quicker recovery times, improvements in lean mass, improvements in brain chemistry and cognitive function, and better sport- and context-specific skill development.

While metabolic conditioning has benefits for every athlete, from a program design standpoint, we’re largely going to be focused on what I refer to as “sprint-based” sports. Whenever I get the chance to talk to sports coaches, I like to ask them about their “conditioning.” All too often, their answers make me cringe.  We can do better.  

Even with the massive amount of evidence and information publicly available detailing the shortcomings of long duration activities at improving athletic outcomes in the majority of sports, most coaches are doing it “the way we’ve always done it.” The problem is, the way they’ve always done it has always sucked. We just know better now.
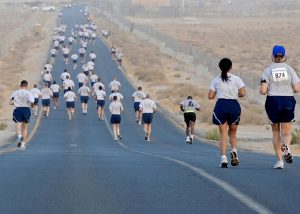
Long runs around fields, huge numbers of “sprints” with little or no rest between, agility ladder or hurdle work with no rest between reps. The list, unfortunately, goes on and on…and on.

What if we look at conditioning for sports from the perspective of metabolic conditioning for sports? In other words, let’s make conditioning look and feel more like the way the sports look and feel. And no, I don’t mean that literally. Your baseball and softball players don’t need to do rope slams with weighted gloves on to get faster hands (I’ve seen that). Your lacrosse players don’t need to carry a telephone pole around the field to “strengthen the shoulders to hold the stick up the entire game” (Yep, I’ve seen that, too). And don’t even get me started on wall sits for hockey players and gassers for football players. Ugh.

Here are the key elements to consider when designing metabolic conditioning programs and sessions for athletes.

  1. Work-to-rest ratios – what does game play look like? How much of the game is spent at full speed? How much rest does the athlete get? Is that rest on the field, waiting for the next thing to happen or on the bench? While work-to-rest ratios need not exactly match those of a given sport, getting them close brings a certain “relatability” for the athletes with whom you’re working. 
  2. Module design – Are you using circuits? Are you using cascading fatigue, wherein you stack 3-4 activities of increasing difficulty one after the other, with an extended rest period at the end? Are you using active rest? Passive rest?
  3. Sports movements – What are the movement variables associated with the sport? Rotation? Direction change? Contact? Does the sport tend to be either lower- or upper-body dominant?
  4. Key injury patterns – What are the most common injuries in the sport? Can you create higher levels of resistance to those injuries with proper metabolic conditioning?
  5. Space and equipment availability – How much room do you have to work with? What kind of equipment is available? Is there enough for all the athletes involved?
  6. Number and skill level of athletes – How many are you working with at one time? Will partner work make your program flow better? What are the athletic levels of your athletes? How variable is it from one to the other?

Let’s look at some simple guidelines for designing metabolic conditioning work for specific sports. The challenge for most of us is that many of our athletes are multi-sport athletes. Because of this, context-specificity is more important than sport-specificity. With context-specific conditioning, we would design for the types of movements most beneficial to the sport, along with a general application of cardio-respiratory, strength endurance and skill development concepts based on the sport or sports being targeted. 

For example, when training football players, a 1:3 or 1:4 work-to-rest ratio makes sense. The average play lasts about 6-10 seconds, with time between the end of one play and the beginning of the next being 25-35 seconds. Since we want maximal power and cardio output during the work phase, shorter is better here. Working for 60 seconds really doesn’t make sense and won’t give us the targeted metabolic conditioning we’re looking for.

10 seconds of all-out work, followed by 30-40 seconds of rest makes sense if we’re trying to match game conditions. Mixing up these ratios to occasionally mimic the “2-minute drill” is appropriate as well.

I prefer explosive and high-output activities. Plyometric jumps, hops and even push-ups are great for this. Try to alternate lower- and upper-body dominant activities from one station to the next. Crawl patterns are practically a must for football players. Medicine ball and Dynamax ball activities are also great for these. Hurdle shuffles, ladder jab steps and even arm shivers on a heavy bag are good, too. Sled sprints and band-resisted activities like shuffles and high knee running in place also fit. Very heavy carries like Farmer or Zercher carries are appropriate, too.

Lacrosse and soccer pose a different challenge. While a lot of coaches will tell you how much their players “run” during a game, it’s not really the case. Starting, stopping, changing directions and actual play on the ball make up a significant portion of time on the field. So does walking and standing still, even if coaches don’t want to admit that. For the record, I’m not suggesting that standing still should be part of your metabolic conditioning program for athletes. 

For lacrosse and soccer, multi-directional movements should compliment explosive and high-output activities. Medicine ball and Dynamax activities, speed and agility work as well as band-resisted activities are great here. Body weight movements like crawl patterns fit here, too, as do sled sprints and heavy carries. For these two sports, I’m a fan of variable work-to-rest ratios. When using explosive activities, I prefer shorter work periods. If agility ladders, hurdles and slightly lower output activities are on the menu, I will typically lengthen the work period to as much as 30-40 seconds. 

My personal preference is to use either high output, shorter work time programs or lower output, longer work time programs during any one session. During a training week for these sports, I will adjust these variables from one session to the next. Movement mastery is important. In my opinion, it takes time for a training effect to “stick,” so bouncing back and forth during a training session doesn’t really make sense to me.

For baseball and softball, including some rotational power development activities makes sense. Rotational Dynamax wall throws and band rotations are good choices to add to the mix.

Basketball and volleyball may warrant some added plyometric work. The caveat here is that you must be aware of the volume of plyometric work being included in regular practices. This is especially true with volleyball, where coaches regularly include (often far too much) plyometric activities in their practices.

Let’s finish off here by building out a metabolic training session for ice hockey players. This can easily be used with field hockey and lacrosse players as well. Ice hockey is an interesting application, since every coach has his/her own view on how long a shift (work time) should be. Most coaches shoot for 45 seconds to a minute, with 1-3 “shifts” in between. 

In theory, every hockey shift is played at full speed and power. In reality, that just ain’t so. As a result, we don’t need to match the exact work time. If we stick to a 1:1 rest-to-work ratio, we’ll get the job done. 

Let’s work with a 45 seconds on, 45 seconds off formula. During the “off” periods, you can choose to have your athletes perform light mobility work or do some SMR. Remember that the goal is to get maximal output during work periods and maximal recovery during rest periods. Most hockey teams have about 20 players (“-ish,”) so we’ll build 5 work stations. Total work time per circuit will be 3:45, with equal rest time. We can get 3 rounds done in about 23 minutes.

Station 1 – Lateral Hurdle Hops (1 hurdle/athlete)
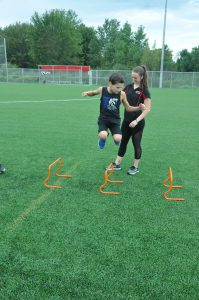
Station 2 – Alternating Single Leg Push-up (regress as needed to match ability levels)

Station 3 – KB Swing (KB Squat to High Pull works well here, too.)

Station 4 – Dead Ball Slam or Alternating Rotational Dynamax Wall Toss (the latter adds an element of positional shifting and setting, since they’ll switch positions each rep. This is great for rotational sports in general.)

Station 5 – Ladder “Icky” Shuffle to Reverse Shuffle (have each athlete use 3 boxes of the ladder and you’ll only need two ladders.)

This is just one simple exercise combination. In the words of the old-time comics, “I got a million of ‘em!” And so do you – you just may not have thought about it like this before.

There’s a reasonable combination of footwork, low level plyometric work, hip drive, strength endurance and rotational power built right into this simple 5-station circuit. Certainly this will work to make any athlete better. But imagine discussing this with a hockey, lacrosse, baseball or softball coach. If you can relate this work to improvements on the ice or field, your buy-in level from that coach will increase significantly. Same for your athlete and his/her parents.

I normally advise my athletes that if they’re really getting tired or just need a drink, they can break for one station if needed. Odd that it almost never happens. But that’s the nature of competitive athletes, isn’t it?

I hope this series has helped open some eyes to the value of metabolic conditioning for athletes. While we normally think of metabolic conditioning in relation to efforts around fat loss or weight loss, the benefits to our athletes can’t be ignored. Like most of my colleagues in the strength & conditioning field, I believe strength is the key to every other athletic skill. But we need to give our athletes every weapon we possibly can. Metabolic conditioning helps provide some of those weapons.

Keep the faith and keep after it!

Bio: Coach Phil Hueston is not just another pretty trainer. With over 18 years of in-the-trenches experience with athletes ages 6 to 60, he brings a unique skill-set to the improvement of his athletes. The author of the Amazon best-seller “Alchemy; Where the Art and Science Collide in Youth Fitness,” his client list includes professional athletes, collegiate athletes as well as thousands of youth athletes. Phil has been the co-owner of All-Star Sports Academy in Toms River, NJ, one of the largest and most successful youth and family fitness centers in New Jersey since 2008. He was named “Coach of the Year” by the IYCA for 2012-2013.  A contributor to IYCA.org and coach to other coaches, Phil provides unique insights and ideas that can help other coaches accelerate their clients’ progress and performance. Phil is married to the woman responsible for his entry into the fitness profession, MaryJo. Between them they have 2 grown children, Nate and Andrew, and 99 problems.  Phil’s personal website is coachphilhueston.com, and he can be contacted at phil.hueston@hotmail.com


The IYCA High School Strength & Conditioning Specialist is the only certification created specifically for coaches training high school athletes, and it was recently updated to include even more information than ever.  The course includes several hours of video instruction and two textbooks with contributions from some of the top strength and conditioning coaches in America.  Click on the image below to learn more about how to become a certified high school strength & conditioning coach.
What We Can Learn About Athlete Development From Elite Athletes – Jim Kielbaso

As our NFL Combine Training program gets started, it is always exciting for me to get to know and help a group of talented, motivated athletes. It’s also a time that makes me examine athlete development in a different way.

Most coaches discuss athlete development in terms of working with young athletes in an effort to help them prepare for the future. With these guys, I get to look at the process backward and evaluate what they may have missed at some point in their development. So, it’s amazing to see these guys in the morning, watch 8-year-olds in the evening, and think about everything that happens in the years between.

Through the years, I’ve seen some interesting trends, and the training we do with the older guys always helps us train younger athletes more effectively because we have a chance to “look into the crystal ball” a little and see what they will need as they get older.

Sometimes you’ll hear coaches say things like “If he had used my methods, he would have been so much better.” I don’t look at it like this at all. So many things go into athlete development, that we don’t know exactly what would have happened if their training was different.

So, without judgment, I simply notice some trends in these guys that help me do a better job with younger athletes in an effort to clear up some issues before they are a problem down the road. While many of these guys will play professional sports, their development isn’t always as pretty as you’d expect.

Four things that I have noticed are:

  • Misunderstanding of strength & size
  • Lack of attention to movement quality
  • Lack of attention to flexibility/mobility
  • Under-appreciation for recovery

What’s interesting about this is the fact that we, as coaches, can help younger athletes avoid these errors before they become a problem. Let me briefly address each area so you understand what I’m thinking:

Misunderstanding of strength & size

Many high school and college-level athletes feel like they either need to get as big and strong as possible or they don’t value it at all. Some of that depends on the sport they play, and some depends on their environment or what their coaches value. We need to help athletes put strength/size into perspective, and teach them that these qualities should be developed as a PART of their overall development. In some cases, it’s a small part, and in other cases, it’s more important. But, concentrating ALL of your effort on lifting weights if usually not what athletes need.

Don’t get me wrong, MANY athletes lack strength, so they need to make this priority.  But, many others simply don’t understand how strength training fits into a comprehensive athlete development program, and it’s our job to teach them.

Lack of attention to movement quality

I’m always surprised at how few elite level athletes have gotten much coaching on the way they move. They often haven’t been taught footwork, running technique, or posture, and it’s incredibly rare to meet an athlete who has been coached on their overall quality of movement.

We spend a ton of time teaching acceleration and sprinting mechanics as we work on the 40-yard dash. In many cases, this is the first time they’ve ever gotten this kind of in-depth instruction.

We also give them feedback on the way they look when they move because scouts want to see fluid athletes who can move through space effortlessly. This is about footwork, posture, and the subjective qualities that make them appear to be more or less athletic. I’m talking about things like taking too many choppy steps, heavy feet, rounded backs, flailing arms, or robotic movements. These qualities need to be taught at an early age so athletes feel more natural moving this way. Trying to teach 23-year-olds how to change this in six weeks is not ideal.

This always makes me realize how important it is for us to teach kids these things when they’re younger, and I hope you do the same.

Lack of attention to flexibility/mobility

College coaches tell me all the time that their athletes come in stiff, and they wish there was more of a focus on flexibility/mobility in high school. Then, I hear high school coaches talk about how tight their kids are, and they wish they would have done something about it earlier.athlete development stretching

I see the same thing when training guys for the NFL – a lot of athletes simply don’t give enough attention to this.

So, we need to recognize this pattern and make sure we spend enough time keeping athletes mobile and supple. That doesn’t mean we need to turn kids into contortionists, but flexibility/mobility should be a part of every program. Whether that comes in the form of quality strength training, movement training, or direct flexibility/mobility work is up to you, but make this a priority before it’s a problem that affects everything they do.

Under-appreciation for recovery

Athletes often think that more is better and they believe that they can handle much higher volumes than they should. They rarely take recovery seriously. Instead, they have poor diets and severely lack sleep. The combination of high-volume training and poor recovery is a recipe for disaster.

Sometimes that disaster is obvious and athletes get sick or hurt. More often, it’s discreet and manifests itself as a lack of progress. Athletes train, train, train, but never get the results they desire because they simply don’t understand that recovery is the key to progress.

Athletes usually think that the stimulus (i.e. training) is where are of the gains take place. They don’t realize that the stimulus is simply a way to get their bodies to adapt and improve during recovery. Without adequate recovery, the stimulus won’t elicit great results.

We need to teach athletes the value of recovery, and how to schedule their training to maximize the results. We also need to teach them that all activity dips into their recovery, so their practice schedule, individual skill lessons, physical education classes, and performance training all need to be considered together not by themselves.

I hear athletes say it all the time – “I’m OK. I can do more.”

Yes, I know you CAN do more, but that doesn’t mean it’s going to be helpful. Trust me, I’d rather have an athlete want to do more than one who doesn’t do anything, but motivated athletes just keep doing more until there is a problem. We can teach them the value of appropriate scheduling and how to maximize their recovery.

There are many things that go into athlete development, so I find it fascinating to examine the process from the top down just as much as from the bottom, up. We will always need to give young athletes variety, teach them a love for moving, and give them quality training at the right times throughout their development. Hopefully, understanding these trends will help you create programs that allow athletes to avoid these issues and become the best versions of themselves as they develop.


Jim Kielbaso is the President of the IYCA and owner of Impact Sports Performance in Novi, Michigan.  He has authored multiple books, articles and training products and has spoken at events around the world.  He holds a BS in Exercise Science, an MS in Kinesiology and has gone through multiple certifications through the IYCA, NSCA, NASM and more.  Jim is a former college strength & conditioning coach and has trained thousands of athletes at every level of competition.  He runs a successful NFL Combine training program in Michigan and has been hired as a consultant for major sports programs like the University of Michigan Football Program and the University of Kentucky Basketball Program.


The IYCA Certified Athletic Development Specialist is the gold-standard certification for anyone working with athletes 6-18 years old.  The course materials were created by some of the most experienced and knowledgeable professionals in the industry, and the content is indisputably the most comprehensive of any certification related to athletic development.  Learn more about the CADS certification here:

Foot & Ankle Strengthening for Athletes – Jordan Tingman

You may have heard that many injuries and long-term structural issues can arise from issues in the feet.  The feet and ankles are often neglected in training, but we should really be focusing a lot of our attention on the quality of movement coming from the feet. Structurally, the feet and ankle areas are comprised of many bones and ligaments, and if not able to move properly/efficiently, these structures may not function the way they should under stress, which can easily lead to injuries and compensations.

The foot contains 26 bones, 33 joints, and over 100 tendons, muscles, and ligaments.  There are also 7000 nerve endings in each foot that not only feel different sensations, but more importantly, help us balance, move, stabilize, and sequence movement strategies throughout our bodies.  The structure is intricate because the foot has to perform incredibly small and subtle movements in order to shift weight during complex movements, remain rigid yet supple, and respond to a wide variety of stimulation.

Literally every force we deliver or accept from the ground goes through the feet and ankles.  When we jump or run, we usually think of our quads and glutes creating large amounts of force to propel our bodies.  While this is true, all of those forces ultimately have to go through the foot.  So, neglecting this area would be a major oversight.

Many coaches are intimidated by the complexity of the foot and ankle.  Doctors and therapists spend years to learn the intricacies of this area, so how could we possibly know everything about the foot and ankle?

We don’t have to.

While it would be very beneficial to have a deeper understanding of the foot/ankle, the truth is, incorporating any sort of foot and ankle prep into a program will offer benefits to the athlete. You can incorporate simple exercises into a dynamic warm-up before a practice/training session or you can incorporate them throughout a workout!

I’m not suggesting you are intentionally ignorant of the subject, but it’s not necessary to get overwhelmed and decide to do nothing at all.  Instead, gather as much information as you can, and choose some simple exercises that do no hard and can help keep your athletes healthy and functioning properly.  If these exercises cause pain or reveal more complicated issues, definitely refer them to a specialist.

Here are some simple exercises that you can add to the beginning of your workout:

Foot/Ankle Video

When considering all the different planes that the ankle works in, it is nearly impossible to train every single movement or range of motion, but we should try to provide as much variety as possible in order to strengthen them!

Banded Ankle Work

Always consider how you’ll fit these exercises into a complete program.  You probably won’t have time to perform every exercise shown, but don’t let that stop you from including at least one thing aimed at training this important area.


Jordan Tingman – CSCS*, USAW L1, ACE CPT, CFL1 is a graduate of Washington State University with a B.S. in Sports Science with a Minor in Strength and Conditioning. She completed internships with the strength & conditioning programs at both Washington State University and Ohio State University, and is currently a Graduate Assistant S & C Coach at Eastern Washington University.


The IYCA High School Strength & Conditioning Specialist is the only certification created specifically for coaches training high school athletes.  The course includes several hours of video instruction (including a complete Olympic lifting instructor course) and two textbooks with contributions from some of the top strength and conditioning coaches in America.  Click on the image below to learn more about how to become a certified high school strength & conditioning coach.

How to Perform Face Pulls – Greg Schaible

Face Pulls are on the top of my list for upper back exercises to help develop healthy shoulders, backs and necks.

The problem is that a lot of people do them poorly and actually irritate the shoulder or upper back when performed incorrectly.

This article and video will help you understand some of the key considerations when performing face pulls, and how to avoid the most common errors.


Many people choose to use bands, especially in rehab because so many physical therapy places just have bands. However, you must consider that the tension of the band increases as you get further into the movement where the hardest point of the exercise is. This means the most tension is at the highest position of difficulty.

For that reason, going lighter then you’d think is a good idea when starting out using bands. Also, the resistance should never compromise form.

A better alternative as you increase the load is a cable machine with the proper attachment because the resistance will be equal throughout the exercise.

To keep safety on the rotator cuff and not irritate the shoulder we should also be aware of the attachment point. Which when done correctly is at about the level of your forehead. Too many people use a low attachment point which causes an awkward upright rowing moment. This almost removes the rotator cuff from the exercise and makes it more rear delt. But also places the arms in more of a internally rotated position generally. Which more times than not just irritates the shoulder when done for sets and reps.

Be sure to use a thumbs back grip as this drives supination which leads to external rotation which helps us open our chest and use the muscles of our back and rotator cuff.

The biggest error people make is leading with their elbows and leaving their wrist behind.

The elbows and wrists should move together! This again helps you avoid an internally rotated position with the elbow above 90 degrees helping you avoid impingement at the shoulder. If you cannot coordinate the elbow and wrist moving as a unit you are either using too heavy of a band. Or you are trying to force yourself into a range of motion that you don’t currently have.

Dr. Greg Schaible is a physical therapist and strength coach specializing in athletic performance and a regular contributor the the IYCA. Greg is the owner of On Track Physiotherapy and owner of the popular online education resource Sports Rehab Expert. Greg works with athletes and active individuals of all ages. As a former athlete himself, he attended The University of Findlay and competed in both Indoor and Outdoor Track & Field where he earned honors as a 5x Division II All-American and a 6x Division II Academic All-American.


Dr. Schaible was instrumental in putting together the completely updated version of the Youth Athletic Assessment Specialist 2.0 course that covers a wide range of screens, performance assessments, and advanced assessment techniques.  Learn more about the YAAS 2.0 by clicking the image below.

T-Spine Mobility – Jordan Tingman

Incorporating a small amount of mobility each day will eventually turn into great gains over time.

Mobility can be easily thrown into a complete warm-up, within the workout or at the end of a workout. It is much more important to do a little of something, than doing nothing at all.

The upper back/thoracic spine is made up of a lot of different musculature. The muscles surrounding the thoracic spine tend to tighten up, and often get neglected when working on mobility. When ignoring working on mobilizing these areas, the upper back can get tight, limiting overhead exercises and movements.

When thoracic spine mobility is compromised, athletes will unconsciously compensate by creating excess movement in other joints.  This typically means that the lower back has to create excess movement or stability because the T-spine is not functioning adequately.  It’s not uncommon for low back pain to be the result of issues in the T-spine/scapula, so taking a pro-active approach by spending a little time on this area can pay dividends you may never even know about because the athlete will be healthy.  While we’ll never get credit for it, that should ultimately be the goal of all performance coaches.

t-spine mobility

There are various reasons why we need to work on t-spine mobility:

-Overhead and throwing movements can be limited due to tightness

-Tightness can affect posture in the various squat patterns

-Mobilizing any especially tight areas can lead to injury reduction

To warm up for t-spine mobilization, foam rolling the entire upper body can be very helpful in warming up and stretching the muscle belly.

:30 seconds of each area

  • UPPER BACK-Starting with an upper back roll, crossing the arms in front of the chest
  • LATS-Roll out the lats, by keeping the hand palm up, arm by the ear, rolling all the way from the armpit to the mid rib cage area
  • PEC/SHOULDER- roll out the pec/shoulder area using either a foam roller or even better a lacrosse ball to really dig into the troubled areas
  • T-SPINE PEANUT- utilizing a mobility peanut, roll out the erectors or focus on t-spine extension using the peanut.

There are a variety of exercises that can be used to mobilize the t-spine in extension and rotation. You can use everything from foam rollers and kettlebells to bars and bodyweight exercises.

Here are a variety of exercises that can be used for t-spine extension:

Here are some exercises that can be used for t-spine rotation:

These exercises can also be used as an assessment. When you find an athlete who struggles with these exercises, you can spend additional time with them to address the issue.  If you never perform these exercises, you may never know it’s an issue.

Hopefully, this gives you several options to include in your programming.  It’s not necessary to perform all of these exercises in every session, but inserting them into an overall plan will help you address these issues in a pro-active way.

Jordan Tingman – CSCS*, USAW L1, ACE CPT, CFL1 is a graduate of Washington State University with a B.S. in Sports Science with a Minor in Strength and Conditioning. She completed internships with the strength & conditioning programs at both Washington State University and Ohio State University, and is currently a Graduate Assistant S & C Coach at Eastern Washington University.


The IYCA High School Strength & Conditioning Specialist is the only certification created specifically for coaches training high school athletes.  The course includes several hours of video instruction (including a complete Olympic lifting instructor course) and two textbooks with contributions from some of the top strength and conditioning coaches in America.  Click on the image below to learn more about how to become a certified high school strength & conditioning coach.

Letter to Parents: From Jim Kielbaso – Let Them Struggle

Dear Parents of Young Athletes,

One of the most important skills your child can learn from sports and training is how to struggle with something and eventually overcome it. 

Unfortunately, it can be pretty difficult for us to watch our kids struggle, and our natural instinct is to help them so they don’t have to experience that pain.  Trust me, I have a hard time with this as a dad, too, so I understand. It’s hard to watch my kids struggle and fail because it breaks my heart. But, kids grow exponentially faster, and become more resilient, when they learn how to work hard and struggle for something they want.  

I recently heard Olympic figure skating champion Mark Hammill talk about the years leading up to his massive success.  He said that all anyone ever wants to talk about are his successes, but he talked about how important it was for him to lose and fail over and over again before that.  He talks about how it developed tenacity and a thirst for success because he hated the feeling of losing. The struggles are what turned him into a champion.

If we rush in to rescue our kids from every obstacle in their way, they’ll never learn how to do it for themselves, and they may never develop the grit it takes to succeed in any endeavor.  We all know that life is full of obstacles, so we better help them learn how to overcome them.  

As hard as it is to watch your child fail, teach them how to turn setbacks into comebacks.  Michael Jordan often talks about how impactful it was for him to get cut from his high school basketball team.  That year, he probably grew more than any other year of his life because he wanted to prove his coaches wrong. That setback helped him develop a mindset, attitude and work ethic that propelled him on to become one of the greatest basketball players of all time.  Had he made that team, it’s possible that he would have never developed that spirit, and we might not even be talking about him.

There is a saying in sports that pretty much sums it all up – “skills from struggles.”  

Growth comes when people are challenged just above their skill level.  This forces us to learn something new, try a little harder, and understand things more thoroughly because we have to keep up with those around us who can already perform the task we’re struggling with.  Of course, putting a child in a situation where they are completely over their head can be demoralizing, so it’s important to give kids appropriate challenges so they can feel a sense of accomplishment as they improve.  

Kids who achieve early successes without having to work hard will often get passed up later in life as others learn how to work hard and overcome setbacks.  Early achievers need larger challenges than others at a young age to keep them constantly improving rather than being satisfied with simply being better than kids on their team.  

I’ve seen this happen many, many times in my career, and I even see it in very talented high school athletes who struggle mightily in college because they have never had to work extremely hard to keep up. They get very discouraged, their confidence drops, and they often end up giving up on the sport they were so good at when they were young.  

I also see the parents of these kids get very frustrated and wonder what happened to their super-talented child.  

The same principle applies to other areas of our lives such as academics, work, and social situations.  We don’t necessarily need to “encourage” mistakes, but we often learn much more from difficult situations than when things are easy.  Let your kids learn that they may fail a test if they don’t study. Let them have friends get angry if they aren’t good friends. Let them get fired from a job for not working hard.  Let them sit on the bench when they don’t practice hard. Let them experience painful feelings.

And, don’t rush to rescue them from these difficult situations.  You don’t have to pile on and ridicule them for making mistakes, but try to look at these struggles as opportunities for your kids to learn valuable skills.  Just try to balance being “there for them” with letting them struggle.  

So, while it may tear your heart out to watch your child struggle, it’s probably exactly what they need once in a while to help them learn how to dig down and figure out how to get better.  This is probably going to hurt you more than them, so good luck with this….and wish me luck too.  

Sincerely,

Jim

Jim Kielbaso is the President of the IYCA and Director of the Total Performance Training Center in Wixom, MI.  He has authored multiple books, articles and training products and has spoken at events around the world.  He holds a BS in Exercise Science, an MS in Kinesiology and has gone through multiple certifications through the IYCA, NSCA, NASM and more.  Jim is a former college strength & conditioning coach and has trained thousands of athletes at every level of competition.  He runs a successful NFL Combine training program in Michigan and has been hired as a consultant for major sports programs like the University of Michigan Football Program and the University of Kentucky Basketball Program.


To learn more from Jim, check out the IYCA Certified Speed & Agility Specialist course.  The CSAS is the most comprehensive and scientifically sound speed certification in the athletic development profession.  It truly prepares you to teach and develop speed.  Click on the image below to learn more.

speed & agility certification

How to Develop Mental Strength in Youth Athletes – Jill Kochanek

A common question that I get from coaches is: How can I make my athletes more mentally tough? For as big of a buzz word as mental toughness is though, the concept is a black box. In this post, I’ll open up that box and bust 4 harmful myths about mental toughness. Dispelling these myths is vital for coaches to actually help young athletes develop mental strength and support their overall mental well-being. Before we get there, however, it’s important to consider our current context. That is, why are coaches concerned about developing mental strength in this generation of youth athletes?

Research on Generation Z athletes and preliminary findings from a study I’m conducting with athletic directors across Michigan offer insight. This response from one coach (also athletic director) echoes the perspective of other sport leaders and (partially) resonates with me in my coaching:

“Today’s generation of youth are, for lack of a better term, soft. It’s not necessarily their fault. The environment that they are growing up in is different. Everyone gets a participation trophy. Kids just are less willing to work hard, to work through failure, and grind it out. And parents aren’t letting kids fail. In the classroom and on the court, parents pave the path for their kids. ‘Helicopter parents’ who used to hover have become ‘snowplow’ or ‘lawnmower parents’ who push all the adversity out of the way so that kids never get the chance to learn how to deal with pressure and failure.”

Like this coach, I work with some parents who get out the snowplow at times. I also work with caring and level-headed parents. Consider that parents, like players and coaches, don’t live in a vacuum. The pressure that parents face navigating the youth sport system (the privatized one with a high price tag and year-round training option only) is challenging. We need to confront these challenges through a lens of contribution rather than blame. Coaches need to work with parents and players (and administrators) to ensure that every youth athlete has an empowering sport experience.

So, how do we help young people learn to grow in/through adversity in sport?

First we need to define what mental toughness. And I’ll pose the same question to you as I do to coaches who bring up the topic: How do you define mental strength?

Better yet, engage in this quick reflective exercise: Think of a time when you felt mentally tough. What was the situation? What were your thoughts/feelings/actions in response to that situation?

Now compare your practical knowledge to one prevalent definition within sport psychology. Mental toughness regards values, attitudes, cognitions, emotions, and behaviors that refer to an individual’s ability to thrive through positively and negatively construed challenges, pressures, and adversities(Gucciardi et al., 2009).

This definition is dense. But the complexity and nuance are important to unpack in order to fully understand what mental toughness is and how coaches can best support athlete mental strength and well-being. Let’s debunk some commonly held myths about mental toughness in sport (and life) in order to work through, and from, this new definition.

Myth 1) Mentally tough athletes always think/feel positive thoughts/emotions
Mental toughness involves observable and less visible behaviors such as thoughts and emotions. But people who show mental strength DO NOT always think self-affirming thoughts or feel 100% confident. More positivity does not translate to more mental toughness. Being overly positive and unrealistic in our thinking can undermine our performance and motivation; when we set unrealistic expectations for success and continually fall short, we are less likely to work hard and persist through challenges. Instead, mental strength requires realistic beliefs about our abilities. It requires trusting in and focusing on our individual process—on improving rather than proving oneself— regardless of the situation.

Mentally strong people are also aware of “negative” thoughts and emotions. They thrive through positive and negative situations, which can be external (e.g., game conditions) and internal (e.g., fearing failure). Athletes who show mental strength have courage to acknowledge and examine negative thoughts/emotions to gather information about their situation. For example, if a player feels frustrated because of a team conflict, that athlete shows mental toughness by attending to their “what” (emotion) and “why” (reasons for the feeling) rather than suppressing their frustration (which likely makes team dynamics worse). Mentally tough individuals don’t ignore negativity. They embrace all aspects of their experience to move forward and act in accordance with their values (e.g., use team conflict to strength group relationships).

Myth 2) Mentally tough athletes are not emotional or sensitive.
This myth harkens back to Tom Hanks’ memorable line from A League of Our Own, “There’s no crying in baseball!”. Being mentally tough does NOT mean that you feel fewer emotions or are less emotionally sensitive. As debunked in myth #1, mentally strong people are deeply aware of their emotions. Mental strength requires that we are willing to acknowledge and validate our emotional experiences. In doing so, we recognize that emotions are a common aspect of being human: we are not the only one, and are not wrong for, feeling sadness, guilt, and fear. By mindfully processing emotions, mentally strong athletes can then decide how to best move toward accomplishing their goals. That is, they can consider why they feel the way that they do, and whether/how those emotions are helping or hurting them achieve their aims.

Myth 3) Mentally tough people push through more (physical) pain.
Mental toughness is NOT measured by the number of wind sprints an athlete can push through. I think, or at least I hope, that coaches are steering away from running youth athletes until they puke as their method for building mental toughness. This old-school approach is not only unintelligent but irresponsible. I am not suggesting that all fitness training is bad. But improperly training athletes and risking their physical/psychological health while claiming that you’re “building character” is abusive.

Mentally strong athletes train hard and smart. Training hard and smart means guiding athletes to push their physical limits in developmentally appropriate ways, and also setting boundaries to ensure long-term performance, development, and well-being. Mentally tough athletes understand that proper rest and recovery are a part of their training process. They are disciplined, consistent, and patient. And, they have the humility and courage to step out of the game if injured when “just playing through it” for the short-term glory jeopardizes their long-term goals.

Myth 4) Individuals working through mental health issues are mentally weak.
Mental health issues are becoming more prevalent and visible across competitive sport levels. Advocacy efforts of professional athletes (e.g., Kevin Love, Missy Franklin, Michael Phelps) have helped spark open conversation about mental health issues. These efforts are important because mainstream sport culture celebrates a “no pain, no gain” mentality and silences talk about mental health. Given increases in mental health issues among Generation Z athletes (and youth generally), talking about mental health and disrupting the notion that mental health struggles and toughness are incompatible are critical.

Mental strength includes (learned) attributes and skills that enable individuals to thrive in performance situations. Everyone has the ability to improve their mental strength, but the process to do so is unique to each person. While athletes with mental health issues may experience more adversity that hardly means they are mentally weak. In fact, athletes actually demonstrate and develop incredible mental strength through, not in spite of, their mental health struggles as Michael Phelps describes here.

Practical tips for building mentally strong athletes

Coaches are in an ideal position to challenge myths about mental toughness in order to help youth athletes build mental strength and change sport culture. Here are 4 practical tips to do so.

1. Work with, rather than, around parents.
Encourage parents to let their kids fail. More than this, communicate to parents and players that failure is necessary for learning and growth. Failure as necessary feedback conveys that “success” is not just about the outcome (i.e., winning) but about committing to a young athlete’s individual process—to becoming the best version of one’s self and getting better each day.

2. Create a “brave” space for athletes in training and games.
Coaches cultivate brave spaces by creating (optimally) challenging situations in which athletes are on their “learning” edge. For athletes to learn to embrace physical and mental challenges and uncertainty, coaches need to praise moments when players have the courage to take risks and attempt difficult tasks. We need to narrate that these moments are prime opportunities for growth so that athletes see value in pushing past their comfort zone. Brave spaces also have boundaries, and coaches must help athletes set these. We need to teach athletes how train smart and listen to their bodies. Along with giving athletes encouragement to test their limits, we must emphasize that recovery is a part, not the absence, of training.

3. Encourage athletes to become aware of their thoughts and emotions.
Invite athletes to view these internal experiences—whether they appraise them as positive or negative—as normal and potentially useful for achieving their goals. Guide athletes to define their values and long-term goals. Regularly check in with players and pose reflective questions to help them consider why they feel or think the way that they do, and whether/how those thoughts or emotions are helping or hurting them achieve their goals. Help them become aware of and responsive to their own (and others’) emotions instead of suppressing them or avoiding perspective taking.

4. Leverage social media to help athletes develop mental strength.
Social media impacts how our young people view failure and their development of mental strength. Social media is often used as a platform to make ourselves appear perfect. We rarely post (or view posts) of failure or adversity and more often see images of championship celebrations and college signing day. While I don’t want to discourage people from celebrating their successes, coaches can help athletes understand that social media largely shows the “positive” parts of others’ process. As coaches, we can use examples of professional athletes working through adversity to start conversations with youth athletes. We can also think critically about what we post (and invite athletes to do so), by asking the question: Is my post an effort to prove myself (and appear perfect) or capture my process?


Jill Kochanek is a doctoral student at the Institute for the Study of Youth Sport at Michigan State University. She is also a high school soccer coach. As a coach-scholar, Jill is passionate about bridging the research-practice gap to make sport a more inclusive, empowering context. Her research and applied work centers on helping athletes (and coaches) take charge of their own developmental process and social progress. If you enjoyed this article, feel free to visit her youth sport coaching blog, bothandcoaching.blog, for posts that address other topics related to sport psychology and sociology and follow her on Twitter @bothandcoaching.
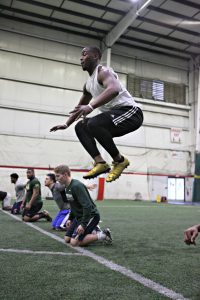
The IYCA is dedicated to helping create better experiences for young athletes all over the world, and the IYCA Youth Fitness Specialist certification is the industry gold-standard for youth fitness and sports performance.  Click on the image below to learn more about the YFS1 certification program.

Hip Stretches for Lower Back Pain – Jordan Tingman

It is very common for athletes to experience lower back pain, especially when they begin a new training program or train harder than they have in the past.  As muscles get sore and/or stiff from training, they will “hold onto” certain positions as a way to maintain different positions.  Often, tightness in the internal hip/back muscles throws postural alignment off, which can lead to even more pain.  This pain can be felt in various parts of the spine, but in this article, I will mostly focus on stretching muscle groups in the hips and lower back.

When stretching tight areas, it is not necessary to stretch to the point of great pain.  Of course, many people feel a little uncomfortable while stretching, especially when they are tight, but it shouldn’t be extremely painful.  There is absolutely no evidence to show that stretching “harder” will elicit better results.  In many cases, stretching too hard can cause muscles to contract as a protective mechanism and may even lead to acute injuries.

Slowly ease into a stretch, and gradually increase the range of motion.  There is evidence that suggests stretches of up to one minute will increase flexibility faster than very short times.  It is also recommended to stretch often in addition to working through full range of motion movements.  Correcting imbalances and/or alignment issues is also crucial to the process of alleviating tight muscles so be sure to assess and address these issues if tightness persists.

This diagram shows many of the internal muscles around the hip and lower back than often get tight or sore and contribute to lower back pain:

Lower back pain in athletes is often an indication that something in the core isn’t functioning properly.  A variety of reasons that lower back pain may occur include:

  • Imbalance of the hips
  • Tightness of the structure around the hips
  • Weakness of the core muscles- putting pressure on joints to attempt to stabilize external load
  • Soreness of the lower back musculature when exposed to lower body pulling exercises

Of course, there is always the possibility of disk derangement, fracture/spondy, or other serious issues.  If the injury is extremely painful, do not allow the client/athlete to stretch too aggressively or continue normal training, especially if the area is still very inflamed. Make sure to consult with a doctor or physical therapist before getting cleared to train them again.

It is recommended to train “around” lower back injuries with modifications rather than train “through” them without altering your program.  An example would be replacing squatting movements (or any movement where weight is placed on the back) with exercises like lunges, leg press, or resistance-band work.

If the pain is less acute and more of an “achy” feeling, try working on these stretches to aid in releasing the hip structure around the lower back.

These exercises can be paired with movements like squats, deadlifts, or Olympic lifts to use rest time between sets more productively.  This rest time can be very useful in mobilizing various aspects of the lower body in an effort to get more out of the training program.  They can be used as a part of a comprehensive warm-up or cool down, and they can even be given as “homework” for specific athletes who need additional work.

In addition to these stretches, make sure you are strengthening the core alongside them. Until the core structure around the back is strong enough, loading the spine may continue to cause discomfort.

These mobility exercises should help keep athletes functioning properly and feel less stiffness or pain in their hips and lower back.  Once you teach them and place them into a routine, your athletes will thank you for helping them stay healthy.

Jordan Tingman – CSCS*, USAW L1, ACE CPT, CFL1 is a graduate of Washington State University with a B.S. in Sports Science with a Minor in Strength and Conditioning. She completed internships with the strength & conditioning programs at both Washington State University and Ohio State University, and is currently a Graduate Assistant S & C Coach at Eastern Washington University.


The IYCA High School Strength & Conditioning Specialist is the only certification created specifically for coaches training high school athletes.  The course includes several hours of video instruction (including the Olympic lifts) and two textbooks with contributions from some of the top strength and conditioning coaches in America.  Click on the image below to learn more about how to become a certified high school strength & conditioning coach.

Overlooked Keys to a Great Push Up – Greg Schaible

The push up is one of those exercises that everyone loves to do, but few athletes or clients do them exceptionally well….

This video goes over three of the most important technical aspects of the movement: 

Most people understand the first point. The elbows should be at 45 degree angle or slightly under. Not too in close to the body or flared out really wide either.

Scapula thoracic positioning is a high priority during a push up. Rib cage retracted at the top of the push up with scapula sitting flush on the thorax. 

An important part of the serratus is to protract the scapula but also retraction of the rib cage. At the top of the push up, you should not see a medial border prominence of the scapula. At the bottom position of push up the scapula retracts. push up

Ensuring the athlete is avoiding hyper extension at the low back and anterior pelvic tilt will go a long ways to help this. The body should move as a unit up and down from the ground. A common analogy I use is “imagine your body as an elevator moving up and down together.” Keeping the position of the torso sturdy with the ribcage stacked over the pelvis helps locks in the mid-section, making it easier to move as a cohesive unit.

A final and often overlooked aspect of a push up is a slight forward lean when dropping down toward the ground so the chest is in line with the hands. Then pushing slightly backwards while pressing back up to the top position so the hands are directly underneath the shoulders. This angle of pressing is very similar to the bar path you should use while doing a bench press.

Pressing back is also an important component that helps the serratus become more active as you are pushing up towards 90 degrees even slightly above at top position of push up. Those who struggle with getting the medial inferior border flush on the thorax tend to benefit greatly from this aspect. As the shoulder moves to 90 degrees of flexion and slightly past the serratus becomes most active. So if you imagine pushing up and back, the shoulder starts moving through more flexion which often results in better usage of the serratus with the exercise.

Most people understand the first point. The elbows should be at 45 degree angle or slightly under. Not too in close to the body or flared out really wide either.

Scapula thoracic positioning is a high priority during a push up. Rib cage retracted at the top of the push up with scapula sitting flush on the thorax. 

An important part of the serratus is to protract the scapula but also retraction of the rib cage. At the top of the push up, you should not see a medial border prominence of the scapula. At the bottom position of pushup the scapula retracts. 

Ensuring the athlete is avoiding hyper extension at the low back and anterior pelvic tilt will go a long ways to help this. The body should move a unit up and down from the ground. A common analogy I use is “imagine your body as an elevator moving up and down together.” Keeping the position of the torso sturdy with the ribcage stacked over the pelvis helps locks in the mid-section, making it easier to move as a cohesive unit.

A final and often overlooked aspect of a push up is a slight forward lean when dropping down toward the ground so the chest is in line with the hands. Then pushing slightly backwards while pressing back up to the top position so the hands are directly underneath the shoulders. This angle of pressing is very similar to the bar path you should use while doing a bench press.

Pressing back is also an important component that helps the serratus become more active as you are pushing up towards 90 degrees even slightly above at top position of push up. Those who struggle with getting the medial inferior border flush on the thorax tend to benefit greatly from this aspect. As the shoulder moves to 90 degrees of flexion and slightly past the serratus becomes most active. So if you imagine pushing up and back, the shoulder starts moving through more flexion which often results in better usage of the serratus with the exercise.

Dr. Greg Schaible is a physical therapist and strength coach specializing in athletic performance and a regular contributor the the IYCA. Greg is the owner of On Track Physiotherapy and owner of the popular online education resource Sports Rehab Expert. Greg works with athletes and active individuals of all ages. As a former athlete himself, he attended The University of Findlay and competed in both Indoor and Outdoor Track & Field where he earned honors as a 5x Division II All-American and a 6x Division II Academic All-American.


Dr. Schaible was instrumental in putting together the completely updated version of the Youth Athletic Assessment Specialist 2.0 course that covers a wide range of screens, performance assessments, and advanced assessment techniques.  Learn more about the YAAS 2.0 by clicking the image below.