fbpx

Archive for “Athlete” Tag

Jim Kielbaso Talks Shop with Cliff Avril

Talking Shop with Cliff Avril and Jim Kielbaso


Cliff Avril of the Seattle Seahawks joins the Impact Show to discuss his journey from an 0-16 season to Super Bowl Champion.

Cliff talks about the difference between his experiences with the Detroit Lions and the Seattle Seahawks and how the environment really made a difference in the mindset of the entire organization.

What is really interesting is what he says when he talks about what he went through as he prepped as a younger athlete. It’s probably not what you think an NFL football player would say.

LISTEN NOW

Cliff also talks about some of his greatest influences. It’s some good stuff. There are many ways you, as a Coach, can have a positive impact through positive coaching. Go get em’!

Baseball Season is a Marathon – Not a Sprint

As baseball season is well underway in most areas of the country, youth athletes across the country are dusting off gloves and bats and have geared their arms up for the spring season.

At any age, there is a sense of urgency to make every toss faster and further than the one before it. No matter the position, throwing can cause wear and tear on even the most prepared arm.

Here are THREE recommendations that every athlete should follow to keep them ON the field and OUT of the doctor’s office.

#1: Mechanics over Throwing More

The idea that to throw better you just need to “throw more” is rampant in the youth sports arena. It seems the same goes for all sports. Shoot more baskets, hit more slap shots, or simply jump until you can’t jump higher.

There is some truth to this but the key word here is some.Boy Throwing

Pro Tip: There are volume limits of which the shoulder and elbow can tolerate before breakdown sets in and thus the title of this article.

Young athletes come out of the gate sprinting in late winter/early spring and wear their arms out before things really heat up.

Teaching proper mechanics is one great strategy to reduce wear and tear on the arm. No different than a car with poor alignment where one tire wears faster than the others, the same is true for throwing. A great way to do this is to focus on throwing mechanics at the beginning and end of each practice. Perhaps it’s odd to focus on mechanics when the arm is exhausted but this is where education is most important.

The goal here is two fold.

First, having the athlete focus on throwing correctly, even for short distances, will reinforce correct mechanics while tired. Second (and most important), if a baseball player cannot throw correctly because their arm is too tired or it hurts, then it’s time to stop!

Too often athletes will just “sling” the ball or alter mechanics to keep throwing. This is a very bad idea. This is another solid education moment for any athlete because fatigue and pain seems to help absorb words better than when things are going well.

#2: Strengthen the Support System Throughout the Season

Once the season starts, the strength and conditioning that was done in preparation seems to go by the wayside. This makes sense, as there are so many hours in the day and hitting your cutoff man takes precedent over crunches.

Throwing requires a complex series of movements and too often we focus on only a few parts of the chain. Postural and scapular muscles are very important to position the shoulder correctly. When these muscles are strong, the rotator cuff doesn’t have to work as much to maintain good positioning while throwing.

Strengthening the postural muscles in the middle of the spine, obliques, and lower trap muscles helps. The combination of these muscles rotates the trunk and creates ideal arm angle during throwing. As long as these muscles are all working together, the rotator cuff doesn’t take as much of a beating.

Pro Tip: Simple exercises will do the trick such as superman’s, prone shoulder flexion with light dumbbells, and supine single leg adduction drops from side to side to engage the core.

What does swinging have to do with it?

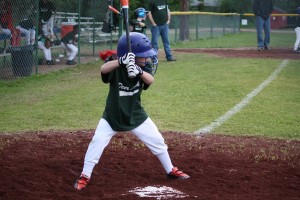
Child at batThousands of swings over the course of the season reek havoc on the hip, pelvic, and lower back. This is because all the force transfers from the legs, up through the back, into the arms, and then contact is made with the ball, sending a jolt of energy back through the system.

This is important to throwing because many hitters and athletes will start to develop tight psoas, chest, and lat muscles from swinging and sprinting. When all these muscles become over-tightened, they tend to pull the lower back into extension and then shoulder into a downward rotated position.

What does this mean? Thousands and thousands of throws will become challenging, reducing the efficiency and quality of every throw.

Pro Tip: Be sure to keep the hips, chest, and lower back muscles nice and loose to maintain ideal body mechanics with throwing.

#3: It’s a Marathon, Not a Sprint

Every long distance runner knows they have to pace themselves because training only for 20 miles won’t finish the race. Baseball is no different. Having and executing a long-term game plan to ensure that a young athlete’s body is working from start to finish is paramount to long-term athletic success.

Too much of youth sports focuses on a game, a tournament, or a showcase. If attitudes and habits only address the now, the future for baseball—or any sport for that matter—is nothing more than a crap shoot.

At work, we put money into a 401k for retirement, we exercise to keep the heart strong and pumping, and we take vacations to keep stress from eating our body’s apart.

Do all the little things right and the big things will take care of themselves.

Play ball!

Dr. Keith Cronin, DPT


Want to help make sure your athletes are prepared to perform for the long-run?

Learn how to leverage the Long Term Athletic Development Model to ensure your athletes are prepared to perform. Sign up today to get instant access to our free 7-minute video and PDF checklist.

Learn More


About the Author: Keith J. Cronin

Keith CroninKeith J. Cronin is a physical therapist and owner of Sports and Healthcare Solutions, LLC. Keith currently supports US Operations for Dynamic Tape®, the “Original” Biomechanical Tape®, providing guidance for education, research, and distribution. He graduated with his Doctorate in Physical Therapy (DPT) from Belmont University in 2008 and later earned his Orthopedic Certification Specialist (OCS).

Prior to graduate school, Keith was a collegiate baseball player and top-level high school cross country runner. He also had the opportunity to work as a personal trainer (CSCS) prior to his career in physical therapy, providing a very balanced approached to educating fitness and rehabilitation. Keith has focused his career on the evaluation, treatment, injury prevention, and sports conditioning strategies for athletes, with particular attention to youth sports. He currently lives in the St. Louis, MO area with his wife and two daughters, Ella and Shelby.

Additional noteworthy items about Keith:

  • Keith is currently a reviewer for the International Journal of Sports Physical Therapy (IJSPT) on a variety of topics including throwing athletes, concussions, and ACL rehabilitation.
  • Keith has produced several online CEU courses for PTWebcuation.com on the topics of running injuries, ACL rehabilitation, Patellofemoral Syndrome, and injuries to the Foot and Ankle.
  • In 2012, Keith participated in a concussion education program in Newcastle, OK that resulted in the documentary “The Smartest Team: Making High School Football Safer” which had several runs on PBS worldwide.
  • Keith has also been published in a variety of media, publishing almost 100 articles through venues including MomsTEAM.com, Advanced Magazine, the 9s Magazine, the American Coaching Academy, and Suite101.
  • Keith was also featured on Fox2News several times on topics of concussions and ACL injuries.
  • In 2008, Keith was a winner of the Olin Business Cup at Washington University for his product innovation “Medibite” a jaw rehabilitation system designed to improve the outcomes for individuals suffering TMJ dysfunction.

Monitoring Part 2- Monitoring Tools That Every Coach Needs

In Part 1 of this blog I discussed why we monitor and considerations for monitoring your athletes.  Part 2 is going to deal with how we monitor at the high school level.

Monitoring can be an expensive venture, but there are also less expensive ways that can be implemented by virtually anyone at any level.

This blog will detail two practical and inexpensive ways in which, monitoring can be implemented to help you make decisions, allowing you to meet your athletes where they are at on any given day.

#1 Surveys

Having your athletes take quick daily surveys can help create awareness regarding their habits.  These surveys can be simple  and ask as few or as many questions as you would like. Keeping it simple is best. Here is an example of some of the questions to ask:

  • How many hours did you sleep?
  • Did you eat breakfast?
  • How many bottles of water did you drink?
  • How tough was practice yesterday on a 1-5 scale with 5 being the hardest?
  • How tough was your workout yesterday on a 1-5 scale with 5 being the hardest?
  • How do you feel overall 1-5 scale with 5 being the hardest?

You could make a survey through excel pretty quickly and log your information there to keep track of long term trends with your athletes. There are a couple of ways in which this can be beneficial for you.

  1. Make educated adjustments to your plan dependent upon feedback from the athlete
  2. Identify, where you feel they are at from a readiness standpoint that day.
  3. Look at long-term trends both individually and globally to make better decisions in programming for your athletes.

Individually, you may find that your athletes do not get enough sleep on Monday nights due to practice and academic obligations. Globally, you may find that the football team’s toughest day is on Tuesday every week. Knowing that your athletes average 6 hours of sleep on Monday nights and also have their toughest day on Tuesday allows you to adjust and make the best decision for your athletes that day.

It is very important that you use the data that you collect!

Pro Tip: Collecting data for the sake of collecting data is counter-productive. The adjustments you make off of the data collections is what is of real significance.

You can also up the ante and implement technology to take surveys. There are programs that exist where athletes can enter survey information into their phones, and it collects and organizes the data. This is a real time saver for busy trainers.

Here is an example of a survey:

Monitoring Part 2 Image- Fred Eaves

#2 Autoregulation (APRE-RPE Scales)

A second cost-effective way to monitor your athletes is by using an APRE/RPE scale in their strength training programming. APRE is defined by Dr. Bryan Mann as Autoregulatory Progressive Resistance Exercise.  APRE is a method that takes the daily readiness of the athlete into account through adjustment protocols that dictate working sets.  

There are two warm up sets, and then the third set is a set to failure at a prescribed rep max (RM). The results of the third set dictate the weight used on the fourth and final set.

As a coach, this can be used to help the athlete train to the highest level possible for that specific training session according to the physical state of the athlete.

We do not use strict percentages in our program but rather we use them as a guide.

Use this auto-regulation method to dictate our training loads for the day.

Pro Example:

I always use the example of the athlete who slept 3 hours the night before a hard training session that is under tremendous personal and academic stress when describing the need for this type of training. This athlete may have a prescription to hit 2 reps at 95% that day, but due to his physiological state that 95% is really more like 105% that day. This is why autoregulation can play such a key factor in the development of your athletes.

Dr. Mann from the University of Missouri has done a tremendous amount of work in this area, and has written an E-book specifically on APRE methods. 1

Mann’s Example:  

Here is what typical APRE protocol according would look like:

2016-02-29_1609

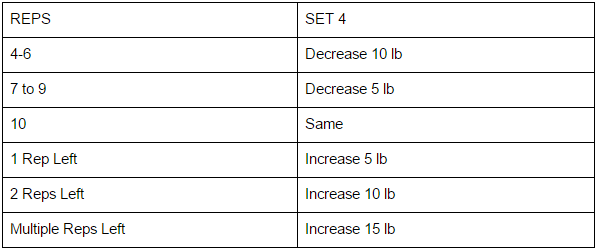
SET 4 ADJUSTMENTS- REFER to this chart after set 3

2016-02-29_1611

An RPE scale in conjunction with APRE methods is another effective manner in which to implement RPE. RPE  stand for rate of perceived exertion.  Athletes use this rating scale to rank the difficulty of a set in training.

Pro Example: Sample RPE rating scale

2016-02-29_1607

Pro Example:

An example would be an athlete does 155lbs. for 10 reps. When he finishes this set on set three, he rates whether or not he had one rep, two reps, or multiple reps left in the tank. Then picks an appropriate weight to finish his fourth set, using the adjustment chart below.

Here is an example of what this looks like:

2016-02-29_1604
SET 4 ADJUSTMENTS- REFER To This Chart after set 3

2016-02-29_1603
Look at long term trends when recording their numbers to make sure there is consistent progress.  Do not worry about disp as this is common due to the variable nature of the high school athlete.

Conclusion

Two simple and cost-effective measures in which to monitor and adjust for your athletes have been outlined.  Use these tools to tremendously impact your athletes in way that is both feasible and practical.


Are your athletes prepared to perform?

Download our free PDF and Overview video on the long term athletic development model.

WFIYCA


About the Author: Fred Eaves

Fred Eaves, Ed.S, M.Ed, CSCS, RSCC, IYCA, USAW, USATF, BIOFORCE Conditioning Coach Certified,  2015 NSCA H.S. Strength Coach of the Year, 2013 Samson Equipment & AFM H.S. Strength Coach of The Year
References

  1. Mann, B. (2011). THE APRE: The scientifically proven fastest way to get strong.


Bands for 6-13 Year Olds

Need bands? Here is a special coupon for your purchase at www.resistancebandtraining.com : RBTIYCA15

RBT-15offyouthequip-coupon-V2

Pushing Power in Athletics

Power in Athletics

When it comes to developing the ability to push someone around, a skill necessary for almost every team-based sport, there isn’t a better training tool than the push up.

I’m sure there are plenty of 5/3/1, Bigger Stronger Faster, or other weight room guys that will argue a big bench trumps someone who can crank out a bunch of push ups any day.

That’s when I refer to the great Earl Campbell and Herschel Walker, two incredibly successful and punishing running backs in the NFL, who reportedly were body weight training guys. They swore by push ups and body weight exercises and clearly had no problem pushing around the best in the world over and over.

Additionally, you have to look at the population of athletes in front of you. We have mostly late middle school or high school age kids who have a low training age and lack the ability to activate their entire body. The push up and its progressions give us an opportunity to teach that skill to our athletes.

More importantly, a girl that can crank out 10 full push ups and a boy that can knock out 25, in our experience, has a body well-prepared for sport and the contact typical of most team sports.

Finally, from a biomechanical standpoint, I look at the push up and see the direct correlation to pushing necessary for sport. The body stabilizes on the ground with four contact points, but the majority of the body MUST be active when pushing away from the ground. Otherwise, we might as well be doing the worm.

That pattern very closely resembles an athlete pushing someone on a field or court, with two legs on the ground and the entire body activated.

Conversely, when assessing the mechanics of a bench press, the back, glutes, and (sometimes) thighs are in contact with a stable surface. I don’t know of a situation in team sports where that much of the body comes in contact with a surface while pushing. The exception, of course, is being on the bottom of a pile of players after a tackle and pushing someone off you, which is not ideal for high performing athletes.

So let’s take a look at our progressions to get a young athlete crushing push ups on a regular basis!

Progressions:

Plank on elbows/hands

When doing a plank on the elbows or hands we are looking for rigidity of the entire body and will use various cues to teach each body part how to activate optimally:

  1. Active legs (straight as an arrow)
  2. Glutes (squeeze a quarter between the cheeks)
  3. Trunk (brace like someone is going to punch your gut)
  4. Shoulders (envision a towel between the elbows or hands and try to rip it apart)

The plank requires a lot of focus and should be difficult to hold for a long time. Therefore, we find it much more beneficial to teach athletes a plank by having them fire everything for brief periods (10-20 seconds) rather than hanging out in a plank for a minute with just enough activation to make it look good.


Mountain Climbers

Mountain Climbers, in our world, don’t differ greatly from a plank. The only difference here is that the athlete now must learn to stabilize in a dynamic setting.

By only moving one leg at a time, they get the chance to maintain full body bracing, like the plank, while actively driving the knee towards the trunk.  Here, the athlete must be on his or her hands. Thus we implement a new cue, “push the ground away.”

By using that cue, the athlete now aggressively pushes his or her body away from the ground, giving the leg more room to move and activate the scapular stabilizers that are generally very weak and assist in poor posture with young athletes.

We also ask athletes to “torque the ground” with the intent of turning the hands away from each other. The hands shouldn’t move, but when torquing occurs, the arms become more active and better prepared for a push up later on in the progressions.

Once an athlete shows quality movement with the mountain climber, we will have him or her start to move the leg with aggression while stopping it at 90 degrees to the body. The exercise then turns into an excellent front leg drive drill for acceleration training.


Assisted Push Ups

We use two main variations of the standard push up to help young athletes progress towards completing a push up that is repeatable and consistent through fatigue.

Our first and most common assisted push up is completed via the use of a resistance band attached to the athlete’s body and a point well above the athlete’s body (typically 7-9 feet high on a rig or hook).

There are some significant benefits to this variation. First, the movement is quite similar to an unassisted push up from the ground. Second, the athlete can torque the ground with his or her hands and arms like we cue during an actual push up.

Once an athlete has developed sufficient assisted pushup strength and can perform the movement without the band, there is almost no adjustment necessary for a body weight push up.

There are, of course, limitations to any assisted pattern.

First, the core is supported during the assisted pushup and for many of our athletes who are stuck in anterior tilt, core strength is the limiting factor and sometimes allows them to continue doing the worm instead of a push up once the band is removed.

Second, we often miss full range of motion (ROM) with our younger athletes, particularly boys. They want to crank out 20 push ups because, “that’s what I did when I tested for football!” However, the only way their chest would touch the ground with their “testing push ups” would be if they had a 60-inch chest. And I have yet to see a 16-year-old that looks like Lou Ferrigno.

**We started using bean bags (like the ones used for bean bag toss) to force full ROM. Our athletes need to touch their chest to two bean bags stacked on top of each other and then progress to one bag before we take the band away and have them train the full push up. **

The other variation we use is an elevated barbell on a rack.

Again, there are both positives and negatives to this assisted push up variation.

First, it is great for younger female athletes who truly lack upper body strength. They can see gradual improvements in strength since the holes on our rack are 1-inch apart. They can make small gains, sometimes within a singular training session, and certainly over a 6-week training program.

Second, because of the height, those athletes who lack upper body strength can start to make significant gains in chest, shoulder, and arm strength since they don’t have to struggle through the pattern and can truly focus on form, positioning, and muscle tension.

But this variation also leads to some potential issues of which coaches need to be aware.

First, due to the angle the athlete is at, the shoulders tend to elevate once the chest and arms have fatigued. So you either need to stop the set before that point or cue the athlete’s “shoulders away from their ears.”

Second, since the hands are on the bar, not on the ground, torquing is nearly impossible. I am not going to lie to you and say I haven’t seen it done, but generally those just learning a push up can’t start pulling apart a bar plus do all the other things they need to do correctly.

Remember, this isn’t our end all, be all. Instead, it is a stepping stone from a mountain climber to a full push up from the floor.


Push Ups

The push up is our end all, be all. I fully believe an athlete does not need to train bench press unless they are required to test for their sport. For the sports required to test the bench, like football, there is enough contact and pushing involved in practice and play that it justifies working the bench press into programming.

However, no matter how advanced our athlete is starting out, I want to PERSONALLY see them do ten perfect push ups before they put their face under a bar and start benching.  All too often we have athletes come in who bench and are stuck at a certain weight.

When they show me their push up, it’s evident they lack the full body activation necessary to do a push-up. Once we train the push up correctly, they go back to the bench and magically set a new personal best.

The things we coach in a quality push up stay consistent with everything taught in the previous movements, but we add additional cues to maximize pushing power.

  1. Create rigidity through the body (body is one long piece of solid oak)
  2. Torque the ground through the hands (rotate the hands away from one another)
  3. Pull the body to the floor (rip the ground apart to give the chest space)
  4. Push down as your body comes up (push the ground away)

Once an athlete shows the ability to accomplish this and get his or her chest to the ground for a reasonable amount of push ups, we may add resistance in the form of plates on the athletes back. We had some strong male athletes rep out ten push ups with 90+ pounds on their back, so if you don’t think you can overload the push up, you’re wrong!

By taking the proper steps in progressing a young athlete through the push up, you will create a powerful, stable athlete capable of pushing around anyone he or she chooses.

And when the athlete returns to his or her team and can crush all teammates in push ups, they walk a little taller. When we as coaches can create confidence like that, we win!

ADAPT and Conquer,
Coach Jared


About the Author: Jared Markiewicz

JarredJared is founder of Functional Integrated Training (F.I.T.). F.I.T. is a performance-based training facility located in Madison, WI. They specialize in training athletes of all levels: everyday adults, competitive adults and youth ages 5-20+.

The long-term vision for F.I.T. is recognition as the training facility for those desiring to compete at the collegiate level in the state of Wisconsin. Alongside that, to also develop a platform to educate those in our industry looking to make strides towards improving the future for our young athletes.

Find out more about Jared’s gym by visiting F.I.T.

Career Highlights

  • 2014 Fitness Entrepreneur of the Year – Fitness Business Insiders
  • 2014 IYCA Coach of the Year Finalist
  • Volunteer Strength Coach for West Madison Boys Hockey and Westside Boys Lacrosse
  • Helped develop dozens of scholarship athletes in 3 years of business
  • Instructed Kinesiology Lab at UW-Madison
  • Houses an internship program at F.I.T. that started in 2013
  • Member of Elite Mastermind Group of Nationwide Fitness Business Owners

Push Ups Help Develop Powerful Athletes:

Learn more power evolution techniques today.

IYCA-PowerEvolution-V1


Why Olympic Lift?


Olympic lifting With Young Athletes

Olympic lifting young athletes
 

By Wil Fleming


There is a large portion of coaches that don’t think Olympic lifting has any benefits whatsoever. These coaches believe that the benefits of Olympic lifting is over blown, inflated and doesn’t really pertain to athletes. They cite the time it takes to teach athletes the lifts (too long they say), and they cite risk vs. reward (they say the risk is too great for too little reward). This post is not for those coaches, if you are one of those coaches, then I applaud you for creating more explosive, faster and more dominant athletes while not using Olympic lifts. This post is for the coaches that are using Olympic lifting or on the fence about these lifts, that need more ammunition when discussing their programs or want a final piece of the puzzle to commit to training their athletes with these lifts.


Type II muscle development


Type II (Fast twitch) muscle fiber is the golden currency for successful athletes. Greater type II muscle makes athletes more explosive, and faster. Type II muscle fibers are part of high threshold motor units and only react to high output activities, so curls with the 25 lbs dumbbells are not going to cut it. Olympic lifting uses high power movements and recruits type II muscle for activation, the more explosive movement is used the more preferentially these units will be recruited. There are movements that replicate the power output of Olympic lifts, but don’t hit on all the other great parts of Olympic lifting.


Improved coordination


The Olympic lifts are a great display of coordination and motor skill for all athletes. There is a precise control of the body that is necessary to complete these lifts. While this coordination is not identical to that required by any other sport nothing else in the weightroom is an identical match to sporting events either. This coordination does center around the hips and legs, similar to many other sporting events.


Improved power characteristics


The completion of the Olympic lifts includes full extension of the hips and knees in an explosive manner. This improvement has great carryover to hip and knee extension power in other areas of athletics. Athletes that are trained extensively in the Olympic lifts show improved rates of force development which greatly improves their power creating ability.


Improved force absorption


Often overlooked, receiving the bar overhead or at the chest requires the athlete to absorb force. This is the piece of the puzzle that can really make the Olympic lifts something that keeps athletes healthier. Most displays of power in the field of play must have a corresponding need to absorb force upon landing, Olympic lifts above other displays of power in the gym can provide this.


Success elsewhere


If you own a private facility the fact of the matter is, your high school athletes are probably doing another program at their high school. That program likely contains an Olympic lifting of some sort (probably power cleans). If you are not going to teach them how to power clean or hang clean, then you are just relying on someone else to do it for you. To give your athletes the best chance of success it is imperative that a qualified coach teaches them how to lift.


There are some young athletes with whom I do not use Olympic lifting with. Those athletes that have a history of back pain or back injuries would be first among them. For young athletes (12-14) I teach the Olympic lifts only as a skill, something to be improved upon by repetition not by weight used. For other athletes that are able, the Olympic lifts can serve a great role.


Olympic Lessons For Young Athletes


Olympic Lessons


Olympic lessons for young athletes


By Wil Fleming


Well it should go without saying, as a former athlete in an Olympic sport, there is no greater time than the Olympics. So many sports put on display, so many great athletes, and so many years of hard work finally shown on the world stage, means that there isn’t a better sporting event on the planet.


As a coach it is important to relay the messages of the Olympics to the athletes we work with on a daily basis.


1) Hope
The opening ceremony demonstrated this to its full effect. For those who missed the opening ceremonies, typically the host country will choose a famous former Olympian to be the final torch bearer as they light the cauldron that burns throughout the Olympics. Rather than choosing a great athlete from the country’s past, Great Britain decided to have the Olympic flame lit by seven athletes of the country’s future.


This gesture demonstrated hope, one of the greatest things that we can instill in our young athletes. While there are 10,000 athletes participating in the games, not every athlete we work with is destined for that glory, or a college scholarship, but we can instill the hope in each one of them that they can be the best athlete that they can be.


Each day we should aspire to inspire our young athletes. Find out what their REAL goals are, not just the typical. Several months ago I found out that one of my athletes didn’t want a college scholarship, all he wanted to do was score a touchdown for his high school football team. Considering he was playing guard for his team, this was not likely to happen. After consulting with him on his diet (losing 30 lbs and improving his 40 yd time), and even talking to his football coach, he is now a tight end and he is closer to realizing his REAL dream.


2) Skill
There are 28 sports in the Olympics and countless events that divide each of these sports. There will be plenty of jokes made about the merits of badminton and other sports and their inclusion in the Olympic games, but a true coach will seek out the skills necessary to compete at a high level in those sports and learn from these lessons.


Look at the hand-eye coordination of a table tennis player. Look at the lateral movement of the badminton player, think about the cardiovascular endurance of a shooting athlete trying to fire a shot between heart beats. Appreciation of these skills can help lead you to being a better coach, and thinking of new ways to help your athletes improve.


3) Defeat
A big part of reality is that of the 10,000 athletes that go to the Olympic games to compete, not many of them will come home with a medal. A majority of the athletes at the Olympic games will end their Olympic career in a defeat. Does that mean that they are a failure? No, not at all but it does mean that dealing with failure or defeat is part of choosing to be an athlete.


Learning to take defeat, or setbacks in training, is part of being an athletes. Young athletes who learn this lesson can benefit greatly by embracing that each defeat means another opportunity to get better.


So this week as you watch the Olympic games, think about the opportunities that we as coaches can embrace as some of these Olympic lessons can help our athletes get better in the process.


Youth Sports Training Program Design Considerations


Youth Sports Training Variables

By Art McDermott
 

The purpose of this article to present some of the key variables required for a successfully designed youth sports training and performance program. This topic always seems to produce some VERY strong opinions about what works, what does not and what the latest and greatest techniques may be.
 

Once all the sweating, lifting and marketing are done, sometimes it may be difficult to tell the difference between one sports performance facility and another.
 

With rare exceptions, even a young athlete’s parents do not know the difference between a good program and one that is not so good. As a strength and conditioning professional, it is your job to be able to clarify this.
 

At the end of the day, there is one thing that cannot be hidden from the light. Results. Physical Testing at the start of a summer program and then a retest at the conclusion of the training will always reveal the answer to the single most important question.
 

Did the youth sports training program work?
 

We cannot cover all the facets that go into a complete program in one article. This topic takes an entire semester when I cover it with the physical therapy students at UMass Lowell. However, I will do my best to present to most pressing issues.
 

There are nearly as many different approaches to youth sports training program design as there are coaches in the industry. However, here some of the factors that should be considered when designing an effective program.
 

* Time Frame – How long do you have to work with the athlete?
* Sport – What position does the athlete play?
* Gender
* Time of Year – Is this a pre-season program or an off-season program?
* Muscle balances and weaknesses – If any imbalances or weaknesses are present, are these the result of overuse, a lack of training, injury other factors?
* Level of Experience (Training Age) – Has the athlete be training for years or are they just learning to train or lift weights?
* Chronological Age – What level of physical maturity has the athlete reached?
 

Let’s examine why these elements are important before designing a youth sports training program:


1) Time Frame: This is the first question I ask ANY athlete that comes to our facility. How much time do you have to train (in weeks)? This will determine nearly every aspect of the program. How much corrective work can I do? What kind of strength level can we expect to achieve? Will we have time to properly periodize the program? Basically, can we do our job effectively? We have literally had parents call us and say, “My son has hockey tryouts in two weeks and we would like to get some training in. What can we put together?” Short answer: Not much.
 

2) Sport: This is a given. Very rarely can two athletes in different sports be on the same program. The physical requirements from sport to sport vary too widely. This is why having “Today’s Workout” posted on a board is a far cry from a properly designed program. A thorough coach should understand the needs of each sport or at least be adept at doing the research to gain this knowledge. The coach must then customize each athlete’s program accordingly.
 

3) Gender: This one is also fairly obvious. There are particular movements that MUST be in every female’s programs. Among them are: Knee and hip stability, hamstring work and upper body work. ACL injury is epidemic among female athletes but the incidence of ACL tears can be reduced by up to 70% according to some studies, if a proper program is put in place. A disproportionally weak upper body is usually the standard for females and should be addresses as well. As Martin Rooney says, “Who decided it as OK for females to do push ups from their knees?”
 

4) Muscle Imbalances and Weaknesses: While some imbalances may be genetic, many are a result of the trend towards early specialization in sport at too early an age. Examples are: Hip flexor shortening in hockey players, spine injury in gymnasts and figure skaters, dominant arm hypertrophy in tennis players, etc.
 

Muscular Weaknesses abound and have multiple sources. Most younger athletes are weak everywhere…unless they are one of those high-end gymnasts. Pinpointing muscular weaknesses allows the coach to correct them. Once the musculature is in balance, the entire “system” will be able to gain strength more effectively overall.
 

5) Time of Year: This refers back to point #1. The time of year will have a clear impact on exercise selection. Generally, as the competitive season gets closer there is a shift from general work to more transferable strength and power work.
 

6) Level of Experience: This is an easily overlooked parameter. If I am training a gymnast, she could be in her 8th year of high-end training and still only be 15 years old. On the other hand, you could have a 15 year old male who has ever been in a weight room but wants to try out for baseball in high school. Should these two be on the same routine?
 

7) Chronological Age: This one varies in a very important way from Training age. Actual chronological age looks purely at the physical maturity of the athlete. Keep in mind that one major factor impacting program design is onset or completion of puberty. If an athlete has significant androgens present in their system, additional intensity and volume options become available.
 

While not all-inclusive, I hope this article demonstrates the need for a properly designed youth sports training. From the testing procedures used to the energy system program used, making sure each program the right program for your athletes is vital for the athlete’s success as well as yours!


Top 4 Alternatives for Olympic Lifts When Training Young Athletes

Training Young Athletes Using Olympic Lift Alternatives


Youth Fitness Expert Wil fFeming on Training Young Athletes


As a coach and professional I know that I love the Olympic lifts when training young athletes. For good or bad I think that there is no EQUAL to getting athletes more explosive than the Olympic lifts.


Being married to a lift or movement places too many limitations on the program you are able to design and in particular limits the improvements that each individual athlete can make.


For the athletes that are exclusively training with me and are physically capable the Olympic lifts are the king of my gym. There is no BETTER way to get explosive.


As my training business has grown, however, more and more athletes find out and are recruited to train with me, the necessity is not to place my training on them, but to discover the best training methods for them.


This means that the athlete that are concurrently training in their high school and doing Olympic lifts 2-3 times a week need alternative methods to train explosively with me. My beliefs are not something that can supersede the needs, time or ability of the athlete.


training young athletes


This being the case when we are training young athletes, the Olympic lifts have been replaced with alternatives that replicate the explosive nature of these lifts.


Using Medicine Balls To Train Young Athletes


training young athletes with medicine balls


The broad category of medicine ball throws can be used for nearly every athlete to produce explosive strength. These throws provide a low impact to the athlete but a maximal force production.


Throws in the rotational plane can be used to develop a vital linkage of the upper body to the lower body through the core musculature. Correctly performed throws originate in the lower body and leave through the hands, a kink in the core armor will be very apparent if a delay occurs from initiation to delivery.


Regardless of whether athletes can do Olympic lifts or not, medicine ball throws are a vital part of athletic programs, nothing develops the all important power in the transverse plane quite like rotational medicine ball throws.


KB Swings To Train Young Athletes


training young athletes


Much has been written on the kettlebell and benefits of using it to develop explosive strength. The addition of elastic resistance can take this movement to an entirely different level.


The swing itself is an excellent tool to develop an explosive hip hinge pattern. Most athletes lack in the ability to feel the explosive hinge and the swing is the best movement that I have found to break knee dominant athletes of using the knee bend to initiate explosive motion in the lower body.


The end range of hip extension is one of the best ways for athletes to truly feel the maximum contraction of the glutes. The voluntary muscle contraction that most athletes have difficulty attaining through other movements is a must for athletes to achieve a total hip extension.


The addition of elastic resistance allows accomplishes 2 main objectives:


1) It spares you of having to buy an unlimited number of kettlebells. Our biggest kettlebell is 32 kg. Many of our high school athletes can toy around with this weight with little to no difficulty for 10-15 swings. By adding even a small band to the kettlebell, 10-15 swings becomes a much greater challenge.


2) The majority of resistance occurs at the top end, where athletic movements occur. The maximal contraction should occur at the top end of the swing movement. With just the dead weight resistance supplied by the kettlebell athletes are sometimes apt to use the top extension as a point of relaxation. The addition of band resistance increases the load as it travels away from the floor. This top “high resistance” position is also the position in which most athletic movements occur.


In general swings simulate overall athletic movement. A correct swing should have the athlete relax momentarily at the top of the swing after reaching full hip extension but before returning to contraction at the top. This contract, relax, contract pattern allows for greater recruitment on the next upward swing.


Prowler Sprints To Train Young Athletes


training young athletes with prowler sprints


The goals of Olympic lifting are varied. They can go from becoming a better competitor, across the spectrum to improving speed (I first noticed that I had become a much more powerful athlete due to Olympic lifting when my 40 yard dash time dropped .5 seconds in just 6 months) For the latter a great substitution is to do resisted sprinting with the prowler.


The idea of special strength training was popularized by USSR coaches, and in particular those coaches in track and field. My first exposures to it were as a hammer thrower, to us special strength training was literally training the specific event in which I competed with a heavier implement (can’t get much more special than that!). Prowler sprints are the perfect special strength tool for athletes looking to improve acceleration.


The sets are typically 8 seconds or less, and the athlete gets adequate rest. This timing both mimics the boughts typically seen in athletic competition, the length of time for typical Olympic lifts, and helps increase the alactic power an athlete is able to produce.


An increase in stride length will be seen for athletes training with resisted sprinting techniques. This increased stride length will be due to an increase in the athletes’ ability to produce more power.


Submaximal Front Squats or Deadlifts to Train Young Athletes

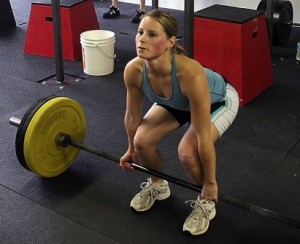
training young athletes with deadlifts

This is something that I have been toying with recently that has really improved the maximum power output that we are seeing from our athletes.


Loads of 40-50% 1RM on the bar and band resistance of less than 100lbs should be used. Athletes should be instructed to lift the weight with maximal force on the concentric portion of the movement.


Recently Bret Contreras wrote an excellent article on similar movements In it he describes recent research showing that maximal force produced during 40% of 1RM in the Hex Bar Deadlift is surprisingly similar to that produced in the Olympic lifts. (4800 Watts Hex Bar vs. ~4900 Watts in O lifts). While research has shown that maximal power production measured in watts can be achieved in the split jerk at nearly 6000 watts, this is very close when it comes to the big 2 Olympic lifts (snatch/clean).


Adding bands to the puzzle has not yet been studied but anecdotally my athletes have seen a large improvement in the ability to produce power top end hip extension. The greatest load is encountered at this point in which the athlete has the greatest mechanical advantage.


The bands pull the athlete down at a faster rate in the eccentric phase of the lift. To resist this greater speed the posterior chain must contract with a greater force. This is similar to the eccentric portion of plyometric action. Higher rate of contraction in the muscle spindles will lead to a greater force of contraction on the concentric portion of the lift.


Check these moves out next time your training young athletes and let me know what you think.


Learn how to become a Certfied High School Strength and Conditioning Coach by Clicking Here.

HSSC

Misuse Of Speed And Agility Training

Speed and Agility Training With Young Athletes

Speed and Agility Training

A lot of people in this field call themselves Strength & Conditioning Coaches. I don’t have a problem with the “Strength” part of the title, but the “Conditioning” part could use a little work.

As a former college S & C Coach, I fully understand the time constraints of the collegiate or high school environment. Running a private facility for athletes, I also understand the limitations of this situation. In both cases, it is very difficult to give every athlete the time and instruction they need. Still, there is one area of our profession that I feel is in desperate need of some attention. That area is what I call Movement Training.

Speed and Agility Training

Recently, I was asked by a college coach what mistakes I have made in the past and what I would do differently if I could re-live the past 6-10 years of my career. At first, like many coaches, my ego didn’t want to admit to any mistakes, especially to another coach. But, after some thought, I realized that the area in which I have the greatest impact on athletes today, I simply did not understand when I was younger.

A few years ago, I thought the best S & C Coach was the one who most fully brutalized his/her athletes. I thought I was supposed to lift my athletes until they puked and condition them until they couldn’t see straight. Don’t get me wrong, I still think that stuff has its place. I love putting athletes through brutally hard workouts, and I think that kind of hard work can have amazing benefits (it also has terrific entertainment value). But, through time, I have gained a better understanding of how to maximize the “Conditioning” or “Speed and Agility Training” part of my job title.

To a lot of coaches, conditioning means creating running programs that enhance the physiological processes involved in aerobic or anaerobic metabolism. You may not think of it this way, but that is essentially what many conditioning programs are designed to do. I have no problem with this. Conditioning sport-specific energy systems is a vital part of athletic success.

Speed and Agility Training

Many coaches also implement speed, agility, and plyometric routines into their programs, and I think it’s great to see coaches making an effort to improve the physical abilities of their athletes. Unfortunately, I see way too many mistakes being made in this area, and I think many coaches are doing their athletes an injustice.

Over the years, we have read articles by some great coaches about specificity, but the full message of these wise men is often lost in an effort to use their message to support our own views. I’m sure you’ve done it. You’ve read an article, and thought to yourself “That’s what I’m talkin’ about. That’s why I do what I do. I’m going to use this article to support my speed and agility training philosophy.”

The articles have been great. They have helped a generation of S & C Coaches formulate their strength training philosophies….strength training philosophies. Why didn’t we see that the same information we’ve applied to strength training can also be used to develop effective speed and agility programs?

In my opinion, a lot of S & C Coaches approach speed and agility training the same way they approach strength training.

They find out what other coaches are doing (through reading summer manuals, watching workouts, etc.), and duplicate it in their environments. This has worked out pretty well for strength training because there are a lot of good Strength and Conditioning Coaches to learn from.

Unfortunately, there are a few problems with learning about speed and agility training this way.

First, there are not nearly as many quality speed and agility coaches to learn from.

Second, most of us didn’t learn anything about effective movement patterns in school.

Third, proper coaching of speed and agility training for young athletes is highly dependent on coaching prowess, movement analysis, and the ability to understand proper movement patterns. It is more like teaching a sport skill; instructor knowledge is vital, and you can’t just apply a cookie-cutter approach like many coaches do with strength training. Nonetheless, we’ve learned our speed and agility drills from Strength Coaches not Speed and Agility coaches.

The best case scenario for many of us was to learn a few drills from a track coach or catch an article outlining a couple of exercises. This kind of coaching just doesn’t cut it. I believe that movement training falls under the “Conditioning” part of our job title, and it’s time we take full responsibility for this important part of our jobs.

I like to call speed and agility training “movement training” because the goal is to train athletes how to move more efficiently. The problem with most movement training is the assumption that if we put some cones or hurdles out in a cool design and have our athletes run through them, we are making an impact on their movement patterns.

speed and agility training

The truth is, we’re not. All we’re doing is helping them reinforce whatever movement patterns they are using to get through the drill. Take a few minutes to re-read some of those specificity articles, and I think you’ll see exactly what I’m talking about.

I have had the good fortune of working with, observing, and learning from a lot of good sport coaches and instructors. I have never seen a good basketball coach allow players to take hundreds of jump shots with poor shooting technique, and I have never seen a good baseball coach let players pitch and hit with poor mechanics. Unfortunately, I have seen a lot of Strength Coaches allow athletes to perform hours of agility drills using horrible technique.

A lot of coaches assume that if the athletes are going through the drills, their athleticism will improve. But, the benefits of performing speed and agility drills are dramatically reduced if the athletes are not executing them with sound mechanics and learning proper technique. If the coach is unable to analyze the movement and give corrective feedback, what good is he/she doing for the athletes?

There are still a lot of questions about speed and agility training and movement training especially with young athletes, but there are certainly some answers and a lot of room for us to improve. I look forward to examining this misunderstood aspect of our profession in more detail with you in the future.


Looking for agility drills to increase speed?

Download this free video and get access to 15 Free drills.

15 Agility Drills-Blog Banner

Cueing Athletes


Athletes Respond To Cueing


By Wil Fleming


Cueing is a big buzz word among fitness and performance coaches right now. Cues are an extremely efficient way to demonstrate some essential piece of technique to assist in the completion of an exercise.
 

A cue could be a set of words that concisely convey the result you would like to see: “brace the core” comes to mind for nearly everything. A cue could also be something more visual, like the imitation of “getting tall”, so often used at Force fitness and Performance when doing ½ kneeling movements. A third type of cue could be from palpation of a body part or region, to set the athlete in the correct position.
 

Stumbling upon, or discovering a new cue for an exercise can be a really cool thing. It can lead to technical breakthroughs, and lead to a cool blog post or a youtube video where you show your new toy off.
 

Cues then are a great tool, but what is the real value of one cue?
 

A particular cue may only work with 1 client and to that client, and to that training session, one particular cue may be extremely valuable. Use of this cue is able help them achieve the right position or make the right corrections to form so that the particular exercise can unleash its full potential. For this type of instance I keep a record sheet in every client’s binder to record things that work.
 

For the athletes on which this cue does not work, this cue has little value to them. In fact it is nearly worthless, but to you it remains a valuable part of your arsenal.
 

The real value of cues lies in the accumulation of many cues. No singular cue is the hammer and no singular problem is the nail, sometimes a cue is a screwdriver and the problem is a screw, and sometimes the problem is a 5mm hex bolt and the (oh nevermind you get the analogy). Problems take many forms and need many different tools. Having a toolbox is the important thing, not having the coolest hammer.
 

Being ready with the right cue at the right time is important, but the more important part is being WILLING to try all your tools until the problem is corrected. I see younger coaches getting frustrated when their “go to” choice of words doesn’t have the effect they anticipate with athletes. Although what they are coaching is correct and effective with many athletes, that cue does not work right now.

Patience and determination is key, a willingness to discover an athlete’s preferred learning style is necessary to create successful athletes.


By all means film your successes and share with others, they help other coaches equip their toolbox, but remember that you must be ready and willing to be diverse in your coaching ability.


Using Complexes In Warm Ups to Improve The Skills Of Young Athletes


Young Athletes weightlifting specific warm-ups

Young athletes olympic lifts warm up tips


By Wil Fleming


When your program is full of barbell strength training , in particular the Olympic lifts, it is important to sharpen the skills of your young athletes with a weightlifting specific warm-up.


A general warm-up is necessary for young athletes to increase mobility and activation, prior to training. Once the athlete is warmed up in general however, a specific warm-up for the days activities should be used to prepare.


In all sports the general warm-up is followed by a specific warm-up, baseball players should touch a ball before actually throwing out the first pitch, basketball players should take a couple shots before the buzzer sounds, just as in those scenarios, in strength training it is important to use some external loading before the training of the day.


A complex is the perfect way to do that.


Complexes are multiple movements done sequentially without rest in between movements. In order to complete a complex it is important to complete all the prescribed reps of one particular movement before moving on to the next drill.


Complexes can be a tremendous tool for conditioning as well, but in this case I would like to think of them for warm-up only.


The great thing about complexes is that they can really include whatever it is that you want for a given day. For my athletes I think that they are a great source of variation in the program, and a great way to challenge them on a given day.


I typically design complexes around what the movements of the day will be, if our athletes are to be cleaning in the session ahead, I will design a complex that includes clean movements. If we are snatching, then the complex will include the snatch.


Designing a complex


Limiting factors:


Athletes should be able to complete the complex without a severe break in proper technique. Complexes will have one movement typically that will be the limiting factor in the amount of weight that is on the bar.


For example: A complex of 5 exercises- Hang Clean, Front Squat, Push Press, RDL and Bent over row. In this complex , for nearly all athletes the bent over row will be the movement on which they will struggle the most with a given weight. In this instance the weight that an athlete can use for the prescribed reps on a bent over row


Selecting Exercises


Selection of exercises should mimic what the athletes will be asked to do in the training session later in the day. It is also important to use the LIGHTER weight of a complex to work on areas in which many athletes struggle. In the clean or snatch that is the pull around the knee area, and with extension of the hips. Including a movement that will specifically work on that area of the lifts is important.


Exercises should be selected in an order that moves logically for the athletes. This means that the starting points of each movement should be similar to the previous one.


For example: A complex that includes Front squats, to RDL’s, to Push Press becomes much more difficult due to the fact that the bar has go from resting on the shoulders, to the hands and back to resting on the shoulders. Changing the order from Front Squat, to Push Press, to RDL keeps the bar in the same position as long as needed.


Importance of Exercises


Explosive movement should be prioritized in complexes. This does not however mean that all complexes have to start out with a full clean or snatch, it does mean that a clean pull, or full clean should precede front squats.


Explosive movement requires a greater level of technical proficiency young athletes need to be fresher to complete these movements.


Examples of Complexes


Clean Complex:
2 to 3 sets of 5 -7 reps of each of the following:
Clean pull from above knee, Clean High Pull from Mid Thigh, Hang clean from Mid thigh, Power Jerk, Front Squat, RDL, Bent Row


Snatch Complex:
2 to 3 sets of 5-7 reps of each of the following:
Snatch Pull from below knee, Snatch High Pull from Above Knee, Hang Snatch from Mid Thigh, , Snatch Jerk behind neck, Overhead Squat, Snatch Grip RDL.


These same complexes could be used with Dumbbells or even Kettlebells. Try implementing them before your young athletes next session.


Change Lives Today


Wil


olymic lifts young athletes


The Olympic lifts are the most explosive and dynamic demonstration of force in which an athlete can participate. It is important to have established, an effective, efficient, and safe way to teach athletes to Olympic lift. Athletes can be taught at any stage to lift well, with proper technique using the methods outlined in this course. Learn more on Olympic Lifting with young athletes here…


Developing Speed and Agility for Athletes: The Short-to-Long Approach

Renowned speed expert Latif Thomas explains his short-to-long methodology to developing speed and agility for athletes

Latif Thomas

People say all the time that speed and agility for athletes is just like talent: It can’t be taught.

I’m here to show you how that belief is flat-out wrong. Speed is a skill.

The ability to take advantage of the potential of one’s body, and to do so consistently, is a highly technical skill. As coaches and athletes, we often allude to this concept when talking about speed development, but rarely do we discuss how important this statement is and what effects it has on training and performance.

When watching skilled athletes run at full speed, there is commonality in the power and fluidity that these athletes display. They run smoothly and effortlessly. And they run the same way, every time. It is this consistency in the patterning of their movements, the skill of running fast, that creates that “Wow” factor when you see them in action.

Depending on your level of experience in speed development, you may or may not know instantly what these athletes are doing that engenders such awe, but you know it is there. Even though we can’t bring every athlete to elite levels, we can teach them the skill of running fast, where they can apply it to their own particular sport in the context of their own particular level of inherent ability.

Anyone who has learned the skill of running fast knows exactly what it feels like when you reach the point where you’re no longer “trying” to run fast but are seemingly floating over the ground. But there is a progression of development required to consistently reach this point of ease in running. My goal is to explain how to progress an athlete toward the consistent application of the skill of running fast.

Speed and agility for athletes

To begin, let us establish the foundation of this progression. I believe it to be simply a matter of common sense, i.e., another area in athletic development where we have made something complicated that is, in fact, somewhat simple. In an individual’s speed development, one cannot expect to be able to run fast consistently over 100 meters if they first have not developed the ability to run fast consistently over 80 meters. One cannot expect to run fast consistently over 80 meters if they have not developed the ability to run fast consistently over 60 meters, etc. Therefore, with prescribing a methodology for youth speed training and developing an athlete’s ability to run fast, we must apply a “short to long” approach.

With a short to long approach, we develop an athlete’s proficiency over short distances and progress to longer distances once that athlete has shown that he/she can perform a given distance to the satisfaction of the coach administering the program. Therefore, the onus is on the coach to know what to look for in terms of strengths and weaknesses, how to cue an athlete to effectively perform certain movement patterns, and how to fix mechanical inefficiencies. This is the case regardless of the sport; where the emphasis, time or effort is spent will be contingent on the particular demands of the sport and the particular strengths and weaknesses of the athlete. Thus, for youth speed training, not every athlete will necessarily need to spend equal time developing every component/skill that will be discussed here.

Training Speed and Agility for Athletes: Three Major Categories

For our purposes, we will divide youth speed training “speed development” into three major categories:

Acceleration – the ability to quickly and efficiently get to full speed

Maximum Velocity (VMax) – the ability to maintain top and near top speeds

Speed Endurance – the ability to maintain efficient coordination of the limbs in order to slow the rate of deceleration

NOTE: When it comes to training speed and agility for athletes, there will certainly be a temptation to rush to other areas, progress to longer distances, and run workouts that are more exciting. I must stress that in training inexperienced athletes, we must look at long-term development. I know this can be difficult when we only have athletes for a 12-week season or an 8-week program at a facility. While radical improvements can and will be made over the short term, if your true goal is to maximize the potential of your athletes, then you will not rush them into skills and movements they are not prepared to effectively execute.

Keep in mind that the purpose of this post is to discuss how to progress using a “short to long” program. Certain assumptions must be made, such as the assumption that while implementing a short to long approach to speed development, you are also developing the other four biomotor abilities (strength, coordination, flexibility, endurance), which will allow athletes to progress at the fastest reasonable rate. Thus, the remainder of this post will not go into the biomotor abilities or how to train them but will focus instead on speed progressions. In addition, it is assumed that you understand the basic cues and demands of speed development, basic body angles, rest periods, etc., in that the confines of this post do not allow for intimate discussion of these issues.

Acceleration Development

Acceleration development should be the primary focus of linear speed development for any athlete in any speed- and power-based sport. Success in any sport requiring running is going to be contingent on the athlete’s ability to accelerate to top speed with little wasted motion or energy (i.e., efficiently). So the foundation of any speed development program must spend the appropriate amount of time focusing on developing this skill.

Before we do any running, we must put athletes in a good acceleration position. An athlete cannot expect to perform a skill if they have not experienced the context in which it must be performed. So before beginning acceleration work, I teach the wall/fence drill. This will allow athletes to feel, both statically and dynamically, the ideal position for acceleration. While they will not be able to hold or maintain this position at full speed, they will at least understand experientially what it should feel like. And this serves as a great starting point for teaching athletes self-assessment, a critical tool for maximal development.

Speed and agility for athletes 1

Wall/Fence Drill – Have athletes stand with their hands against a wall with their arms parallel to the ground. The feet should be behind the hips and the athlete should be at, approximately, a 45-degree angle to the ground. The torso should be erect, hips forward, and stomach and lower back tight so that one could draw a straight (45-degree) line from the head through the hips to the ankles.

This is the ideal body position that an athlete would be in at the outset of acceleration, particularly when accelerating from the ground, out of a 3- or 4-point stance, starting blocks, etc.

From this position, we implement a marching action. Have the athlete raise the right leg so that the ankle is beneath the hips, toe dorsiflexed. On your command, the athlete will march, alternating legs, for a given number of repetitions. They will finish with their leg in the original starting position.

You will see immediate breakdowns in technique:

  • Athletes will break at the hips while performing the march, so that the butt sticks out. The straight line from head to ankle is broken. Cue them to keep their hips forward (squeeze the cheeks).
  • They will not keep their heels underneath the hips. Instead the ankle will pump straight up and down, piston like, so that the foot is out past the center of mass. Cue athletes to pull the heel under their butts.
  • They will not drive down and back so that each foot strike takes place in the original starting position, behind the hips.

Since athletes cannot perform this basic drill in a confined setting, they certainly cannot be expected to possess the skills required for smooth, powerful, and efficient acceleration to top speed. At the outset of acceleration development, I will have athletes perform this drill before each training session. Additionally, of course, we are teaching traditional speed drills.

So what next?

Speed and agility for athletes 2

I like to start with short hill runs. And by short I mean 10-15 meters, max. I put athletes on a fairly steep hill, and we begin with accelerations up this hill. As we learned with the wall march, holding acceleration angles is difficult at this point. With a hill, we can bring the angle to the athlete, putting them in the position we want them to be in. With short hills it is paramount that athletes drive down and back, applying force to the ground. If they don’t, they will immediately feel that their center of mass is behind them and they will not be able to get up the hill with any reasonable speed or power.

Because force application, and the strength demands that come with it, is such an integral part of running fast, we can teach this skill with short hills as well as help athletes experience how much easier and more effective it is when they can activate and fire the glutes so that power is transferred appropriately. At the beginning, athletes will often try to bound up the hill, with the swing leg landing too far in front. This overcompensation is another opportunity to cue the importance of driving down. Like in traditional sprinting, when the foot gets out in front of the hips at foot strike, athletes must spend longer on the ground, which limits force output and slows them down.

Generally, I’ll start with around 10 repetitions with 1-2 minutes rest for teenaged athletes. At this point, I’m not going to get overly technical with the volume. I always err on the side of caution. The more critical element to teach here is self-assessment. And this goes for all phases of speed development. Once you’ve established some of the fundamental skills that athletes should be trying to learn with a particular workout or series of workouts, they must begin to identify positives and negatives on their own. I constantly ask them, “How did that feel?” “What did you feel?” “What were your arms doing?” etc.

Ask questions that get them to analyze their performance. If you are giving them good feedback with each interval, they will begin to come back and tell you how they felt, what felt right, what felt wrong, what they were thinking, etc.

This is an incredibly important component of training speed and agility for athletes and should not be overlooked. But to make it happen, you must be able to give appropriate comments that facilitate their learning.

Once athletes have become proficient at the short hill runs extending out to 20m, I will take them to the track or to a turf field. I do not advise doing speed work on grass as it is an invitation to injury. From here we will start out at 20m, starting from a variety of positions on the ground, a crouch, a 3-point stance, etc. I’m looking for the same aggressiveness that was required to accelerate up the hill to now be transferred to a flat surface. Once I see that, with the mechanical elements in place, we’ll extend out to 30 meters, then to 40. Again, the progression is logical. What you should be looking for in graduating your athletes to longer runs is consistency in their movement patterns, proper running mechanics, and an improved ability to tell you what they did right and what they did wrong without you having to tell them first. The best way to assess consistency is to time the athletes’ intervals. When they are consistently running the same times within .1-.2 seconds, it is likely that they are doing the same things each time. At these shorter distances, there is less room for error, but developing these skills early will pay great dividends at longer, more challenging distances.

Now that we are out to the 30-40 meter range, athletes are no longer accelerating. In fact, the vast majority of athletes will be at full speed by 30 meters, so this is the time where we will begin adding Maximum Velocity components to training. If an athlete is not reaching full speed until after 30 meters, they are likely holding back or have mechanical problems that are limiting proper acceleration. These athletes are not ready for longer sprint work.

Maximum Velocity (VMax)

Speed and agility for athletes 3

Even elite sprinters can only maintain top speed for around 2 seconds before beginning to decelerate. Thus, VMax work is geared more toward maintaining near top speeds for longer distances (reducing the rate of deceleration) than running at full speed because the time spent at full speed is quite short. Again, this post is not a discussion of this type of training but rather guidelines for how to implement it.

I am a big fan of fly runs. This is where you will have a buildup zone, a fly zone, and a deceleration zone. With our acceleration work, we’ve been practicing in the 30-40m range, so we will now add a fly to our work at these distances.

Our initial runs will be “fly 15’s.” Set up a cone at the start, at 20m, at 35m and at 60m. The breakdown is this: 0-20m is the acceleration zone, 20-35m is the fly zone, and 35-60m is the deceleration zone. The final 20 meters should be a slow deceleration to a full stop. Since we’ve been focusing on acceleration development thus far, athletes should be quite proficient through 20m. Our new focus is on what they should be doing while at full speed.

Cue athletes to run hips tall and with a foot strike beneath the hips, not behind or far in front. It is important for young athletes especially to focus not on straining to run faster but rather on executing a consistent pace. Our goal here is maximum speed, minimum effort. Again, we can assess consistency here by timing athletes through the zones. If their time to the first cone is inconsistent, it will likely lead to inconsistencies in the fly portion. Because we’re breaking the run into sections, we can identify where things are going wrong (and right) and give appropriate solutions. I strongly recommend videotaping these runs and breaking down the film with your athletes.

As athletes become consistent and proficient at fly 15’s we can simply extend the distance with time. Generally, for athletes who require extended sprints in their training, our meat and potatoes workouts are fly 30’s and fly 40’s. Volume is dependent on the particular athletes. When times fall off, the workout is over. As a general rule, with teenage athletes, we look at a total volume in the range of 250-300 meters before fatigue begins to adversely affect the quality of the workout. But again, this is a generality and you must prescribe distances appropriate for your athletes—thus, the art of coaching.

Because we are implementing a short to long progression, even with VMax work, you are still working on acceleration development. Athletes must accelerate properly to reach true to top speeds. So, where I was previously doing acceleration work twice per week as we made our way to the 30-40m range, I will now do one day of acceleration work and one day of VMax work. When you think about it, we’re getting more bang for our buck because we’re still getting two days of acceleration work in, but we’re also developing our ability to maintain at top speed. Since acceleration work is paramount in almost every sport, we can maintain constant focus on that skill because we’ve mastered it. Consistent acceleration paves the way for maximal development at longer distances.

We also use another type of workout for VMax development. It goes by many names, but we call it “Sprint-Float-Sprints.” This is simply a more advanced progression of the fly XX. Here the goal is to teach athletes to relax once they reach top speed, but without slowing down. This is one of the hardest things for coaches to teach and athletes to learn. Athletes simply must experience this in order to understand it. I’ve never been able to come up with a universally understood cue that got athletes to do this right. The important thing to convey is this: Once an athlete reaches top speed, continuing to try to accelerate will only slow the athlete down.

When timing experienced athletes in this type of workout, they run faster in the float—or relaxation portion—than when they are pushing to run faster. To most athletes, this doesn’t make sense at first, but there is a reason that you see elite athletes with relaxed faces, shoulders, hands, etc. at the end of a race. They know that they must stay within a certain confine to run faster. If they begin to press, they will break down mechanically and slow down. So, when doing Sprint-Float-Sprints with your athletes, you must get them to understand this. One very clear way to tell if athletes are slowing down in the float zone vs. relaxing is by watching their torso. If the shoulders drop back behind the hips (foot strike will also take place in front of the hips), then you know the athlete is doing it wrong.

Here is how to set up the workout. Set up a cone at 20m, 30m, 40m, 50m, and 70m. From 0-20m athletes accelerate normally, 20-30m athletes will sprint aggressively, 30- 40m athletes go into a float, 40-50m back into an aggressive sprint, 50-70m athletes should slowly come to a stop.

Generally, I stick to this distance throughout the season. If an athlete excels, I may bring the zones from 10m to 15m. Because this workout is quite taxing, both physically and mentally, we don’t do a large number of them in a workout. We may do a max of 4 or 5 total. As with fly runs, getting this on tape is an incredibly valuable tool. With so much going on from zone to zone, it really is difficult to assess an athlete live and time their zones. You really have to pick one or the other.

With this workout, it would be the alternative to running, say, fly 40’s. Depending on the sport and time of year, it is unlikely that I will get away from pure acceleration work entirely, but there are exceptions to every rule. Now that athletes have become proficient in acceleration patterns and maintaining top/near top speeds, we can add a new element to training:

Speed Endurance (SE)

Speed and agility for athletes 4

With speed endurance, we want to be specific to the demands of the sport. For our discussion, there are two types of speed endurance: Alactic speed endurance and Glycolytic speed endurance. Without turning this into a lecture on energy systems, alactic SE is for runs of 30-80m with rests periods of 1-3 minutes between reps and 5-10 minutes between sets. Glycolytic SE is for runs of 80-150m, with rest periods of 5-6 minutes between reps and 6-10 minutes between sets.

At this point, you should have a clear understanding of how progressing distances works. Fundamentally it’s going to be the same here, but again, sport specificity comes into play. There is little need to focus on glycolytic SE if your athletes are never going to have to sprint for longer than 60-70m on a fairly regular basis, i.e., almost every sport outside of track and field. Instead, I would focus on alactic SE. Athletes are going to be competing in a state of fatigue for a good portion of their games, so short sprints with relatively short rest periods are going to prepare them better for the demands of their sport. Because you’ve taught them proper acceleration mechanics and developed the skill of high speed maintenance, they will be able to run faster and longer while tired. If you had not done this progression in this way, once they got tired (in a workout or competition) they would immediately regress from a mechanical and technical standpoint, which of course makes them less competitive athletically and at increased risk of sustaining an injury. But because they have learned the skill of sprinting, as well as self-assessment, they can focus and fall back on the previously learned and repeated movement patterns that lead to running faster and winning more.

With track and field sprinters, the need for longer speed endurance runs is obvious. It is important, however, that we adhere to these rest protocols. I find that many track coaches can’t overcome the urge to reduce rest periods, believing them to be too long to be effective. They are not.

So how is it all put together?

Putting Together Acceleration, VMax, and SE in the Context of a Season

If you have a true preseason or offseason, that is where I would put in the short hill accelerations or even flat surface acceleration work. But if you’re working on limited time frames of a typical season, here is how I would structure the progression, assuming you are working on speed twice per week.

This, of course, is a general guide. Look at it in terms of progressing in distance. As far as volume, these are estimates. Some athletes are workhorses; others are not. There is no magic formula for determining the perfect volume for a workout or workout period, and there are many other variables to consider in prescribing speed sessions. It should vary by athlete based on training age, experience, skill, etc.

M: 8-10 x10m hills

Th: 8-10 x 15m hills

Once athletes have begun to improve:

M: 8-10 x 20m hills

Th: 8-10 x 20-30m acceleration development on flat surface

Once proficiency is shown:

M: 8-10 x 30m

Th: 4x30m, 3-4 x 40m

Once athletes have developed consistency in their acceleration development:

M: 10 x 30m

Th: 6-8 x fly 15’s with a 20m buildup

Choices from here vary by sport. Non-track coaches will likely stick with a format along these lines. Remember, you don’t always have to move up in distance; you can do repeat 10’s, 20’s, etc. Make it specific to your sport. In fact, you should move around in volume, distance, and intensity so that athletes do not adapt and become stagnant in their training.

If athletes aren’t going to maintain an all-out sprint for more than 15-20m, spend the bulk of time on various components of acceleration development, speed endurance, and some VMax work:

M: (Acceleration work) 5x10m, 5x20m, 5x30m (full recovery)

Th: (SE) 2 sets of 6x25m with 1 min rest between reps, 5 min between sets

Do a VMax workout every 3 or 4 workouts.

With track and field, you have to consider meets as part of your program design. So if an athlete is running the 100 and 200 in a meet plus field events, acceleration work and VMax work may be part of that week’s training, generally speaking. Of course, you must consider the above factors, time of year, etc.

For a 100/200m runner who has progressed through the requisite acceleration and VMax skills:

M: 5x30m out of blocks on the straight, 3 x 60m out of blocks on the turn (float at 40m)

Th: 4x fly 30’s with a 20m buildup, 1 x 120m

The meet will involve speed endurance elements so we don’t have to go heavy on that during the week. And both the Monday and Thursday workout cover some degree of speed endurance work as well.

Keep in mind that when doing VMax work, you’re still doing acceleration development. You have to accelerate to get to top speed. When you’re doing (Glycolytic) Speed Endurance, you’re doing both acceleration work and VMax work. To get the most out of a longer run, an athlete must be capable of effectively performing a shorter run. It is for this reason that the short to long approach to youth speed training and development is the optimal method for developing the fastest athletes.

Get CertifiedYouth speed training certification

If you understand that speed and agility are the most coveted skills your athletes and clients need you to teach them and you want to stay on the cutting edge of what is being taught by the most effective speed coaches in the field, then you’ll want to invest in the IYCA Youth Speed Specialist Level I Certification. This is, without question, the most comprehensive and up to date linear and multidirectional speed and agility for athletes training course on the market. Learn more on youth speed training.


15 Free Speed & Agility Drills

Get access to 15 free Video drills to try with your athletes that focus improving their balance, coordination, and speed.

15 Agility Drills-Blog Banner

Evaluating Yourself As A Coach


Become The Best Coach You Can Be

youth coach evaluation

By Wil Fleming


There are a lot of great coaches in the world, and this newsletter reaches plenty of them. To become an even better coach evaluation is really important.

I think that coaching breaks down into four categories and seeing where you are an expert or could need some work is a helpful tool to become a better a coach.


  1. Anatomy and Kinesiology 

    This category is first as it is likely the first thing we learned in school that actually pertained to our development as coaches. For coaches that changed careers or don’t have a classic background in this area, this is typically the weakest. Coaches that are strong in this area, can do wonders in assessment, analyzing movements, and innovating new ideas.


    This is by far my weakest area and something that I strive to get better in everyday. Brushing up on anatomy, kinesiology, and biomechanics through reading is my primary way to get better in this area.


  2. Program design 

    Designing great programs can really make your athletes better. Putting the wrong exercises in the program can make your athletes unprepared for their competitions, or even get them injured. Incorrect rep schemes and volume can leave your athletes under or over trained. The right program can give each athlete a chance at giving their best effort when it counts.


    I think that I am fairly strong in this area, but could definitely use improvement. The easiest way to improve in this area is to observe and interact with coaches that are preparing athletes on a daily basis and glean what you can from their programming secrets.


  3. Practical Coaching 

    Practical coaching is what I have named the actual coaching on the floor. Seeing movements and cleaning them up to get the best patterns possible. Being a problem solver on the floor coaching the technique at every step.


    In my perspective, this is where I am strongest. I am able to identify issues in movements and make the modifications on the floor or to the technique that are necessary. Again watching good coaches in action is a great way to improve in this area, as is completing the movements yourself. Working through your own technical problems is a great way to get a feel for what you need to coach.


  4. Impact 

    Impact is all of the non-programming stuff. Are you making the environment fun? Are you setting the athletes up for life-long success by associating positive emotions with training?


    Also one of my strong suits, but probably the area in which I worry about the most. I want to make sure that the athletes love the experience and are excited to train. To improve in this area there are no secrets, it is always making sure that your energy is higher than the athletes’ energy and focusing on bringing them up with you through their training session.


Don’t be afraid to evaluate, and don’t be afraid to focus in on your weak points. You as a coach and your athletes will get better because of it.


Change Lives,


Wil


Core Training For High School Athletes


Training A High School Athletes Core


By Wil Fleming
 

Not very long ago AR Bloomington was fortunate to get IYCA Board of Experts Member, Mike Robertson, to do an in-service for our entire team and he really knocked it out of the park.
 

Mike’s selected topic was “Core Training”, needless to say his presentation changed the way that we both think about and train an athlete’s core.
 

The IYCA training system is at the forefront of training high school athletes, so I thought that I’d share with you my takeaways from Mike’s presentation.
 

First off let’s try to define what the core is. Some people suggest that it is only the abdominals (and specifically talk about the rectus abdominus and external obliques), others begin to include the spinal erectors, and others go even further.
 

We will go with a description that includes deeper muscles (multifudus, transverse abdominus). By including these muscles we will be able to get to a better and deeper model of core training that is more applicable to high school athletes.
 

Athletes use their core for specific purposes, Mike termed the 2 uses for the core as the 2 R’s “Re-Distributing force and Re-Directing force”. This simple idea is on the cutting edge of performance training and shapes how we train the core.
 

Re-Distributing force is the idea that the core should take stress off of the lumbar spine and prevent pain. A strong core in this sense will focus on the ability to maintain and get in a neutral spine and pelvic position.
 

By doing this athletes will have greater core stability in their movements. When a football player has a glancing blow they will not go down as easily because their core keeps them stable; when a tennis player is in an extended 1 leg stance returning a ball they will be less likely to get injured. In this way Re-Distributing force keeps athletes healthy, and is the basic part of core training.
 

Re-Directing force is the next step in core training, by using core stability to re-direct force athletes swinging a baseball bat will be able to transmit power from the lower body and turn it into rotation at the shoulders.
 

A weak core in this sense is like a poor power line. All the power in the world can be generated at the power plant, but if it doesn’t get to your house, you don’t have any use for it.
 

To train each of these try the following movements with your high school athletes:


Planks….With a dowel on your back
 

Nearly everyone has tried the basic plank, but by making 1 simple change this becomes a tremendous exercise for training re-distributing force. Place a dowel rod along your back while in a plank and have 3 points of contact with it: the back of your head, your thoracic spine and your pelvis.
 

In the region of your lower back there should only be the space of your hand in between the dowel and your back. This position is the neutral spinal alignment we look for. Increasing time and decreasing stability (through removing a point of contact) are two easy ways to progress this exercise). Increasing the angle (i.e. elevating the upperbody by putting them on a bench) is a great way to regress the exercise.
 

MB Side Throws
 

Medicine balls throws are a big part of the AR Bloomington training system at the younger age and should remain so as athletes reach the 14+ group. There is no better way to train athletes to re-direct force than through the use of MB throws.
 

Ensure that the athletes are getting rotation through their hips, remaining stable through their lumbar spine and then again rotating in their thoracic spine. Changing the cadence (adding steps or recoiling in a rhythm) can add variation to the program and add a degree of specificity that High School Athletes really enjoy.


Concussion Prevention: A Pro-Active Approach


Concussion Prevention For Young Athletes


concussion for high school young athletes


By Jim Kielbaso


The concussion problem in sports has reached epidemic proportions. The NFL is spending millions on awareness and just instituted new practice rules to reduce the number of blows the players are exposed to during practices. Several high school athletic associations are also implementing new rules to deal with the issue. So far, everything has focused on how to deal with the athlete after the concussion, but there is now a movement to help educate athletes, parents and coaches about sports concussions and what can be done to prevent or avoid them. We’ll never be able to eliminate concussions from sports, but there are certainly things we can do to help reduce the forces our brain encounters.


There are really four basic components of concussion prevention:


    1. Protective equipment – In most sports, this means properly fit, quality helmets and mouth pieces. Unfortunately, no equipment or training currently known to us will eliminate concussions. “The best helmet on the market can still lead to injuries of the head including concussions,” said Scott Peck, a certified athletic trainer in Washington state. “To decrease concussions, athletes need to practice good technique in tackling and blocking by keeping their heads away from contact.”


    1. Technique – Some sports include more contact than others. Good coaches always teach athletes not to initiate contact with the head, but we still see a lot of young athletes using poor form when tackling or hitting.


    1. Awareness – It seems crazy, but there are still a lot of parents and coaches who simply do not understand how dangerous a concussion can be or that there is inherent risk involved in participating in most sports. This site was set up to help heighten awareness at the same time we discuss prevention options and proper treatment


  1. Training – This component is just now picking up momentum, but some coaches have known about this concept for years. This is also the least publicized aspect of concussion prevention for several reasons.


First, most people don’t know how to safely and effectively train the head and neck musculature. Second, it would be next to impossible to produce scientific evidence to show that training will help prevent concussions because you would have to use real human beings and expose them to potentially life-threatening blows. This would never pass any collegiate ethics committee, so the research probably cannot be done.


Still, the automotive industry has known for years that a stronger and stiffer neck significantly reduces the G-forces encountered by crash test dummies in crash research. It seems obvious that a stronger neck would be extremely helpful during a blow to the head, but most doctors aren’t yet ready to admit that. That could be because:


a. Doctors won’t make any money from the prevention side of this issue.
b. Doctors probably have no idea how to train.
c. Doctors typically refer to the scientific literature, but we already established that this evidence will probably never be published in any scientific journal.


We have to understand that no amount of training or equipment will eliminate all injuries, but that is not the point. Ten years ago, ACL prevention programs were virtually non-existent. Today, female athletes all over the country understand that proper training will limit their risk of sustaining an injury. Yet, ACL injury rates haven’t slowed down. It doesn’t mean that the training has not helped. And, going through a training program does not mean you will never hurt yourself. Training is meant to reduce risk or severity of an injury.


The same goes for properly training the neck & head to reduce the risk of concussions and serious neck injuries. The training does not eliminate the injuries, but it can help to lessen the risk or severity of neck and head injuries.


The leading researcher on neck training, Ph.D. candidate Ralph Cornwell, put it best when he said “If we know that it might help, and it’s not going to hurt, why wouldn’t you want to do this kind of training? People do ACL prevention programs all the time. This is like an ACL prevention program for your brain and neck. You can replace your ACL, but as far as I know, you only have one brain. It just makes sense to protect it.”


Research done by the NFL is now revealing that the repetitive sub-concussive blows – the hits that don’t knock you out, but just ring your bell a little – are the main culprit behind the long-term brain damage seen in many former athletes. Many of these athletes are now suing major sports organizations because they are mentally and physically disabled due to these blows. It seems that every brain has a certain number of hits it can take before long-term damage sets in. The more G-forces the brain encounter, the worse it gets.


Training can reduce the G-forces encountered on these sub-concussive blows, raising the bar on the number of hits it will take before the long-term damage sets in. This is some of the best news ever presented on this topic, because it gives us hope that we may be able to combat this problem.


Major sports organizations like USA Hockey and the NFL are recognizing that something must be done, so rules are changing quickly. Even Dr. Robert Cantu, who is considered one of the leading experts on the subject, has said that he thinks young athletes should wait until they are stronger and more mature before they engaging in intense contact/hitting sports. This means that the leading authority on concussions understands that being stronger will have a positive effect and is part of the concussion prevention equation.


With the knowledge that training can help prevent concussion and other injuries and, when done properly, can cause no harm, why would we NOT strengthen the muscles surrounding the head and neck?


Outcome Based Coaching In A Nutshell


Young Athletes Coaching Style In A Nutshell


By Dave Gleason


The primary coaching style we want to use with our youngest athletes is called outcome based coaching. This style of coaching puts more emphasis on the outcome of the activity or exercise you have asked for from from your athletes.
 

Outcome based coaching utilizes very little cueing or technique modifications if any. Our 6-9 year old athletes can suffer from goal confusion, leading to frustration and a less than average experience. As athletic revolution franchisees our goal must be to provide an exciting, memorable and remarkable experience – EVERY TIME.
 

A communicative coaching style such as outcome based coaching is exactly what a young person needs to ensure the indoctrination of a healthy physical culture. At some point in life every athletic career ends. Our role is to provide an opportunity for their ability to move and exercise to continue long into their adult lives…no matter their current level of sporting success.
 

In addition, it is imperative that a young athlete discovers movement patterns on their own as much as possible. The central nervous system is considered more plastic for a young athlete. That is, a young athlete’s CNS is very sponge like or magnet like. Internal and external stimulus is more readily assimilated, learned from and transferred to movement patterns. This aspect of neural development is a crucial component of the natural development of a child. Let your young athletes “Discover” movement patterns on their own.
 

Here are some practical concepts to think about as you engage in outcome based coaching:
 

Be careful what you ask for. If you cue your athletes to skip across the length of your facility and what a few of them perform is a high skip in a zig pattern…they are STILL giving you what you asked for. Encourage their creativity followed by layering one or two appropriate boundaries with simple cueing. In this example ask the entire group to skip in a straight line on the next try.
 

Be a reflective coach. During and after your sessions reflect on the effectiveness of your coaching cues. Take note of what was successful and what you and your coaches need to improve on. Communicating more effectively with your young athletes will only result in more fun for them..and you!
 

Praise and praise often. When a child gives you their interpretation of what you asked of them praise them for it. If modifications or boundaries need to be communicated use simple cuing. For instance, a lunge walk with a pronounced forward lean at the hips can be corrected by saying “heads up, eyes up, or reach for the sky”.
 

Use names. Calling and praising a child by name will add tremendous value to the relationship building process and significantly increase the enjoyment your young athletes experience while in your care. In short, it makes it personal.
 

Take these concepts and coach your young athletes with your heart first, head second.


Keep changing lives!


Using Weighted Sleds for Acceleration Work


Using Weighted Sleds With Young Athletes


young athlete acceleration training


By Jim Kielbaso


There are plenty of toys out there designed for speed development, but one of the most effective and easiest to use is a weighted sled. The research on resisted sprinting using these sleds is way behind the actual use of the device, but that’s usually how it goes. More recent information has shown that proper use of these sleds can have a positive effect on a young athletes ability to accelerate – one of the most important aspects of speed in many sports.


Most of the early research on resisted sprinting was focused on kinematics. They wanted to see if using a sled would change sprinting mechanics significantly enough to cause problems. Through experimentation of different loads, it turns out that using a relatively low weight (8-20% of bodyweight) will not have a significantly negative impact on mechanics.


The old research also focused on maximal velocity running instead of acceleration. The conclusions drawn from this research showed that resisted sprinting at maximal velocity (top speed) did not have a positive training effect and could actually have a slightly detrimental effect. Most of this was seen because the resistance caused longer ground contact times at top speed. The studies showed that maximal velocity training with no resistance may be better than using resistance.


A more recent study by Harrison and Bourke out of Limerick, Ireland showed that training with the weighted sled significantly improved scores on the time to 5 meters test. The study had subjects perform two resisted sprinting sessions per week for six weeks, using 13% of their bodyweight as the load. This load was based on an earlier study by Lockie et al that recommended using 12.6-13% of bodyweight. All subjects had experience with resisted sprinting and all were competitive rugby players. They weren’t using untrained individuals, making this much more useful information for sports performance coaches.


After warming up, subjects performed six 20-meter sprints with 4 minutes of rest between bouts. They did this twice a week for 6 weeks and had significantly positive results on their ability to accelerate.


This study, along with the experience of many coaches, provides evidence that use of a weighted sled may be beneficial for improving an athlete’s ability to accelerate. Of course, one of the keys to this kind of training is adequate coaching in the mechanics involved in accelerating. When training young athletes we often see them trying to accelerate without a proper forward lean or taking small, lower-power steps. The sled can be a helpful tool in the learning/coaching process because it can help an athlete get into a steeper forward lean without falling. It can also help an athlete alter his/her turnover slightly in favor of producing as much power as possible on the first 2-8 steps of a sprint.


An extremely important aspect of acceleration training with young athletes is the use of proper mechanics. Without quality instruction and the plenty of reps with optimal mechanics, the use of weighted sleds or any other type of acceleration training will be marginalized. A qualified youth coach who can analyze the young athletes movements and utilize individualized cues and feedback to improve mechanics is absolutely essential to this process. Lower-quality instruction will yield lower-quality results no matter what kind of apparatus, toy or method is used.


Knee drive is another important aspect of acceleration, and information from another study by Alcaraz et al suggests that a weighted sled may help athletes exaggerate knee drive. This could be a result of having to pull extra weight or the additional forward lean they observed. Either way, it’s a good thing and can benefit athletes who want to increase their acceleration performance.


Based on the scientific evidence and years of coaching experience, use of a weighted sled for improving acceleration performance is recommended as long as adequate coaching is available so mechanics are optimized during the process. I recommend focusing your efforts on the first 5-10 yards of a sprint since this is where the most benefit is seen.


We’re still kind of guessing in regards to the optimal load used, but you certainly want to keep it fairly low for most people. The research does not take into account the abilities of each of the young athletes, so a more powerful athlete may be able to use higher loads than 13% of bodyweight and still reap the benefits. Since the research suggests that resisted sprinting somehow strengthens the musculature at high velocities, using the heaviest weight possible without a negative effect on mechanics or joint rotational velocities seems to be the goal.


I also highly encourage the use of contrast training when using a sled. First, do a few reps without a sled, then perform 5-10 reps with the sled. Be sure to always perform 2-4 more reps without the sled to give the athlete the opportunity to “feel” the difference and allow the nervous system to adapt. This could simply be a trick, but it has been suggested that this kind of contrast training can actually get the nervous system to “up-regulate” with consistent training over time. When using resistance, the body is forced to fire harder on each step. Over time, using contrast training, the athlete’s nervous system may learn to fire harder all the time, not just directly after use of the weighted sled. This is still a theory, but the recent research suggests it may be exactly what is occurring.


Other professionals, including well-respected trainer Mike Boyle, use weighted sleds with much higher loads as more of a movement-specific strength training exercise. You can load the sled up and have athletes “march” forward, driving the knees upward, pushing backward as hard as possible and getting into a steep forward-lean position. There is no real scientific evidence that this works, but the principle of specificity would suggest that this could be a good way to add strength when the goal is to improve acceleration speed.


There seems to be enough evidence that a weighted sled works to warrant its use when training for improvements in acceleration speed.
p>

Because there is limited research available, we’re still searching for the optimal training volume and loads for young athletes, but some guidelines are being created through the literature and experience.


·2-3 days/week


·8-20% bodyweight as the load


·4-10 short-distance sprints (5-20 yards) per workout


·Relatively long rest periods between bouts (1 – 4 minutes)


·Utilize contrast training


·Possibly use the sled as a strength training exercise


Try using a weighted sled with your young athletes, and be sure to focus on mechanics.


While it is just one tool in a trainer’s toolbox, it does seem to have merit. As long as the athlete is giving high effort, using appropriate loads and practicing proper mechanics, you should enjoy the results of faster acceleration after a period of training.


Jim Kielbaso acceleration Training program for young athletes


Jim Kielbaso


Teaching The Perfect Push Up To A Younger Athlete


Younger Athlete Push Ups Exercise


Push up for younger athlete from the IYCA


By Dave Gleason


Teaching the push up to a younger athlete can be arduous and complicated depending on physical maturity, body awareness, current skill and or experience. Let’s face it, in most scenarios the younger athlete has had no instruction, incomplete instruction or instruction with incorrect information. Once more, the opportunity to perform a push up is usually at the end of a practice, as a form of punishment or as an element of a timed standardized testing protocol. We know none of these story lines are optimal for any young athlete to achieve true success.


Creating a foundation where a younger athlete can progress to a push up worthy of actually performing as part of any training program is where we need to start.

In this video Dave Gleason, 2010 IYCA Trainer of the Year and owner of Athletic Revolution in Pembroke MA, shows you the progressions he uses with a younger athlete 10-13 years old.


How to Create a Strength Training Program For Young Athletes

Strength Training Program For Young Athletes

Strength training program design can get very complicated, but it doesn’t have to be. The bottom line is that you need to develop a well-rounded, comprehensive program that encourages hard work and progressive overload of the musculature. If those components are in place, you are well on your way to helping your athletes reap the benefits of a strength training program for young athletes.  Keep in mind that “young athletes” can mean just about anyone under 18 years old.  In this case, the program is mainly geared toward athletes 12-18 years old.

Strength Training for Young Athletes Component #1: Comprehensive

A strength training program for young athletes should address every major muscle group in the body: chest, upper back, shoulders, biceps, triceps, neck (for collision sports), abdominals, lower back, hips & glutes, quadriceps, hamstrings and calves. Certain sports will focus more on a particular body part or require specialized work on smaller muscle groups (i.e. baseball pitchers will train the rotator cuff extensively), but all major muscle groups should be addressed. In general, an equal amount of work should be done on each side of a joint.

A strength training program for young athletes should address every major muscle group in the body.

Deficiencies can be overcome through a strength training program, but it generally takes specialized assessment to determine which muscles are deficient, and that is beyond the scope of this article.

Strength Training for Young Athletes Component #2: Progressive

Strength Training Program for Young Athletes

In order for any program to be effective, there must be a systematic and progressive overload of the musculature. In other words, athletes should systematically attempt to perform more work on a given exercise. For example, an athlete who can perform a maximum of 10 push-ups today should attempt to perform 11 repetitions at some point. When 11 can be performed, 12 should be attempted, and so on.

Progress can be made through any of the following: increasing the number of repetitions, increasing the amount of weight, increasing the number of sets, increasing the number of training days per week, decreasing the amount of rest time between sets, or a combination of any of these.

One of the easiest approaches is called “double progression.” To use this method, start by determining a range of repetitions you are going to use, for example 6-10 reps. If the athlete is unable to perform at least 6 reps, the weight is too heavy. If more than 10 reps can be performed, the weight is too light. During each workout, one more rep should be attempted until the top of the range (10 reps in this case) can be performed. When the top of the range is achieved, the weight will be increased at the next workout by the smallest amount possible.

Strength Training for Young Athletes Component #3: How many sets?

The number of sets used on an exercise or within a complete workout can vary greatly, but the following guidelines can be used. In most cases, 1-3 sets will be performed for each exercise and 15-20 working sets (not including warm-up sets) will be performed in the entire workout.

If fewer sets are used, each set should be performed with maximum intensity. In other words, the set should be taken to the point of momentary muscular fatigue, or no more reps can be performed. If the athletes are unable to perform with maximal intensity, it is generally a good idea to complete multiple sets of an exercise.

Strength Training for Young Athletes Component #4: How many reps?

While there is great debate of the number of repetitions that should be used in a set, it really should not be confusing. In general, it is recommended that 6-20 reps be performed on each set. While this is a large range, it offers a guideline in which to create smaller rep ranges from. It is best to choose smaller ranges such as 6-10, 8-12, 10-15, or 15-20.

As long as your program continually challenges the athlete to perform a greater amount of work, strength gains will be made. Any rep range will work. There are, however, some subtle differences between the benefits of each rep range.

Lower rep ranges (i.e. under 6 reps) will stimulate the nervous system to a greater extent, but actual tissue changes may be more limited. Very heavy weight (relative to the athlete’s strength) must be used, which can be potentially dangerous because athlete may have a tendency to use improper technique to lift the weight.

In general, it is unnecessary for any middle-school or high school athlete to use weights that cannot be lifted at least 6 times with good form. Prepubescent athletes should generally use weights that allow for at least 10 reps.  This allows more repetitions with good form to solidify proficiency at the exercise.

Medium rep ranges (i.e. 6-10, 8-12, 10-15) offer the benefits of increasing strength, eliciting positive tissue changes, and allow for greater safety than very heavy weights. These rep ranges are recommended for most sets with young athletes.

Higher rep ranges (i.e. 15-20) offer the greatest results when muscular endurance is the goal. Endurance athletes may want to consider higher rep ranges. Young athletes or beginners may also consider higher rep ranges because it offers the opportunity to practice good technique. Strength will still be gained with higher rep ranges.

Strength Training for Young Athletes Component #5: How much weight?

Strength Training Program for Young Athletes

Once a rep range is determined (for example 8-12 reps), selecting a weight is fairly easy. Have the athlete perform a set of as many reps as possible. If the athlete cannot perform at least 8 reps, the weight is too heavy and should be decreased at the next workout. If the athlete can perform more than 12 reps, the weight is too light and should be increased at the next workout.

Within 2-4 workouts, the optimal weight will be selected. This selection process gives the athletes the opportunity to practice technique and experiment with different resistances without having to go through maximal or sub-maximal testing.

Strength Training for Young Athletes Component #6: How often should you train?

Selecting the number of training sessions per week is dependent upon many outside factors such as practice time, game schedule, outside activities, facility availability, etc. Generally, there will be more time available for strength training during the off-season than during a competitive season.

The following are some guidelines for the number of training days per week during different phases of the competitive cycle, with routine ideas in parenthesis:

  • Off-season: 2-4 days/week (2 or 3 total-body workouts per week T & Th, 2 upper & 2 lower body workouts/week M-T-Th-F or 3 days/week alternating upper & lower body routines M-W-F)
  • Pre-season: 2-3 days/week (2 or 3 total-body workouts per week, or 3 days/week alternating upper & lower body routines M-W-F)
  • In-season: 1-3 days/week (1- 3 total-body workouts per week, or 2-3 days/week alternating upper & lower body routines)

Strength Training for Young Athletes Component #7: How long should the workout take?

Each strength training session should last 20-60 minutes. There is no reason for any high school strength workout to last more than 60 minutes.

Rest between sets should last about 1-2 minutes. This allows time for a partner to complete his/her set and the next exercise to be set up.

Work large muscles first.

In general, the order of exercises should begin with the largest muscle groups and move to smaller muscle groups.

Large muscle groups include the chest, upper back, and hips & quads. Smaller muscle groups include the shoulders, arms, hamstrings, calves and abdominals. An example of the order of a total body routine would be:

  • Explosive/plyometric Exercise
  • Hips & Quads (squatting-type movement)
  • Chest (upper body push)
  • Upper back (upper body pull)
  • Shoulders
  • Hamstrings
  • Arms
  • Calves
  • Abdominals
  • Neck

Strength Training for Young Athletes Component #8: Variation

A workout routine should be changed every 6-12 weeks to offer new stressors to the body. A change can be very small such as changing the rep range, changing the number of sets per exercise, adding a new exercise or two, or changing the order of exercises. Change can also consist of a completely new routine. Small changes are all the body needs to continually make progress so don’t feel that it is necessary to create brand new programs.

The process of changing the workout routine is called periodization. This can get very complicated, and there are entire books written on the subject. To get started on a strength training program, it is not necessary to understand the intricacies of periodization. This workout is for beginner lifters, so for now, all that is important is to modify the workout every 6-12 weeks.  More advanced programming should be reserved for athletes with much more lifting experience.

Changing the routine too often does not allow the muscular tissue time to gradually adapt to the stress. If the routine is changed too quickly, it is difficult to determine whether or not the routine is working. Building strength requires a great deal of patience and persistence, so encourage athletes to be diligent.

Variety, however, can often keep athletes engaged, so it is encouraged to offer something slightly different every couple of weeks. All this means is that every 2-3 weeks, you change one or two things about the program for that day. You can increase or decrease the number of reps on an exercise, add additional sets of an exercise, add 1-2 new exercises, or give an unexpected day off.  Anything to make the workout a little different for the day in an effort to keep the athletes engaged.

Strength Training for Young Athletes Component #9: Off-season vs. Pre-season vs. In-season

Strength Training Program for Young Athletes

The time of the year is going to create more differences in your strength training program for young athletes design than just about anything else. While this can get very complicated, once again you are encouraged to keep it simple. The major differences between the programs you will design for each “season” are as follows:

  • Off-season: The off-season is the best time to make strength gains because fewer physical demands are placed on the body at this time. Overall training volume will generally be increased during the off-season. This means that more days per week may be used, more sets of each exercise and more energy overall will be spent on strength than any other time of the year. In general young athletes will train 2-4 days per week and use 15-20 total working sets per workout. Aerobic and anaerobic conditioning is generally de-emphasized during the off-season to allow more energy to be spent on gaining strength or the improvement of other deficiencies.  Developing speed is another common priority during the off-season.
  • Pre-season: Strength training will continue through the pre-season, but the overall volume will gradually decrease as more time and energy are spent on conditioning or fitness. In general, strength training will consist of 2-3 days per week and 12-15 total sets per workout. The intensity of each set may be increased as the volume of work is decreased.
  • In-season: It is absolutely imperative that strength training be continued through the competitive season. The total volume of work will be reduced, so the relative intensity can be increased. The workouts will be less frequent and shorter in duration. Athletes should strength train at least one day per week, and no more than three days. Workouts will take 20-40 minutes with a total of 10-14 working sets per workout.

The number of training days per week and volume of each workout will depend upon the competitive schedule and physical demands of the sport.

Decide what time of year it is, think about the facilities available, and consider which exercises you feel are most appropriate for you to teach and for your young athletes to perform.

Below is a partial list of exercises for each body-part.  By choosing exercises from each group, you will begin to create a comprehensive, well-rounded program.  Balance all sides of a joint by performing equal work on each side.  For example, if you two sets of upper body pushing, you should balance it with two sets of upper body pulling.  This is a basic guideline to follow when getting started with young athletes.

Quads & Hips: Pick 1-4 Exercises

  • Squat, Goblet Squat or Front Squat
  • Deadlift or Trap Bar Squat
  • Leg Press
  • Lunges DB
  • 3-D Lunges
  • Leg Extension
  • Glute Ham Raise
  • Airball Squat
  • Hip Thrust/Glute Bridge

Hamstrings: Pick 1-2 Exercises

  • Leg Curl
  • Airball Leg Curl
  • RDL/Hip-hinge
  • Glute-Ham Raise/Hyperextension
  • Kettlebell Swing

Calves: Pick 0-1 Exercise

  • Standing Calf Raise
  • Seated Calf Raise
  • 1-Leg Calf Raise

Upper Body Push: Pick 1-3 Exercises

  • Bench Press, Incline Bench Press, Decline Bench Press
  • DB Bench Press, Incline DB Bench Press, Decline DB Bench Press
  • Machine Press
  • Dips
  • Push Ups

Upper Body Pull: Pick 1-3 Exercises

  • Chin-Ups/Pull-Ups
  • Pulldown
  • DB Row
  • Cable/Machine Row
  • Close Grip Pulldown
  • DB Pullover
  • Inverted Row
  • Shrugs

Shoulders: Pick 1-3 Exercises

  • Overhead Press, Seated/Standing with DBs or Barbell
  • Machine Military Press
  • DB Lateral Raise/Front Raise/Bent Over Raise
  • Band Pull-a-parts
  • Internal Rotation External Rotation

Biceps: Pick 0-1 Exercise

  • Barbell Curl
  • DB Curl
  • Hammer Curl

Triceps: Pick 0-1 Exercise

  • Dips
  • Close Grip Press
  • Skullcrushers
  • Pushdowns
  • DB Overhead Extensions

Forearms/Hands: Pick 0-2 Exercises

  • Wrist Curl
  • Wrist Extension
  • Reverse Curl
  • Wrist Roller
  • Farmers Walk
  • Towel Chins
  • Plate Pinch

Abdominals/Low Back: Pick 1-3 Exercises

  • Sit-Ups
  • Hanging Leg Raise
  • Russian Twists
  • Plank Variations
  • Side Planks
  • Back Extension
  • Superman
  • Ab Rockers

Neck: Pick 1-3 Exercises

  • Machine or Manual Resistance Neck Flexion, Extension or Lateral Flexion
  • Shrugs

And There You Have The Building Blocks of a Strength Training Program For Young Athletes.

Let me know what you think!


Want to help make sure your athletes are prepared to perform for the long-run and not just for next week’s big game?

Download our FREE Prepared to Perform Video to hear youth coaching expert Wil Fleming break down critical aspects of the long-term athlete model.

IYCA-LTAD-LM-Blog AD-V1


About the AuthorJim Kielbaso

Jim Kielbaso is currently the director of the Total Performance Training Center in Wixom, Michigan where he still trains athletes every day.  He went to Michigan State University for a BS in Exercise Science and became a traitor when he went to the University of Michigan for his M.S. in Kinesiology.  Jim got his NSCA-CSCS back in 1995, and did the NASM Certified Personal Fitness Trainer certification back in 1993 when you actually had to go to Chicago and do the whole thing live, in-person. Jim was the Strength & Conditioning Coach at the University of Detroit Mercy from 1996-2002 and earned the distinction of NSCA Strength & Conditioning Professional of the Year for the Midwestern Collegiate Conference (now the Horizon League) in 1998. Jim was also an adjunct faculty member at UDM, teaching several courses in the Department of Sports Medicine. He also served as the State Director for the National Strength & Conditioning Association for six years, and Regional Coordinator for four years. He has written several books and contributes regularly to the IYCA.