This is the last of a 3-part series on metabolic conditioning for athletes. In Part 1, we discussed what metabolic conditioning is, what energy really is and what it means for the human body and, more specifically, your athletes. I broke down the three principle energy systems in the body and how Adenosine Triphosphate (ATP,) the “secret sauce” of energy for movement and other bodily functions, is used in the body.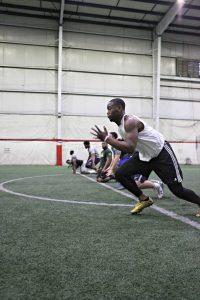
In Part 2, we discussed the 3 forms of metabolic conditioning and the reasons to use each of these with your athletes. (We’ll very briefly review these again.)
In this last part of the series, I’ll break down the “how-to’s,” with some detail regarding what activities to include for various sports and how to maximize metabolic conditioning for your multi-sport athletes.
First, let’s quickly review parts 1 and 2.
In 2011, Bergeron defined metabolic conditioning as “exercises that impose a moderate to high demand on the cardiovascular system and energy metabolism of the active muscle fibers to meet with the muscles’ repeated high energy requirement.” (Current Sports Medicine Reports, 2011) Metabolic conditioning is the improvement of energy storage, delivery and usage through the application of activity to the movement system of the body.
Energy can be neither created nor destroyed, only shifted in form. It’s this shape-shifting quality that allows us to have 3 separate energy systems for activity in the human body. The key to all of it, like any good recipe, is the “secret sauce.” In this case, that’s ATP.
The 3 energy systems we care about are 1.) Phosphagen (ATP-CP) System, 2.) The Glycolytic (Anaerobic) System and 3.) The Aerobic System. To keep them straight, you can think in terms of how long your athlete can “go” and how much force can be produced while going.
The Phosphagen System allows high force production, but short duration of work. Lots of ATP being created and lots being used. Creatine phosphate plays a role here. You get massive force, but only for about 30 seconds, with a 1 to 5 minute rest phase needed to fully recover. There are no fats, carbohydrates or oxygen involved in this process. It’s an anaerobic energy system.
 The Glycolytic System gives you more time, but less force production over that time. It involves the breakdown of carbs into pyruvate, then into either lactate (when oxygen isn’t plentiful) or acetyl co-enzyme A (when oxygen is available.) The latter is taken up by mitochondria for the production of ATP. The former is involved in a process which creates issues surrounding the buildup of metabolites and other cellular “trash.” (Technical term there, don’t just throw it around.) This system will give you 30 to 60 seconds of decent effort (maybe several minutes, depending on which studies you read) with a rest time of 1 to 3 minutes to refuel.
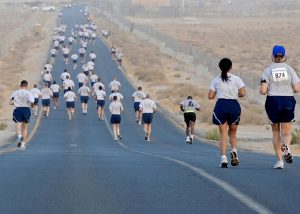
The Aerobic System will let you go long, but not hard. (Get your mind out of the gutter!) If you’re going 5 minutes or longer, this is your energy system. Of course, we’re talking about relatively low force production.
Aerobic energy production involves ATP synthesis within muscle mitochondria and uses blood glucose, glycogen and fats as fuel. A very large amount of ATP is produced, but that production is slow compared to the other processes. Because force output tends to be low, recovery times can be short.
In part 2, we discussed the 3 forms of metabolic conditioning:
- Anaerobic-based – Based on muscles and systems, this form prefers ATP-CP as it’s energy source. Beginning in the Phosphagen system, there will be a slight shift into the Glycolytic system as muscle fatigue sets in. Preferential use of this system will lead to a preference for it. This form of conditioning strengthens muscles as well as improves the body’s endurance. It is peripheral in nature, creating conditioning in muscles and systems primarily, with overall endurance as a secondary benefit.
- Aerobic-based – This is more central in nature, providing overall work capacity and endurance conditioning for activities of varying speed, intensity and duration. It introduces cardiovascular parameters into the conditioning process, but can also be accomplished by means that are not necessarily “aerobic” in nature.
- Non-Exercise Activity Thermogenesis (NEAT) – All energy expended for all activities other than eating, sleeping and exercise or sports. It’s both central and peripheral in nature. It’s also not what we’re concerned with in this discussion.
There are lots of reasons to do metabolic conditioning with your athletes. Among them are increased calorie burn, improved metabolic efficiency and flexibility, improved Excess Post-exercise Oxygen Consumption (EPOC), improved cardiovascular capacity, quicker recovery times, improvements in lean mass, improvements in brain chemistry and cognitive function, and better sport- and context-specific skill development.
While metabolic conditioning has benefits for every athlete, from a program design standpoint, we’re largely going to be focused on what I refer to as “sprint-based” sports. Whenever I get the chance to talk to sports coaches, I like to ask them about their “conditioning.” All too often, their answers make me cringe. We can do better.
Even with the massive amount of evidence and information publicly available detailing the shortcomings of long duration activities at improving athletic outcomes in the majority of sports, most coaches are doing it “the way we’ve always done it.” The problem is, the way they’ve always done it has always sucked. We just know better now.
 Long runs around fields, huge numbers of “sprints” with little or no rest between, agility ladder or hurdle work with no rest between reps. The list, unfortunately, goes on and on…and on.
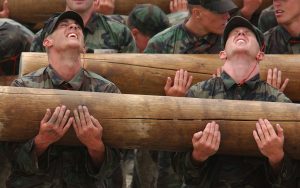
What if we look at conditioning for sports from the perspective of metabolic conditioning for sports? In other words, let’s make conditioning look and feel more like the way the sports look and feel. And no, I don’t mean that literally. Your baseball and softball players don’t need to do rope slams with weighted gloves on to get faster hands (I’ve seen that). Your lacrosse players don’t need to carry a telephone pole around the field to “strengthen the shoulders to hold the stick up the entire game” (Yep, I’ve seen that, too). And don’t even get me started on wall sits for hockey players and gassers for football players. Ugh.
Here are the key elements to consider when designing metabolic conditioning programs and sessions for athletes.
- Work-to-rest ratios – what does game play look like? How much of the game is spent at full speed? How much rest does the athlete get? Is that rest on the field, waiting for the next thing to happen or on the bench? While work-to-rest ratios need not exactly match those of a given sport, getting them close brings a certain “relatability” for the athletes with whom you’re working.
- Module design – Are you using circuits? Are you using cascading fatigue, wherein you stack 3-4 activities of increasing difficulty one after the other, with an extended rest period at the end? Are you using active rest? Passive rest?
- Sports movements – What are the movement variables associated with the sport? Rotation? Direction change? Contact? Does the sport tend to be either lower- or upper-body dominant?
- Key injury patterns – What are the most common injuries in the sport? Can you create higher levels of resistance to those injuries with proper metabolic conditioning?
- Space and equipment availability – How much room do you have to work with? What kind of equipment is available? Is there enough for all the athletes involved?
- Number and skill level of athletes – How many are you working with at one time? Will partner work make your program flow better? What are the athletic levels of your athletes? How variable is it from one to the other?
Let’s look at some simple guidelines for designing metabolic conditioning work for specific sports. The challenge for most of us is that many of our athletes are multi-sport athletes. Because of this, context-specificity is more important than sport-specificity. With context-specific conditioning, we would design for the types of movements most beneficial to the sport, along with a general application of cardio-respiratory, strength endurance and skill development concepts based on the sport or sports being targeted.
For example, when training football players, a 1:3 or 1:4 work-to-rest ratio makes sense. The average play lasts about 6-10 seconds, with time between the end of one play and the beginning of the next being 25-35 seconds. Since we want maximal power and cardio output during the work phase, shorter is better here. Working for 60 seconds really doesn’t make sense and won’t give us the targeted metabolic conditioning we’re looking for.
10 seconds of all-out work, followed by 30-40 seconds of rest makes sense if we’re trying to match game conditions. Mixing up these ratios to occasionally mimic the “2-minute drill” is appropriate as well.
I prefer explosive and high-output activities. Plyometric jumps, hops and even push-ups are great for this. Try to alternate lower-  and upper-body dominant activities from one station to the next. Crawl patterns are practically a must for football players. Medicine ball and Dynamax ball activities are also great for these. Hurdle shuffles, ladder jab steps and even arm shivers on a heavy bag are good, too. Sled sprints and band-resisted activities like shuffles and high knee running in place also fit. Very heavy carries like Farmer or Zercher carries are appropriate, too.
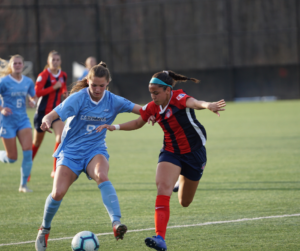
Lacrosse and soccer pose a different challenge. While a lot of coaches will tell you how much their players “run” during a game, it’s not really the case. Starting, stopping, changing directions and actual play on the ball make up a significant portion of time on the field. So does walking and standing still, even if coaches don’t want to admit that. For the record, I’m not suggesting that standing still should be part of your metabolic conditioning program for athletes.
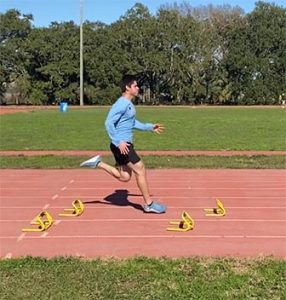
For lacrosse and soccer, multi-directional movements should compliment explosive and high-output activities. Medicine ball and Dynamax activities, speed and agility work as well as band-resisted activities are great here. Body weight movements like crawl patterns fit here, too, as do sled sprints and heavy carries. For these two sports, I’m a fan of variable work-to-rest ratios. When using explosive activities, I prefer shorter work periods. If agility ladders, hurdles and slightly lower output activities are on the menu, I will typically lengthen the work period to as much as 30-40 seconds.
My personal preference is to use either high output, shorter work time programs or lower output, longer work time programs during any one session. During a training week for these sports, I will adjust these variables from one session to the next. Movement mastery is important. In my opinion, it takes time for a training effect to “stick,” so bouncing back and forth during a training session doesn’t really make sense to me.
For baseball and softball, including some rotational power development activities makes sense. Rotational Dynamax wall throws and band rotations are good choices to add to the mix.
Basketball and volleyball may warrant some added plyometric work. The caveat here is that you must be aware of the volume of plyometric work being included in regular practices. This is especially true with volleyball, where coaches regularly include (often far too much) plyometric activities in their practices.
Let’s finish off here by building out a metabolic training session for ice hockey players. This can easily be used with field hockey and lacrosse players as well. Ice hockey is an interesting application, since every coach has his/her own view on how long a shift (work time) should be. Most coaches shoot for 45 seconds to a minute, with 1-3 “shifts” in between.
In theory, every hockey shift is played at full speed and power. In reality, that just ain’t so. As a result, we don’t need to match the exact work time. If we stick to a 1:1 rest-to-work ratio, we’ll get the job done.
Let’s work with a 45 seconds on, 45 seconds off formula. During the “off” periods, you can choose to have your athletes perform light mobility work or do some SMR. Remember that the goal is to get maximal output during work periods and maximal recovery during rest periods. Most hockey teams have about 20 players (“-ish,”) so we’ll build 5 work stations. Total work time per circuit will be 3:45, with equal rest time. We can get 3 rounds done in about 23 minutes.
Station 1 – Lateral Hurdle Hops (1 hurdle/athlete)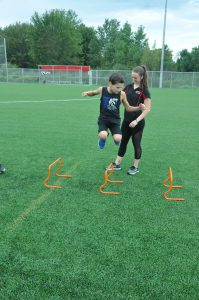
Station 2 – Alternating Single Leg Push-up (regress as needed to match ability levels)
Station 3 – KB Swing (KB Squat to High Pull works well here, too.)
Station 4 – Dead Ball Slam or Alternating Rotational Dynamax Wall Toss (the latter adds an element of positional shifting and setting, since they’ll switch positions each rep. This is great for rotational sports in general.)
Station 5 – Ladder “Icky” Shuffle to Reverse Shuffle (have each athlete use 3 boxes of the ladder and you’ll only need two ladders.)
This is just one simple exercise combination. In the words of the old-time comics, “I got a million of ‘em!” And so do you – you just may not have thought about it like this before.
There’s a reasonable combination of footwork, low level plyometric work, hip drive, strength endurance and rotational power built right into this simple 5-station circuit. Certainly this will work to make any athlete better. But imagine discussing this with a hockey, lacrosse, baseball or softball coach. If you can relate this work to improvements on the ice or field, your buy-in level from that coach will increase significantly. Same for your athlete and his/her parents.
I normally advise my athletes that if they’re really getting tired or just need a drink, they can break for one station if needed. Odd that it almost never happens. But that’s the nature of competitive athletes, isn’t it?
I hope this series has helped open some eyes to the value of metabolic conditioning for athletes. While we normally think of metabolic conditioning in relation to efforts around fat loss or weight loss, the benefits to our athletes can’t be ignored. Like most of my colleagues in the strength & conditioning field, I believe strength is the key to every other athletic skill. But we need to give our athletes every weapon we possibly can. Metabolic conditioning helps provide some of those weapons.
Keep the faith and keep after it!
 Bio: Coach Phil Hueston is not just another pretty trainer. With over 18 years of in-the-trenches experience with athletes ages 6 to 60, he brings a unique skill-set to the improvement of his athletes. The author of the Amazon best-seller “Alchemy; Where the Art and Science Collide in Youth Fitness,” his client list includes professional athletes, collegiate athletes as well as thousands of youth athletes. Phil has been the co-owner of All-Star Sports Academy in Toms River, NJ, one of the largest and most successful youth and family fitness centers in New Jersey since 2008. He was named “Coach of the Year” by the IYCA for 2012-2013. A contributor to IYCA.org and coach to other coaches, Phil provides unique insights and ideas that can help other coaches accelerate their clients’ progress and performance. Phil is married to the woman responsible for his entry into the fitness profession, MaryJo. Between them they have 2 grown children, Nate and Andrew, and 99 problems. Phil’s personal website is coachphilhueston.com, and he can be contacted at phil.hueston@hotmail.com
The IYCA High School Strength & Conditioning Specialist is the only certification created specifically for coaches training high school athletes, and it was recently updated to include even more information than ever. The course includes several hours of video instruction and two textbooks with contributions from some of the top strength and conditioning coaches in America. Click on the image below to learn more about how to become a certified high school strength & conditioning coach.
 Here’s how to apply these concepts to soccer:
 Beni is an IYCA Ambassador, Entrepreneur and CEO. He’s earned UEFA coaching badges and a BA in Physical Fitness & Sports Conditioning. He has professional experience across soccer, golf, and rugby, expanding programs in Texas and Ireland. He has founded GameLikeSoccerCoaching and BBsports Fitness and Nutrition.
 Increasing vertical jump height, force production, and reducing ground contact time is important for many sports.
 Pogo Jumps are one of the best exercises to reduce ground contact time and get athletes used to popping into the ground and reproducing that force quickly in the upward direction.

 In soccer, speed is a multidimensional skill that goes beyond mere running speed. There are principles of Soccer Speed, that when applied, can be highly effective.
 Athletic development across the lifespan is a complex process that is heavily influenced
  Developing the fundamental movement skills (e.g., walking, running, and jumping) happens early on in a child’s life. Unfortunately, being unable to perform fundamental movement skills can restrict later opportunities, which is why it is vital to develop physical literacy early in the child’s life.
  The very first step in any effort towards change, is to gain education. Our
 It is no secret that the development of the young athlete is multifaceted and it is the responsibility of the coach and/or trainer to take into consideration developmental, physical, and psychological aspects of training.
  Unilateral exercises, or single-leg squat variations, are beneficial for a variety of reasons including that they require stability, they have the potential to eliminate imbalances, and they can help create awareness of weaknesses. The single-leg squat has been utilized commonly in knee rehabilitation settings such as with individuals experiencing patellar tendinitis or going through a return-to-play protocol with knee surgeries. Considering the stress that sport has upon the knees themselves, implementing exercises that stress the knee joint is imperative when preparing the body for these demands. The single-leg squat is a great way to strengthen not only the larger muscles of the leg but also all of the stabilizing muscles of the hips due to the nature of the unilateral exercise.
 Jordan Tingman – CSCS*, USAW L1, ACE CPT, CFL1 is a graduate of Washington State University with a B.S. in Sports Science with a Minor in Strength and Conditioning. She completed internships with the strength & conditioning programs at both Washington State University and Ohio State University, as well as a Graduate Assistantship in S & C at
 way we consume information about strength and conditioning, and it’s probably not the best way for us to make decisions.
 We see something on Instagram from someone with a bunch of followers, and we instantly think it must be the truth instead of digging deeper, doing our own research and getting the whole story. So, whether it’s politics or strength & conditioning, it’s important to get the whole story before you make a decision.
 sources of information. Of course, I use social media, but I also go to scientific journals, I take courses, I have multiple degrees, I read lots of books, I attend conferences, and I go to people who have many years of experience in the industry who put out quality information and who are in the trenches daily. These people have been doing it for years, documenting the results, analyzing their experiences and their programs, and then making decisions based on those analytics.
 Along with the effectiveness of a training stimulus, you have to weigh the risk vs. benefit to help determine whether it’s the right choice to include in a program. For example, when I see kids standing on stability balls or doing circus tricks, I feel like the training benefit is incredibly small while the risk is fairly high. Or, I’ll see kids stacking a bunch of plates up on top of boxes to see how high they can jump. Again, the training benefit of jumping onto a box is no greater than jumping in the air as high as you can and landing on the ground, but the risk is MUCH greater. So, I personally don’t feel like the risk outweighs the benefit.
 Jim Kielbaso is the President of the IYCA and owner of
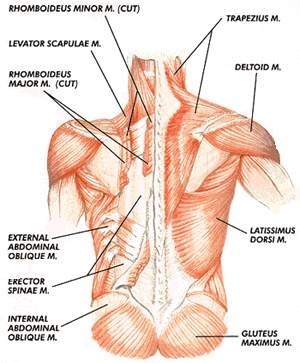
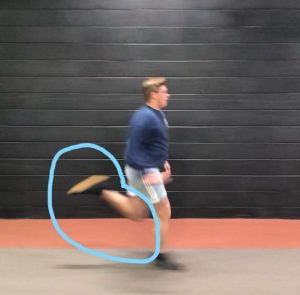
  Coaches may recognize an exaggerated arch in the lower back, but that’s just one part of the equation. The ability to control anterior and posterior pelvic tilt is critical to sprinting, squatting, hinging, and a variety of athletic movements. Many athletes struggle with these movements because they simply don’t know how to create or control pelvic tilt.
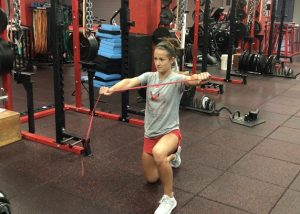 Continuing our Top 3 series from Jordan Tingman, these are her Top 3 Core Exercise Variations.


 understand that some of these may be done by other coaches, and while I respect other coaches opinions, this article outlines how I personally like to coach these exercises.
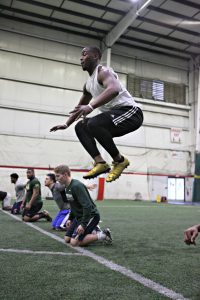
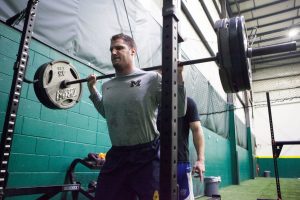 conditioning coaches to receive push-back from people trying to vilify exercises in their program, with the squat being the target of the attacks. Whether it be sport coaches, athletic trainers, administrators, parents, or even athletes themselves, the squat is always surrounded by questions and opinions. It has been blamed for unrelated issues it hasn’t caused and even termed “dangerous” for reasons that many don’t know nor care to find out. To learn where all of this came from, it’s important to understand the history of the squat in America and how one particular researcher sparked a debate that continues today.
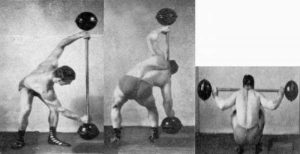 were quite impressive, even by today’s standards. While Steinborn is notable for many reasons, it’s the way in which he performed the squat that will still shock many lifters today. Steinborn performed squat sets, as heavy as 550 pounds for 5 repetitions, without having any supports, wraps and most remarkably, no access to a squat rack. He simply stood the barbell up tall on one end, leaned under it and hoisted it across his shoulders. This style of squatting is aptly known as the “Steinborn Squat”.
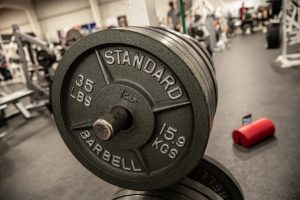
 squatting. A letter sent to Klein from the US Marine Corps stated: “Our consultants agree that the type of exercise you condemn should probably be eliminated from physical conditioning programs.” The Army physical fitness test omitted anything that resembled a squat, and until recently, stayed the same for decades. While Klein had convinced many communities that the squat did more harm than good, there was still a strong contingency of professionals that saw Klein’s study as more subjective than objective.

 Many high school and college-level athletes feel like they either need to get as big and strong as possible or they don’t value it at all. Some of that depends on the sport they play, and some depends on their environment or what their coaches value. We need to help athletes put strength/size into perspective, and teach them that these qualities should be developed as a PART of their overall development. In some cases, it’s a small part, and in other cases, it’s more important. But, concentrating ALL of your effort on lifting weights if usually not what athletes need.
 stress, which can easily lead to injuries and compensations.